

Rustynuts
-
Content Count
238 -
Joined
-
Last visited
-
Days Won
1
Content Type
Profiles
Forums
Gallery
Blogs
Calendar
Store
Posts posted by Rustynuts
-
-
Actually on my 20, but... Forget the make on my guard, either Tapco or Tromix. I have the "U" shaped bracket at the front and that seems fine, but the rear tab that slides into the receiver body is SUPER loose. I don't want to bend the receiver slot to close the gap as it seem too big, and saw a few hokey fixes online. Aluminum foil "gasket", glue soda can spacer into the receiver slot, etc.
Anyone have any better tip? Maybe something like an accurizer wedge on an AR? Or simply a rubber sheet bent over the plastic tab to form a gasket as in the foil trick above, but "better"?
-
Update - Bought two new AK safety levers of various flavors. One came full auto tab and looked identical to the stock lever. Other one was semi-auto tab, but with a weird hole drilled through the tab as well. Unsure why and hole is a bit offset and seems too close to the edge potentially allowing the tab to collapse. Don't trust that one.
The tabs look slightly longer and engage the trigger better, but not perfect. There is still too much movement of the trigger with safety engaged IMO. But looks like it will stay safe at least. I'd prefer it to be a tight fit though. Guess this G2 trigger isn't the best for a 20.
I also re-swapped back to the stock hammer. Clearances on the bottom side would have required a bit more grinding on the Tapco one. It was hitting the nut on my bolt-on trigger guard and would not let the BCG slide past and cycle. The stock one clears fine. Or I can consider get a lower profile nut or see if I can rivet it on. Prefer not to rivet though for future re-work.
Also got rid of the damn sheperd's crook spring on the pins this time! Went with the pivot bar that anchors with the safety lever "pin". MUCH easier and less cussing!
-
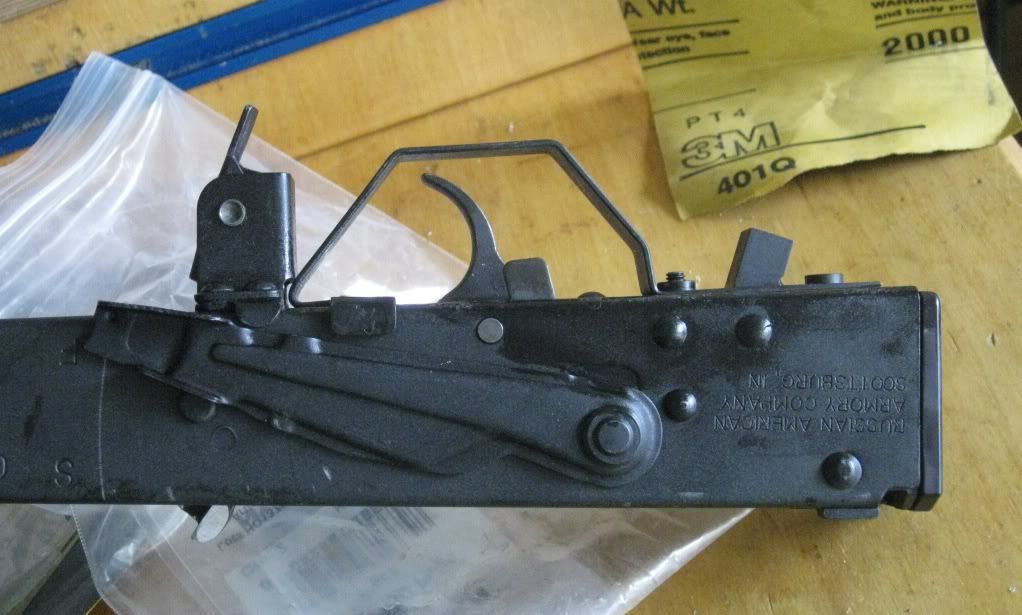
OK, upon second look, and trying the new Tapco hammer, it appears like I did grind off the tab on the safety bar shorter 10-yrs ago when I started this conversion. DO NOT DO THIS!
I know a lot of conversion vids recommend this to get the safety in/out easily, but doing so can make the gun unsafe. Note this is the trimming on the bottom of the tab, not notching it to clear the disconnect (semi-auto style). I highly recommend notching the full auto safeties as there are a lot of vids on how the full auto safety can actually "pull" the trigger when rotating the safety lever upwards to remove it.
That tab should fit snug to the trigger when safety is engaged. Mine had about a good 1/4" gap at least. Enough so that with safety on, the hammer was hanging by a thread onto the sear. Any slight budge further upwards (like if the safety is loose) would cause the hammer to drop. Not good.
Another note. The standard Tapco AK hammer appears to require quite a bit of mods to fit the S-20. It did hold the sear "slightly" better than stock, but otherwise the stock hammer works way better. Once I get a new safety, the stock hammer will go back in.
-
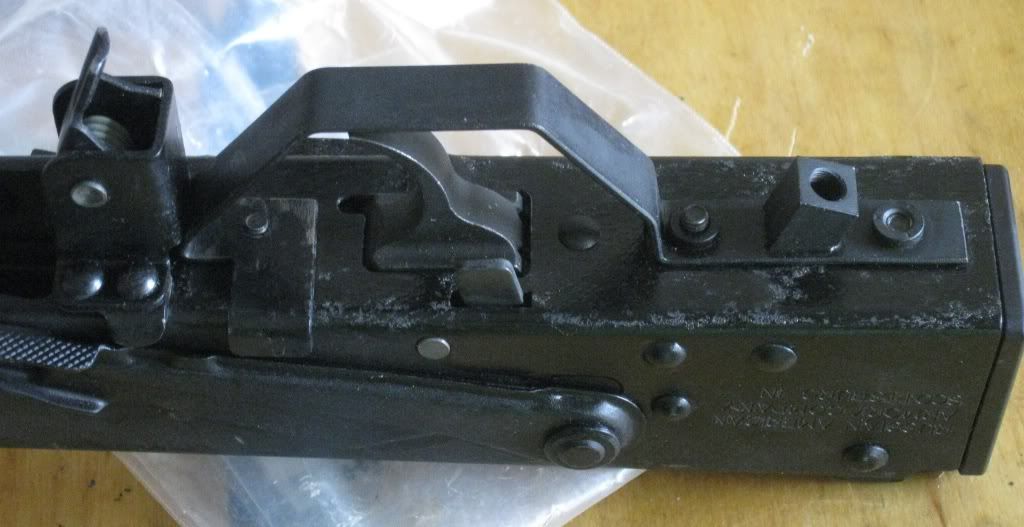
Safety lever is stock, not trimmed or anything. Just put in a tapco single hook AK trigger, not S-20 specific. Re-used the old hammer which seems to cycle fine. However, with the safety engaged I can see the side bars of the trigger group start to rise up to meet the safety, but seems like there is a pretty big gap there and the trigger releases before hitting the safety stop. What gives?
Are the sides of the trigger sear (or whatever those sides are called!) on a 20 taller than a regular AK? Don't recall this issue on my 12 or 410, and some instructions even call for trimming the safety bar for an easy install with the trigger pin already in, etc.
-
Thanks, ordered a set from Carolina. Been several years (maybe 10) since I converted the 12 & 410. For some reason thought I could mod the originals and not buy a new FCG? Maybe you still can, but I got a Tapco single hook for the same price. Think I recall modding a double hook for my 12 back then. Believe even the Tapco will need some mods as it's a standard AK trigger set.
-
 1
1
-
-
My 20 has been in pieces for awhile waiting on me to convert. Finally got to it, but my baggie of FCG pieces seems to be missing the actual trigger. Got the hammer, springs, clips, and what looks like the sear piece. The sear looks a bit weird in that I can't tell where the actual trigger goes! Way different than the S-12 conversion videos I've been watching. If anyone has a stock FCG or just the trigger lying around, I'd be interested in it! Thanks!
-
21 hours ago, pedal2alloy said:
One of the bigger companies had some advertised for around $650. If you can get one in good condition for under 500 I think it is a good deal
Is that stock or converted?
-
Was cruising gunbroker and noticed there seemed to be WILD swings in what people are asking for with the S-12's. Price ranges from $400 to $3k+. Even within seemingly similar states of stock or conversions were off wildly. What gives?
-
I've tried the dummy pin and dental floss approaches, never seemed to work for me. I just bend the short end slightly into the lever. Seems to keep it from sliding off as easy. One of the u-tube vids describes it I think. Been awhile.
-
Never seen this before. Bizon submachine gun. Horizontal magazine like a P90, but on bottom! Think I heard Iszmash in there as well.
-
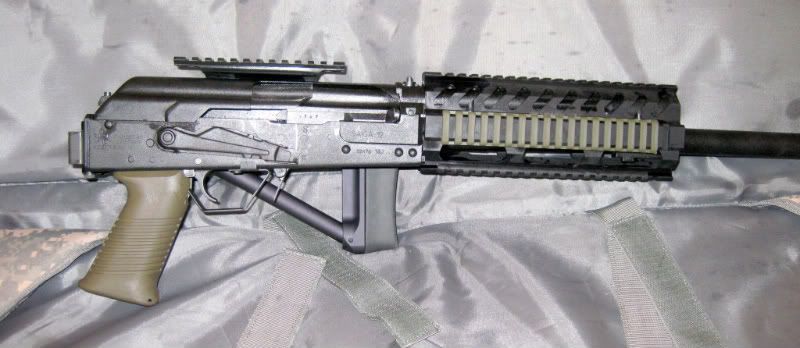
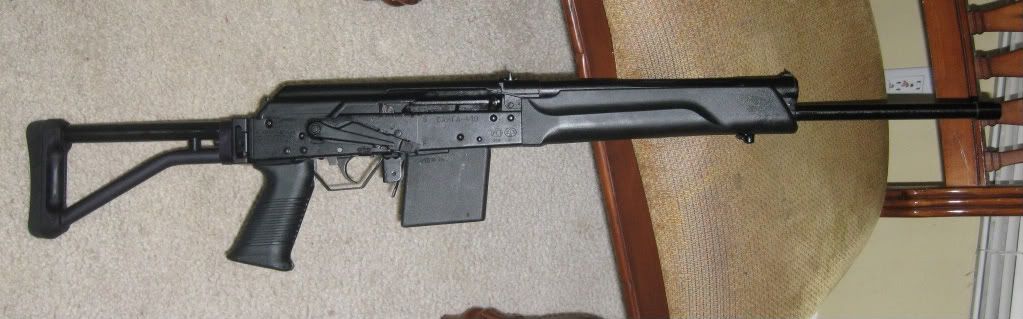
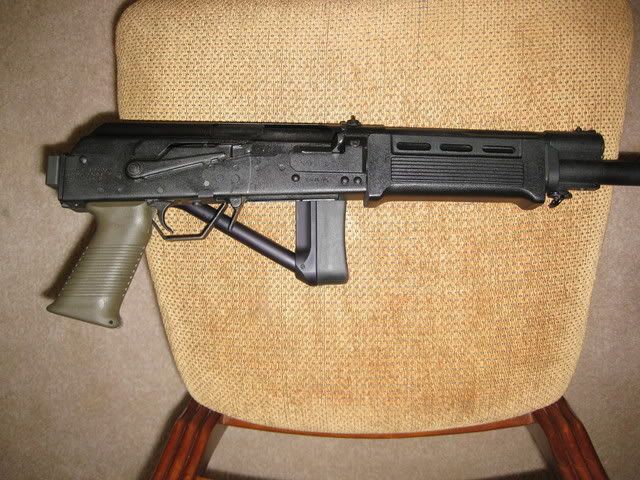
Looks good, but in the later pics it looks like you suffer from my malady. The foregrip seems to angle DOWN! Only way I've heard to correct this is to grind the block down which I refuse to do until I refinish again. Here's y angled pic.
-
Had to do the A&B mods to get mine fitted, which is fine by me as this allows the absolute best fit. Great job MD, the drum is totally cool! Still need to get out and fire it up.
-
Got my balance charged email, order number 134XX. Should be here soon!
-
I would media blast with medium/fine grit (NOT beads). Then wash with water & clean detergent (nothing that will leave residue, maybe just laundry booster) and dry. If you live in FL like me, you WILL get flash rust, but don't worry. Rub down with MEK and pre-heat in warm oven (like 100-deg). After that spray with K-Phos pretreatment. All that flash rust will magically disappear before your eyes! Back in the oven for pre-heat again, and SPRAY! Bake and then you are done. Be sure to plug your barrel/gas port. I just stuffed wadded paper towels in there.
-
No effect at all for me, works fine. If you have stubby fat fingers, may be a problem, or gloves as I mentioned. That's why the real Tromix 410 uses a squared off guard. I wanted to see if I could get the original profile to work so it matches my S-12.
-
In my honest opinion. . . this thread's subject title is hugely misleading. (Can't help but to wonder if such was your intent.)
Nonetheless, congrats with the successful installation of your new trigger guard.
Ha! You thought it was one of Tromix's 410 SBR's? I wish! That's why I put it in "parens" in the title.
-
It works! Sorta. Check out my post in the 410 section if you want the Tromix look on your 410 without welding! A few minor mods and it's good to go. So now if you want His/Hers Tromix's in 12/410, do it!
-
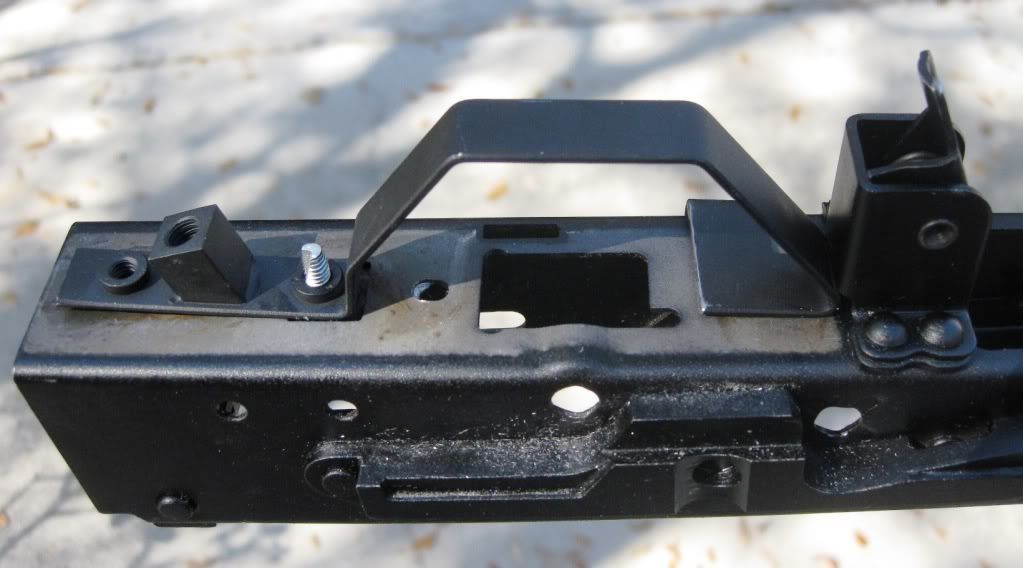
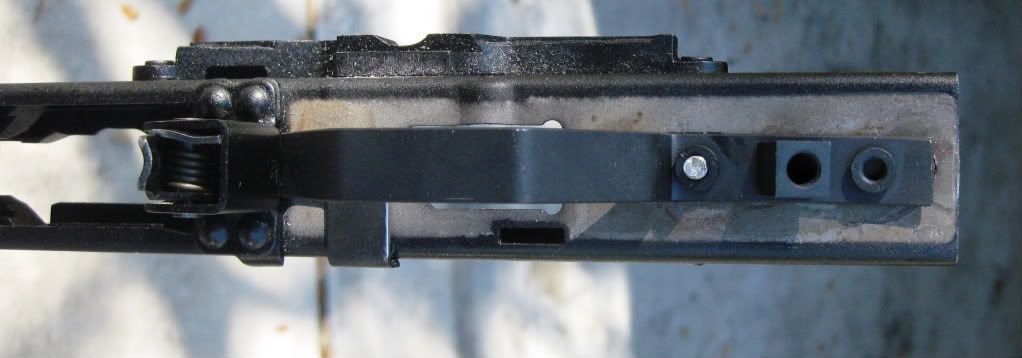
I'm sure it's been done before, but I wanted to try the Tromix DIY S-12 trigger guard on my 410. Was stymied at first as none of the holes really lined up. Then I got the idea to trim off the forward welded nut to clear the new trigger, then drilled two new holes, one in the trigger guard forward of the old one, and one in the receiver for the rear welded nut. The middle nut was lined up with the old trigger hole, so I just placed a big washer over the Ace Internal block and cranked it down without filling the old trigger hole. The Tromix guard "almost" fills the void. Worked out pretty good, but the trigger does set a little forward. No issues with functionality, but might not work with gloves. At least it matched my S-12 now! (forgot to take pics of the two together). Here are a bunch of progress shots. (ignore the crappy finish on the bottom of the receiver, most of it is fuzz from where I knocked them down by sanding. Will need to refinish later)
-
I seem to have lost the bolt/nut to secure the AIB into place. The one at the top, not the PG nut. Anyone know the correct size?
-
Any good reason NOT to just re-use the old hammer on a conversion? (S-12 or 410) This would seem to save a lot of effort grinding down the new one. If the new ones are that much better, or really needed for parts count, then I'll do it!
-
That MD Arms job looks sweet!
-
If it were me, I'd just re-spray the whole thing. Its not like it could be any worse than the factory finish, ya know?
Problem is, when I start doing that I go whole hog. Media blast, wash/dry, rub down with MEK, pre-heat, spray on K-Phos, pre-heat again, spray on Norrell's, bake. Big pain in the ass with no real spray setup (pancake compressor) and messy. Factory finish on this one look pretty good and I'm lazy on this one. It's only a 410 which will get beat up by my son. Once he knows better and after he messes up the factory job, then I'll do a good re-finish. (yes I'm cheating in the S-12 forum with a 410!)
-
Has anyone just stippled on some coating like Norrell's (semi-dry brush) and had it work OK? Got some areas to go over on a new conversion (underside of the receiver, etc.) that I don't feel like stripping the whole damn gun again or breaking out the spray gun for such a small job. Will still bake the touchup on, but can I cheat on the airbrush? Don't really care if it looks perfect, but if it will look like crap, I'll airbrush. Can I assume a re-bake will not hurt the factory finish?
-
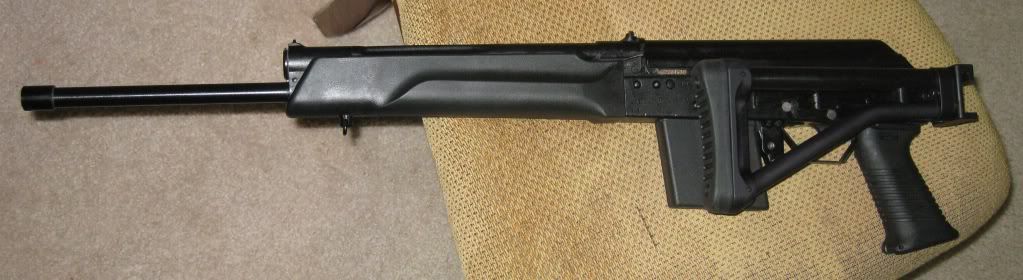
Unless you like welding, I would just go Ace internal and forget about it. Uses the stock screw holes except for the upper tang which gets filed off flush to receiver, so no you don't see any extra screws. The main complaint is usually the extra holes in the receiver. Some plug them to look like rivets, others tap the new block and use the extra holes as attachment points. I left the holes visible and they look fine. No problems at all with the internal block being sturdy enough. It's rock solid.
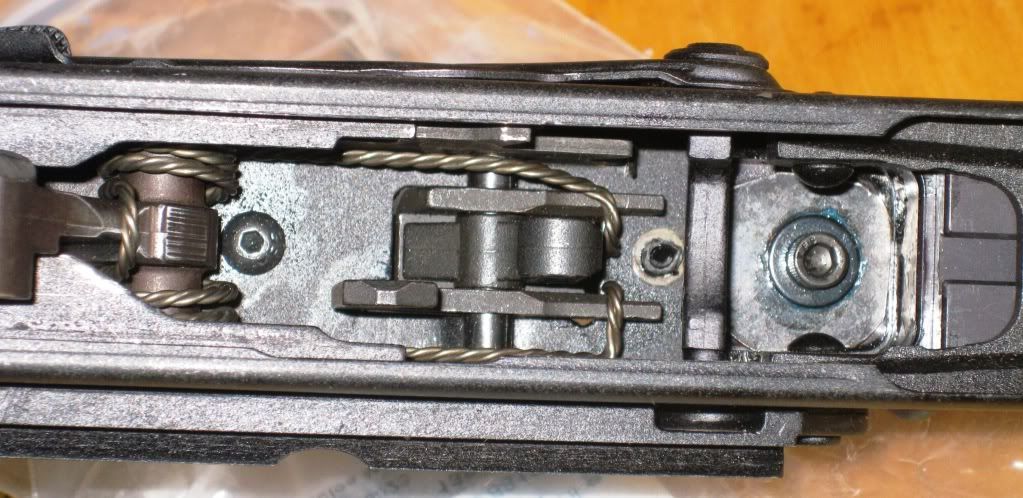
Don't have a close up of my block, but works fine with my folder. On the bottom pic, you can see the extra length it adds (black plate behind the grey folder plate). Any extra length is hardly worth mentioning. (1/4" over a weld-on maybe?)

Galil Handguard Loose
in Saiga-12
Posted
Fixed this with a fairly thick foam rubber self stick pad cut to fit. Wrapped it around the tab like a "U" and stuffed it in. Holds snug now, much better. The gap looked huge, was guessing at least 1/4-1/2". But measured it as only 1/8". Sure looked and felt bigger!