Twinsen 86 Posted December 21, 2008 Report Share Posted December 21, 2008 (edited) I pretty much have no idea what I'm doing. I don't know what a sear or disconnector look like or what they do. I just know how to put back together some FCG's so that they work, like in my Ruger 10/22. I can put that thing together blindfolded. I have everything I need at this point, I think. Except for a trigger guard. I'm gonna get a bolt on SaigaTechUSA one based on a recommendation from Noobie. I'll go inventory what I have in a bag of crap: ~IZ-109 ~One piece skeleton stock, PG+stock in one (required by CT law) ~FCG parts I got from Dinzag: -Hammer G2 -Trigger single hook G2 -Tiny retention clip things ~Two large screws?! maybe these came with the stock? They don't fit the stock... 1/4" threading, 3/4" long, rounded head with standard screw cut. ~TAPCO retaining plate ~PG nut + bolt ~Fake rivets, thanks Dinzag ~Trigger guard on order, STUSA, S12 Ak Steel version I'm afraid to transfer my shotgun, because I fear the government that has been chosen for me by my so called peers. I also have a Dinzag muzzle brake that fits well, but doesn't index well without me gluing it on or pinning it. I want Cobra to put a detent in my Kreb's FSB for it, AK style... but I'd have to transfer. The guide that keeps getting posted is http://www.cross-conn.com/Saiga_Conversion/index.htm , is this a good how-to for a 12 gauge? I've browsed through it a few times, and do not know what more I'd have to do with a 12 gauge or what is different. I know I don't need to make a bullet guide anyway. For tools, I have the following: ~Drill press, tons of random bits ~Hand drills ~Dremil ~Files ~Vice ~Hand tools If all goes well, I'll try to do my .410 with the same stock. And then get sights and a muzzle brake for that one too. Add: Oh wow, never seen this somehow. http://forum.saiga-12.com/index.php?showtopic=2042 Edited December 24, 2008 by Twinsen Quote Link to post Share on other sites
Twinsen 86 Posted January 21, 2009 Author Report Share Posted January 21, 2009 (edited) So I've followed 4 conversion guides and all of them suck ass for using a retaining plate. Is there somebody out there that actually explains how to use a retaining plate? Not even the directions that came with the thing make any sense. Apparently my selector is supposed to teleport around my BHO so I can install the selector. And according to Cobra's directions, the retaining plate needs to teleport itself over the hammer pin to be installed. I used a video online that didn't cover install of the BHO at all, and http://www.cross-conn.com/Saiga_Conversion/ doesn't mention it either. So I need to either have a teleporting selector, retaining plate, or BHO to finish this shit. Which can all be said more simply with this statement: Do not buy a retaining plate. Edited January 21, 2009 by Twinsen Quote Link to post Share on other sites
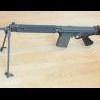
Twinsen 86 Posted January 21, 2009 Author Report Share Posted January 21, 2009 Well it looks like the BHO is a duplicate item in my FCG now. Because that hammer sure does just as good of a job on holding the bolt back. This thing is not going to cycle well as is. I bet I get MASSIVE triggerslap as well. Thanks again Dinzag, for all those extra parts. He sent standard ... pin... clampy... things. Yeah. For free, for the win. Go Dinzag. If he hadn't have sent them, I wouldn't have this tonight: Quote Link to post Share on other sites
Racer 27 37 Posted January 21, 2009 Report Share Posted January 21, 2009 Twinsen sorry I didn't see this sooner, I could have told you some of it. I did my own and was scared that I would mess something up. It was easier then I thought. Although I didn't use a retaining plate. I had some spring thing that held me up for like 2 hours because I looked at it then searched for info. Them cobra ended up helping thank god he was on when I asked the question. I can't believe that nobody answered you in a month. Quote Link to post Share on other sites
saigafan2008 0 Posted January 21, 2009 Report Share Posted January 21, 2009 I just converted my 7.62x39, and I used a retaining plate. I used the following conversion guide: http://www.stu-offroad.com/firearms/saiga/saiga-1.htm This was posted here awhile back in another thread, but I'm too lazy to go look it up. To see the retaining plate, go to page 9 of the conversion (http://www.stu-offroad.com/firearms/saiga/saiga-9.htm). It's easy as pie to put in, takes all of two seconds! Good luck! Carl Quote Link to post Share on other sites
nalioth 405 Posted January 21, 2009 Report Share Posted January 21, 2009 Well it looks like the BHO is a duplicate item in my FCG now. Because that hammer sure does just as good of a job on holding the bolt back. This thing is not going to cycle well as is. I bet I get MASSIVE triggerslap as well.All new G2s exhibit "bolt hold open" characteristics. As you shoot it, the "bolt hold open" effect will go away. I just converted my 7.62x39, and I used a retaining plate. I used the following conversion guide: There are internal differences in the 7.62x39 Saiga and the 12 guage Saiga that require a bit of creative thinking to use the retainer plate in the 12ga. Quote Link to post Share on other sites
Twinsen 86 Posted January 22, 2009 Author Report Share Posted January 22, 2009 Wow, I took it out today, 100% functioning with AGPs and MD20! It jammed with the new Surefire 13 round mag with 6 rounds left in it all 3 times that I wrung that mag out. So I figure there's a burr on the inside of the magazine about halfway down. My MD-20 cycles will all the same ammo it cycled with before! What great news, all those reloads are good to go! Oh and I know how my FCG works. That's always cool. I only know my AK's and 10/22 now though. I'm sorta embarrassed. I'm gonna build an AR soon though, so I'll know 3 FCGs. These Saigas never fail to impress me. I'm going to end up cutting a slot in my BHO myself just so I can slide the safety lever in there past it. I don't know why they didn't do that from the factory. Whatever, shouldn't take me long, and I have a LOT of room to make mistakes as the part is nonessential and really simple in operation. I'm sending some stuff over to Cobra, assuming he forgives me for hating my neighbors' cats. Quote Link to post Share on other sites
Cobra 76 two 2,677 Posted January 23, 2009 Report Share Posted January 23, 2009 I don't have any problem with you hating your neighbors cats....never did. What I do have a problem with is you grouping ALL CATS and ALL CAT OWNERS together in one big f'king group, and talking down to us they way you did. That's a sign of a very small mind.... All of these questions you asked above, I have answered myself a million times, and even spelled most of it out slowly in my 12 ga tutorial that's stickied in the conversions section (THIS section... Yeah...that one I worked very hard on to try and make it as simple as possible and cover things in detail that the other ones left out....so even the most simple minded idiot could figure out how to do everything....the one that you say SUCKS because I didn't use that stupid plate that was designed for people with no patience or understanding of a simple 3 dollar spring.... ) Maybe the reason you didn't get more replies is because you come off like a spoiled whiney bitch who expects to be spoon fed all the information instead of finding some of it on your own. And because your tone shows a huge lack of respect to everyone like myself who has poured hours and hours into this place trying to help people like yourself. Most people appreciate that. I don't know what your problem is...must be that time of the month, or maybe some cat "pissed" you off before you posted. I didn't see this thread til now or I would have answered them yet again. I'm sorry you listened to noobie and chose the STUSA trigger guard over the Tromix one. I've stated my reasons why that one's a poor choice (IMO) before, but I guess you missed that too. Like I said, I'll still be happy to fix your FSB / brake problem, and whatever else. And it won't require a transfer. Just please try and show a little respect to those who have done all this shit lots of times before you, and were unselfish enough to come here and share their knowledge and experience. Quote Link to post Share on other sites
Twinsen 86 Posted January 23, 2009 Author Report Share Posted January 23, 2009 Cobra, I had no idea what was required for converting, so I asked you. You told me to get the retaining plate instead of the spring. And for your how-to, that's the one that went into detail with putting the FCG back together. I first did it just by guesswork, but when I was finished, I couldn't get the selector in. So I read yours, and saw that you put the selector in earlier. Well ok then, I took everything out and put it back in, this time selector first. Then bam, those directions you gave said I can just put in the retaining plate at the end. Oh wait, that's impossible. So I was like hey what the hell, why did Cobra tell me to buy this thing, and then I read his directions for installing it on the forum, and it doesn't work! And I never lumped all cat owners together, you just took it personally when I referenced my want for my neighbors (in Connecticut) to raise a finger to keep their cats out of my house. As for the trigger guard, I ended up getting the Tromix one. It's pretty terrible. The grip comes nowhere near the trigger guard, it's made for the massive Tapco SAW grips. I wish I had known. I was getting angry converting the thing because nobody's directions out there mentioned that the selector plate is useless if you want to keep your BHO. And I found 2 conversion how-to's that say it can work, when it won't. I spent over an hour sitting there trying to figure out how to get that thing in there, knowing the entire time that it probably wouldn't, but trusting your word, Cobra. And my original post wasn't asking anybody how to do the conversion or asking for details, I just wanted to know what the best guide is out there. There's too many different parts out there for any of the older guides to give somebody a perfect idea of what they'll need to do with the mess of parts they were able to get for themselves. Your guide is great if somebody bought an unmodified FCG and actually knows what they are looking at. Luckily, I have a FCG moded for a BHO supposedly, which is fantastic. I'm pretty sure that's because you told me to get this exact modded FCG. Thanks. That made my conversion more tard-friendly, so everything just dropped in. But I was just looking for a link, so that I could get it done without asking a bunch of questions. I guess asking for a link to fill in the missing details is "coming off like a spoiled whiney bitch who expects to be spoon fed all the information instead of finding some of it on your own". There are 4 different G2 FCGs out there for the S-12 I think: Tromix, Danzig, Texas, and Tapco original. No conversion guide that I know of explains that, nor do they explain what the parts do, or that the Power Custom retaining plate isn't for use with a BHO. Quote Link to post Share on other sites
Cobra 76 two 2,677 Posted January 24, 2009 Report Share Posted January 24, 2009 Twinsen...First...I recommended the plate to you because I didn't think you would have the patience to mess with the shepherd's crook...based on things you had said already. Secondly...I never even mentioned using a retaining plate in my how to. I was adamantly opposed to it in fact. My instructions were based on the shepherd's crook only. Here they are...copied and pasted from my how to. Yeah now the fun part. Reassembly! Blew everything out with air and cleaned all metal dust and grit ot of the reciever. Put pistol grip screw up through the hole and thread into small side of PG nut. Guide it back down into the hole with screw angled toward the rear. Unscrew it and hold the back of the nut while installing the PG. Screw it in by hand untill it's about flush with the PG and tighten securely while keeping the PG seated straight. I got out my FCG parts and BHO. I cleaned each piece separately and wiped down with oil. 1. First I layed the shepard's crook in the reciever along the left side where it goes. 2. Put the hammer spring on hammer and place it in the rec. where it goes. 3. While holding hammer in place and making sure the shepard's crook is in the right place(clip part ahead of the hammer), put the hammer pin in all the way. 4. Place the trigger/disconnector assy.(with disconnector spring and sleeve in place) down into the reciever by working it in behind the rails. Leave the pin out so you can move it forward and work the selector in behind it . 5. Put the selector in and rotate it down into the "fire" position. 6. With the selector in and down out of the way, put the BHO spring in aganist the right side with the long leg pointing down and to the front. 7. Place the BHO lever down in between the BHO spring and the trigger assy. where the push button can slide down through the slot where it goes. This is where it gets really fun. 8. Push the hammer pin back out far enough to work the front of the BHO lever in between it and the right side of the reciever. Line the hole up and push the hammer pin through it and seat it all the way in while pushing down on the hammer to depress hammer spring. 9. Grab the end of the shepard's crook with some needlenose or hemostats and pull it to the rear until it snaps in place around the groove in the hammer pin. Confirm that the pin is locked in place by trying to push it back out by hand with a punch. 9. Line up the trigger assy. and while holding the shepard's crook down push the trigger pin through the hole, over the crook and almost through the sleeve of the trigger assy. 10. With hammer pin fully seated, trigger pin in but hanging out some, and BHO spring centered over trigger axis hole, use something thin, flat, and blunt on the end(so as not to spit the spring coils) to push the spring down while you push the trigger axis pin through the sleeve and through the middle of the spring and out the hole in the reciever. Whew! If it won't go in all the way make sure it's not pinching the shepard's crook between the pin and the sleeve. It has to lock into the groove of the pin right next to the wall of the reciever. Repeat step 10 as many times as it takes to finally get it in! If you are really patient you can do it the first time. There are several other methods for getting the BHO spring lined up including this one I like: Feed a piece of dental floss up through the BHO button hole and through the loop in the spring before step 7 and then back down through the button hole. When you get to step 10 pull down on the two ends of the string while looking through the right pin hole. when the bottom of the spring loop gets below the hole push the pin through and out. Then just pull one end of the string and it all comes out. 11. With a dental pick or some other small hooked tool pull the rear spring leg up onto the keeper on the back of the BHO lever. 12. Make sure the end of the shepard's crook is locked in the groove of the trigger pin and the ends of the hammer spring are hooked on the two rear legs of the trigger. YEE Haw wasn't that easy? A shepard's crook replacement plate makes this just a little easier but costs more. I just wanted to outline the way to install with shepard's crook like in a real AK because my aim was to do this "old school" and this method only costs 5 bucks. You can also use the spring that came out of the Saiga if you use a pin or screw through the original trigger hook axis hole to hold it in place. With the stock removed you can feed it in from the back of the reciever and it's easy. Or you can even save the 5 bucks and cut and bend your own AK style shepard's crook out of your old Saiga spring. Here is a drawing showing several different methods. And thirdly... it IS possible to use the plate, and put the selector in last, with the BHO already installed. I have gone over how that's done before too. You have to leave the BHO spring off, and rotate the BHO up out of the way while you put in the selector. Then very last, you rotate it back down where it goes and hook the BHO spring up last, with a hook tool. This method works, but is a pain in the ass. This is exactly why I started selling this >>>> http://forum.saiga-12.com/index.php?showtopic=33104 I have spent many many hours staring into an S-12 receiver myself thank you. There are many ways to skin a cat...pardon the pun... Quote Link to post Share on other sites
Recommended Posts
Join the conversation
You can post now and register later. If you have an account, sign in now to post with your account.