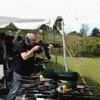
Roushman 0 Posted August 27, 2009 Report Share Posted August 27, 2009 It seems like there are many first time Saiga owners looking for some advice on how to move the FCG forward and install a pistol grip on their S12. It just so happens I picked up a second Saiga a few weeks ago and had the time to convert this one and take some half-assed pictures along the way. I wanted to do this one on a tight budget. In order to do this cheap, I decided to do the work my self, and reuse the trigger guard, and mod a FCG myself. Before doing anything on the conversion, I first took 'er to the range for a test fire. This is a 4 port gun and runs like a dream! I hope that this will give some guidance to those searching for it. There is a ton of helpful information on this board that helped me out, and I hope to add to it in my own way with this post. This isn't meant to be all inclusive, but only to offer some insight on how I did my last conversion. I offer this record of what I did without warranty for what happens to your gun if you decide to replicate what I did. Also, if anyone has any info to add to this post, PLEASE DO SO!!! I am a rookie and this was only my second conversion. I know that I still have a lot to learn. Thanks for your time, and I hope this helps! ***Disclaimer*** Make sure you follow all safe firearm handling procedures when attempting any firearm modifications! Check your local, state, and federal laws and make sure you are in compliance! Here is a guide to help you! I take absolutely no responsibility for anything bad that happens to you, your gun, your dog, etc, etc, etc. Tools used: 1/2" drive hand drill 3/16" drill bit with pilot tip[*}3/8" drill bit with pilot tip Dremel rotary tool Dremel cutting bit Dremel conical grinding bit center punch rubber mallet flathead screwdriver needle nosed pliers metal file Parts used: Tapco G2 Single Hook Fire Control Group Tapco Original Style AK Stock Tapco Original Style AK Grip Tapco AK Grip Screw and Nut DPH Birdcage Flash Hidder Tromix Gas puck Step 1: First we have to remove the factory sporter stock. In my short time on this forum, I have seen quite a few people ask how to accomplish this. Most people seem to overlook the fact that there are 3 screws holding the factory stock. After removing the dust cover, it at first looks as though there is only one screw on the top of the receiver. Once we remover the recoil spring guide the third screw is revealed. After removing all 3 screws, sometimes it is necessary to give the stock a few love taps with a mallet to loosen it up. Step 2: Hopefully by this point you have already removed your bolt carrier and bolt as well. If not, now would be a good time. Now it's time to remove the Fire Control Group retaining pins. To do this, you need to lift the retaining spring out of the way. I had a jard time taking pics of this while I was doing it, so please forgive the poor quality. While holding the spring out of the way, tap the pins out from the right to the left like this: Make sure you save these pins. You will need them when installing the Tapco G2 FCG. Step 3: Now with the factory FCG removed, it's easy to see that all we have left is the linkage which is riveted in place. It's time to take out that drill and 3/16" bit, along with those needle nose pliers. In this picture you can see the pilot tip on the bit. When using a hand drill, this really helps keep your hole centered. Remember to keep the drill speed low, and take your time. While drilling, use the pliers to hold the rivets from inside the receiver so that they don't spin. All you need to drill out is the rolled edge of the rivet on the right side in order to tap out the pins. I recommend removing the rivets, then drilling the holes out the rest of the way so that you can fill them with the 3/16" nylon hole plugs later. If you're lucky, you will be on center and just pop off a little ring from the rolled edge Step 4: Now we're down to a lot less moving parts. This means it's time to take off the trigger plate and trigger guard. There are 3 rivets holding this assembly in place. Take your Dremel and cutting disk, and start at the rivet towards the back of the receiver. Keep the disk parallel with the bottom of the receiver and have a steady hand while you take off the head of the rivet. Once the head is removed, use your center punch and mark the center of the remaining rivet. Finish drilling it out with the 3/16" bit and drill. Next, lift the trigger guard up and do the same to the next rivet. Finally, take care of the last rivet in a similar fashion. When you are done, save the trigger guard for the next step. Step 5: Here is where I got creative with the Dremel, and fashioned the trigger guard and safety stop for reuse. I took thi pic before I cut off the rear most hole on the trigger guard. Make sure you remove that tab so that your pistol grip will fit. Step 6: After painting your newly designed trigger guard, it's time to install it. I'm guessing there are going to be a bunch of people that disagree with the way that I reattached my trigger guard, but it works for me. I used 3/16"x1/8" aluminum rivets. After installing the rivets, I chopped off their heads inside th receiver with my Dremel. I made sure not to go so low that i compromised the rivet, but enough that I got a clean, flat surface. I also made sure to rivet the front hole first, then bend the guard straight and get the back one. Step 6: In the last few pics, you probably noticed that I drilled the hole for the pistol grip nut. I measured the hole more or less by sight, and marked it with a pistol grip nut. Then I used my center punch to mark the center before drilling the 3/8" hole. After drilling the hole, I used my Dremel to square it off, and a file to smooth it out. I did a really shitty job at this. I'm glad it is hidden by the grip once everything is said and done. It works, and that is what I was concerned with. Once I was done, I hit everything with a couple coats of paint to try and hide my mistakes. Moe Zambeck' I just recently bought a Tapco collapsing buttstock and would like to use your instruction to mount the stock to my Saiga12. Would you mind updating your pics again??? Thanks!!! Quote Link to post Share on other sites
Moe Zambeak 53 Posted August 28, 2009 Author Report Share Posted August 28, 2009 Sorry about my photobucket going over the limit guys. I guess a bunch of people are viewing the pics! I started an album here with all the pics I had in my conversion folder. I guess I should have hosted the pictures here to begin with. Now it's too late for me to edit my original post. You can find the album here Quote Link to post Share on other sites
kwesi 39 Posted September 8, 2009 Report Share Posted September 8, 2009 Well that photobucket crap sure tainted an excellent post. After my conversion If I have time I'll copy & paste & modify the original post adding the pics from his gallery. If nobody beats me to it. (Please... Somebody beat me to it.) HERE IS A QUICK FIX FOR NOW http://forum.saiga-12.com/index.php?showto...t=0&start=0 Thanks Moe! My conversion was set to begin at 9:00 tomorrow morning - I'll add this to my file to guide me through - perfect timing and great job! Quote Link to post Share on other sites
kwesi 39 Posted September 13, 2009 Report Share Posted September 13, 2009 First conversion update and a tip for other newbie's like myself. Being rather mechanically challenged I got a buddy to assist. My conversion included the Tromix DIY trigger guard and the Tromix FCG, Tapco AK SAW pistol grip, Tromix LS folding stock with an internal block and folding mechanism. I researched numerous threads showing step by step and downloaded several video's! Sounds like we had a lot of difficulty compared to the posts of others attempting this. The main problems were getting the two springs attached to each side of the receiver, one is called the "Shepherds Crook". Stay with me as I'm getting to the tip. We finally got the Shepherds Crook attached but it seemed as if we installed the hammer backwards because the twisted cable ends were pointing towards the muzzle instead of the trigger. After calling Greg at CSS, what a great gentleman he is, we realized it was installed correctly BUT we did not put the tension on the cable BEFORE inserting the hammer. Tip#1: make sure you watch the third video on Greg's site because you must rotate the hammer clockwise to create the tension. Don't forget to watch his first video also! So we have to remove the Shepherds Crook ( took us a long time to get on )to get to the hammer. I'm holding the receiver while my friend is trying to pull the Shepherds Crook off. Then it comes off and flies out the rear of the receiver; all we heard was one "ping". We searched everywhere inside his garage for 1 1/2 hours then finally gave up trying to find the Shepherds Crook. I called Greg to ship a new one. Tip#2: protect the open end of the receiver should you have to remove the Shepherds Crook. So by now you figured out why I'm not posting any photo's just yet. *** I purchased the Saiga internal receiver block to eliminate the need to mill or weld but the legs on the block both rubbed leaving 1/4" gap so we did end up grinding off enough to get her on. The Tromix stock + the Saiga stock folding mechanism locks up real tight and feels good! By Tuesday I hope to have the Shepherds Crook and hammer correctly installed to test the trigger reset....man I hope we didn't do anything that will cause it to not reset! I can't thank everyone enough for the threads, photo's and tutorials! Even with all that this was a major job for us. Quote Link to post Share on other sites
presto_z 125 Posted September 13, 2009 Report Share Posted September 13, 2009 this is a great tutorial, after reading over it a few times it gave me the confidence to do it myself... once you start its pretty self explanatory what needs to be done, this just gives you the motivation and comfort in knowing that if you get stuck or confused during the process all you need to do is pull up the pics and get back to work.. cant wait to do my next conversion +1 Quote Link to post Share on other sites
hindsight 0 Posted September 15, 2009 Report Share Posted September 15, 2009 Awesome post! Thanks for the info. Doc Quote Link to post Share on other sites
Kacey_Arnold 0 Posted September 21, 2009 Report Share Posted September 21, 2009 Ok a few more Tips. 1) Make sure you actually have the parts you ordered. I ordered the Tromix FCG got a double hook tapco G2 unmodified, BTW the double hook Tapco G2 will not work in a Saiga 12 you need to remove one of the hooks and shorten it a little bit. The tromix is the Tapco G2 already modified. 2) Get a vice you can buy a small easily mounted vice for around $20. 3) Round the short tip of the shepherds crock just so it will slide along the bottom of the gun easier. 4) make sure you seat the FCG pins, that the shepherds crock retains, fully. 5) Get out the old tap and die set inevitably something will go wrong. 6) a couple of good flat tipped medium to small screw drivers will save you a lot of time when it comes to putting on the BHO spring and the shepherds crock. I'll post some more thoughts from my next mod. Quote Link to post Share on other sites
warrantw4 0 Posted September 22, 2009 Report Share Posted September 22, 2009 Wow, nice job. Where do you get the black caps for the holes you drilled? I think I will convert mine when I get back home. Warrant Quote Link to post Share on other sites
Moe Zambeak 53 Posted September 22, 2009 Author Report Share Posted September 22, 2009 Wow, nice job. Where do you get the black caps for the holes you drilled? I think I will convert mine when I get back home. Warrant They are 3/16" nylon hole plugs. I got mine at Lowes, in the specialty screw drawers. Quote Link to post Share on other sites
warrantw4 0 Posted September 22, 2009 Report Share Posted September 22, 2009 (edited) Wow, nice job. Where do you get the black caps for the holes you drilled? I think I will convert mine when I get back home. Warrant They are 3/16" nylon hole plugs. I got mine at Lowes, in the specialty screw drawers. Moe, Thanks to you I am finally going to convert mine. Warrant Edited September 22, 2009 by warrantw4 Quote Link to post Share on other sites
StealthyBlagga 4 Posted September 30, 2009 Report Share Posted September 30, 2009 (edited) One suggestion: When removing the trigger guard, only grind off the rear two rivets, then use a Dremel cut-off wheel to carefully cut through the plate in front to remove the trigger guard. This leaves the original safety stop in place (held on the receiver by the third rivet that you did not grind off). This saves $$$, time and effort, and is cosmetically appealing. I have shamelessly exploited the OP's photo from Step 4 to illustrate: Here is a picture of mine done this way: Edited September 30, 2009 by StealthyBlagga 2 Quote Link to post Share on other sites
Coal_forge 15 Posted October 8, 2009 Report Share Posted October 8, 2009 After getting the axis pins put tape over the heads to retain them while installing the pin's retainers. Thanks for the write up BTW. Almost done, all I have to do is GTAW the extra holes and the safety stop to the trigger guard. Quote Link to post Share on other sites
INDYk 9 Posted January 7, 2010 Report Share Posted January 7, 2010 IM DOING IT thanks for the post!!!! Quote Link to post Share on other sites
AKHOODLUM 0 Posted January 14, 2010 Report Share Posted January 14, 2010 Had you considered using the Tromix DYI trigger guard kit? Quote Link to post Share on other sites
ErikTaylor 41 Posted February 3, 2010 Report Share Posted February 3, 2010 Awesome Moe. I am going to get to try this real soon, as soon as USPS drops off a package. Quote Link to post Share on other sites
ErikTaylor 41 Posted February 4, 2010 Report Share Posted February 4, 2010 Hey Moe, Thanks to you I was able to convert mine without any issues: Surprisingly the most difficult thing was the blasted shepards hook. The BHO was a breeze..haha. Only took about 1:30 from beginning of prep to clean up (not bad for a first timer) Ha ha. Thanks again. Erik Quote Link to post Share on other sites
Moe Zambeak 53 Posted February 4, 2010 Author Report Share Posted February 4, 2010 No problem! I'm glad to be of help! Quote Link to post Share on other sites
cholly_horse 3 Posted February 10, 2010 Report Share Posted February 10, 2010 (edited) In the video he said something about having to grind on the inside of the receiver "only on the 12 ga". To keep it from rubbing.. Whats that about? Edited February 10, 2010 by cholly_horse Quote Link to post Share on other sites
cholly_horse 3 Posted February 10, 2010 Report Share Posted February 10, 2010 *cough* Quote Link to post Share on other sites
Stink Star 13 Posted February 14, 2010 Report Share Posted February 14, 2010 it seems to me from looking at pictures that the Tapco DIY trigger guard has a built in pistol grip nut, eliminating the need to cut a square in the bottom of the receiver. Am i assuming correctly? Id really like to be able to do this conversion without cutting that receiver Quote Link to post Share on other sites
cholly_horse 3 Posted February 15, 2010 Report Share Posted February 15, 2010 it seems to me from looking at pictures that the Tapco DIY trigger guard has a built in pistol grip nut, eliminating the need to cut a square in the bottom of the receiver. Am i assuming correctly? Id really like to be able to do this conversion without cutting that receiver Youre correct. Quote Link to post Share on other sites
Stink Star 13 Posted February 15, 2010 Report Share Posted February 15, 2010 well thats just excellant! i cant wait till the stuff comes now! im gonna have to get myself a 7.62X39 to convert as well Quote Link to post Share on other sites
Stink Star 13 Posted February 18, 2010 Report Share Posted February 18, 2010 no turning back now! cant wait till the rest of my parts get here! Quote Link to post Share on other sites
Top Notch 0 Posted February 20, 2010 Report Share Posted February 20, 2010 Very good reference for Saiga 12....I have found several 7.62x39 but not many if any Saiga 12 conversion pics and steps....I am currently converting my first Saiga 12 now and it helps to have another point of reference....Just waiting for the duracoat to cure and I will be putting it back together....should be really sweet....thanks again Quote Link to post Share on other sites
jbmidnight 8 Posted March 24, 2010 Report Share Posted March 24, 2010 (edited) Thanks so much Moe. Outstanding writeup made it easy to follow. If I can follow your directions anyone can. Thanks again. JB Edited March 24, 2010 by Placebo Quote Link to post Share on other sites
Moe Zambeak 53 Posted March 24, 2010 Author Report Share Posted March 24, 2010 Thanks so much Moe. Outstanding wrieup made it easy to follow. If I can follow your directions anyone can. Thanks again. JB I'm glad people are still finding this thread useful! Quote Link to post Share on other sites
a782482 0 Posted April 14, 2010 Report Share Posted April 14, 2010 OP great write up, been eye balling this thread for a while now ever since I got my S12 After making sure that it ran reliably with all ammo I've decided to do it. I havent even ordered any of the parts yet besides a stock, while I was trying to fit it on tonight to see what it looked like, one thing after another... well I ended up stripping the reciever taking everything out including the TG The questions I have for you and anybody else who can share; what paint did you use or can I use to cover up the bare metal areas? I understand that now would be a good time to refinish the whole reciver, but I dont have the extra $$$ and dont believe I can do it my self. Besides its only a small area that needs to be covered up. Also those DIY, RAM S12TG, Cobras' tg and such with a built in PG nut... Are they durable to sustain 12 gauge recoil? Because it seems that the only thing that holds the whole TG including the PG are the 2 tiny screws. Thanks Quote Link to post Share on other sites
Matthew Hopkins 1,065 Posted April 14, 2010 Report Share Posted April 14, 2010 (edited) The questions I have for you and anybody else who can share; what paint did you use or can I use to cover up the bare metal areas? I hit it with regular ol' off the shelf black spray paint. it's only 2 small areas of bare metal, and it's not in a area that will see lots of rubbing or use. you don't need to go nutzoid overboard by redoing the entire receiver for 2 small bare spots. Edited April 14, 2010 by Matthew Hopkins Quote Link to post Share on other sites
a782482 0 Posted April 14, 2010 Report Share Posted April 14, 2010 The questions I have for you and anybody else who can share; what paint did you use or can I use to cover up the bare metal areas? I hit it with regular ol' off the shelf black spray paint. it's only 2 small areas of bare metal, and it's not in a area that will see lots of rubbing or use. you don't need to go nutzoid overboard by redoing the entire receiver for 2 small bare spots. Yup, that what I was thinking.. should I use like a grill spray paint? I know its flat black and will probably match well, on the other hand I believe the shinie black will stand out a bit from the rest? Thanks Quote Link to post Share on other sites
Matthew Hopkins 1,065 Posted April 14, 2010 Report Share Posted April 14, 2010 I just used regular ol' flat black spray paint I had in the basement. you don't need to get all fancy or use some kind of "special" paint. the purpose of this exercise is just to cover up the bare spot Quote Link to post Share on other sites
Recommended Posts
Join the conversation
You can post now and register later. If you have an account, sign in now to post with your account.