IPvFletch 2 Posted May 11, 2012 Report Share Posted May 11, 2012 (edited) I just got myself an S12.. The S/N begins with 11, and was "new in box" from Bud's Gun Shop.. It was imported by EAA ("US Sporting Goods" in FL), according to the obvious engraving on the side, but it appears to have all of the "newer" modifications from the factory - including the revised/newer sights, threaded barrel (with a thread protector which I had to tighten slightly), and factory bolt hold open lever (dohh, I just bought one from CSS!).. I've done a LOT of reading over the past few weeks and even more today/tonight... I've still got a lot to learn, but so far I've learned a lot about the "vodka special" type issues, and know what I need to look for, should I have issues. I've answered "most" of my questions by doing more searches, but I still have some specific details I need help with... 1. When I do my conversion (already got the "basic" kit from CSS), do I want to use my factory hammer or the newer hammer? For the trigger group, I'll just use the new trigger I suppose, but I think that since the newer factory Saigas (and hammers) already have the BHO lever in place, this means I don't need the modified hammer in the conversion kit, which is slightly narrower on one side (because in theory my new factory hammer is already ready for the BHO). Right? But I also read some folks were resurfacing their hammers to make them smoother or else to hit better with the modified angle from the move/conversion... Which do you think I should use? 2. I installed a new handguard, and while it was a pain in the ass to get into the tang, it finally fit. THEN I read about the gas vent hidden under the handguard so no chance to look easily at the moment. Can someone tell me where this is? Do I want to just block it off completely, or should I try it as-is with the new handguard in place (it's similar to the factory hg) and see if I have gas issues? 3. This is the only REAL question... I was looking down my barrel (don't worry, it was unloaded duhh I am a CHL instructor actually, so I know a thing or two about safety).. Inside the barrel right where the gas block is, on the top of the barrel lining, I saw what looked like "fuzz". It actually looked kind of like a dead spider, but I'll call it "fuzz" for now. I ran a rod down the barrel with a cleaning cloth on the end, and some of it looked like it came out (might be part of a spider web) but most of it is still there. I rubbed it real good with the cleaning rod/cloth but couldn't get it loose. I fear what I'm seeing are burrs from the drilling of the gas ports... I'd like to inspect those further. From reading it looks like all I need to do is move my gas port from 2 to 1 to 2 to 1 a few times counter-clockwise until it pops off, is that right? Then I can see in there, and ideally use a mirror and dental pick or wire or paperclip to probe the ports and a) verify I have at least 2 if not 3 or 4 uncovered and try to push anything like a burr down into the barrel maybe with a larger wire (someone said 12awg is close?) and see if I can dislodge them - exiting into the barrel and then blow out the barrel to get them outta there... Does this make sense?? 4. Until I fire it, I likely won't have any further questions, but is there like a "start up" guide to a new Saiga, to verify gas power, and cycling?? Like should I just mix up a few 2 3/4" and 3" shells and some 00 slugs and try them with setting 1 and see if anything fails to eject or feed the next round?? I realize I'm not supposed to do 3" or "magnum" loads on setting 2 because it could damage my trunion, right? Is there like a worksheet or something outlining tests I should perform like I'm describing?? 5. I noticed it cycles really rough by hand/manually. I haven't run a single round through it yet, so hopefully it smooths up a bit. I'm not sure there's any oil on it, either. I mean I see some oozing out of the receiver but the internals look bone dry. I might throw some brake free on them when I strip things down and re-assemble this weekend.. Thanks in advance!! Edited May 13, 2012 by IPvFletch Quote Link to post Share on other sites
corbin 621 Posted May 11, 2012 Report Share Posted May 11, 2012 (edited) Welcome to the forum, and your new addiction. Though I've had a Saiga 12 for a few years now, today I picked up another one (unconverted and unfired, from what I can tell). So I'll be doing a lot of the things I'll be suggesting to you. 1. I would suggest using a new (US made) hammer. If you're going with a Tapco group, you'll need to grind/file the hump off the front of the hammer and take a little off the right side, if you're going to keep your BHO. Some people ditch them completely, some keep them. It's a personal choice. 2. The gas vent is on the left side of the gas block, just under the handguard's edge. I would advise not to block it off (like welding it). Having a HG over it shouldn't matter though, unless it's like SEALED over it, which I've yet to see any that are. My understanding is it helps vent air from behind the puck, but I'm not sure. 3. It's probably a slight burr or some type of material that got caught there. Unless it's large, it would probably blow out the first time you shoot the shotgun. Of course, if you have a dowel rod, try hitting it with that. Your idea of using a dental pick to check your ports is definitely something I'd recommend. I got lucky with mine. It has 4 unblocked ports. 4. I don't know of a start up guide, but general concensus is to fire it STOCK first, before doing anything to it. As far as what rounds to use, I'd say try as many different ones as you like. See how it functions with high brass, low brass and everything in between. Obviously, if it won't cycle slugs, it probably won't cycle birdshot. 5. The finish on these are not polished and smooth, to say the least. It's a bit better than spraypaint, but not like highly polished bluing or anything. Shooting it will cause the carrier to rub on the face of the hammer, the sides of the carrier (the slots) to rub on the rails in the receiver and the fire control group (hammer, trigger and disconnector) to rub together. Polishing these areas will smooth up the action and produce better reliability. Firing it a lot will polish them too, but not as much as actually polishing them yourself. If you don't want to do it yourslef, there are a few people on the forum that do outstanding jobs. Pauly and Cobra come to mind. Sometimes you'll get the cheap, soft hulled shells to catch on the barrel hood and jam up. They can also catch in the extractor cut (at the 1 o'clock position in the barrel). Winchester bulk ammo from Wal Mart is notorious for doing this. Federal bulk is better. You can leave a few Federal shells laying out in the sun for a while to soften them up to see if your gun is prone to this, rather than buying a bunch of ammo you can't use in the Saiga. Again, welcome to the forum and please try and search the various threads to find info on what might be giving you issues, before starting a new thread that asks the same question that many have asked before you. I made that mistake when I first got here and I felt a bit stupid after I discovered there were several pinned or stuck threads that addressed things. Edited May 11, 2012 by Corbin 1 Quote Link to post Share on other sites
gunfun 3,931 Posted May 11, 2012 Report Share Posted May 11, 2012 (edited) Everything Corbin said is right. I would supplement his response to #1, to add that if you have a modified FCG such as the tromix one that comes with the basic kit, you should not need to profile the hammer at all. I vote for keeping the BHO. It is handy. Adding a notch for the spring and cutting the notch to allow easy installation of the safety is worthwhile. Mozambique's sticky on how to do a conversion from scratch is worth reading though. Also you want the hammer that goes with your trigger set for geometry and 922r reasons. You may be over thinking this a bit because you have read about every problem that has been discovered and solved long since. I would estimate that for every person who posts here with a problem there are 20 that never have a problem and never have a reason to look up the forum. For all you know, your gun will run flawlessly without changing anything. Running federal bulk from walmart on #2 is a pretty good baseline. Specifically #7 1/2 shot @ 1 1/8 oz (3 dram) ~1200 fps. Everyone benefits from deburring anything rough in the action, so running sandpaper over the rails is a good idea. Ignore any advice that includes the phrase "break in" Here is a paste of my recommendations for assessing a new saiga: I think the order for an NIB saiga is to see if it works first.. step 1) Don't convert (yet). Resist the urge to change any parts untill you know if it works. Run a few high brass. Buy some ammo that should be marginal. I say 1 box of federal bulk, and one box of winchester. (3 dram 1 1/8 oz 100 pack from Walmart) If it runs the federal, you might be ok to stop there. If it won't, let the importer fix it. If it won't run the winchester, and you want it to, you know that it is pretty close. Now you can start to think about whether to fix gas or friction. step 2) after doing your warranty/no warranty decision, everyone should do a simple home polish. I am not talking about a full reprofile. I am talking about taking a wire brush and some sand paper and slicking up the rails and, removing any burrs... and feeling by hand cycle for any sticky points. If your gun works well, this is a logical stop point for many users. If not, you need to assess gas ports, and whether there are major friction problems. See the sticky on that. The point is to be methodical, and only fix problems if you have them. That info and other opinions of varying quality is from Post #68 of this thread: http://forum.saiga-1...__ports__st__60 There are other good stickies on how to do the port work, and also a good sticky on bolt profiling. (~$100 gets you exceptional work on your bold from either Pauly or Cobra. This is a good area to use the pros. You can do the work yourself, but they will do it nicer, and you won't risk munching a new gun.) See the video in my sig line for other thoughts & tips on bolt work and reloading. Edited May 11, 2012 by GunFun 3 Quote Link to post Share on other sites
The_Caged_Bird 474 Posted May 11, 2012 Report Share Posted May 11, 2012 It's been said... You guys are spot on! Quote Link to post Share on other sites
IPvFletch 2 Posted May 11, 2012 Author Report Share Posted May 11, 2012 (edited) Ok, THANKS guys!! This is good stuff!! I have read through Moe's conversion thread, as well as several others and also watched all the videos on CSS's site.. I plan to keep these next to me while doing the conversion.. Regarding my questions... 1. It sounds like use the revised trigger in my Tromix FCG. From the CSS website, it LOOKS like all of the newer Tromix FCG kit hammers have ALREADY had a) the bump removed and been shaved down to be narrower to work with the BHO... So that should be mostly drop in, since I already have a BHO setup.. (Source: http://store.carolin.../trxtrgword.jpg) 2. Ok, thanks. 3. I'm not sure I got a clear answer yet, but it sounds like nobody objected to what I said, so I will pop off the gas dial today and see what's behind it.. It's funny, I can't remember a dream for the last few years now, but LAST NIGHT I swear, I dreamed I was using a mirror to find my gas ports and I had all 4 and they were clean and obvious and PERFECT.. I was so relieved... Let's just hope it's like this in reality.. Oh if I could be so lucky... 4. Understood, will try a variety and be sure to try the aforementioned Federal (have some already) and Winchester (also have some already fortunately). 5. Ok, I will check into this and likely do some sanding myself, just for giggles. I didn't see any closeup pics of exactly where to sand, but hopefully it will be as obvious as my handgun's slide rails are... ?? Edit: I'm heading to Red's indoor range (allows shotguns) in a bit to test this out BEFORE I convert it.. Wish me luck!! Thanks again all for the great comments and support (and keep them coming)!! Edited May 11, 2012 by IPvFletch Quote Link to post Share on other sites
The_Caged_Bird 474 Posted May 11, 2012 Report Share Posted May 11, 2012 I wouldn't recommend conversion before firing on your first S-12, learn a bit on your first then get a second and knock it out! Quote Link to post Share on other sites
IPvFletch 2 Posted May 11, 2012 Author Report Share Posted May 11, 2012 (edited) I just got back from the range, and the S12 did great. The gun felt VERY SMOOTH shooting it, but still feels a little "grainy" when I manually rack the bolt. I'll probably sandpaper the rails a bit when I strip it down this weekend... All I could shoot were Federal 12 gauge slugs, 2 3/4" shells with 1oz slugs (the lightest they had, they also had 1 1/8 oz Remingtons though). They would't let me shoot shot or buckshot, and one of the guys ended up watching over my shoulder at one point, so I didn't try to sneak a few I had brought with me in to the mag... oh well... I'll go to my real range (outdoor) soon enough, but was planning to do the conversion this weekend (my buddy is also converting his)... So what are you guys thoughts on the slugs I shot and the gas/cycling I observed? Would those be considered low-power? The gun cycled GREAT on gas setting 1, so that was good to see... Ideally I would have put in some low velocity shot, but I wasn't able to... FWIW, this gun will NOT be for hunting (I only hunt Zombies), so it'll only be for home defense, where I'll likely use slugs or some of the crazier hd ammo... Edited May 11, 2012 by IPvFletch Quote Link to post Share on other sites
Mullet Man 2,114 Posted May 11, 2012 Report Share Posted May 11, 2012 Not too many S12's around that wont cycle slugs (2-3/4" 1oz is pretty standard), so it sounds like your testing was on par so far. That is unless the package said "low recoil" or something to that effect. The low power lightweight bird shot will be the real test on setting #2, in factory stock configuration. Quote Link to post Share on other sites
IPvFletch 2 Posted May 11, 2012 Author Report Share Posted May 11, 2012 (edited) Don't you mean worst case is bird shot on setting #1? My understanding is that setting #2 makes it easier to cycle (more gas is utilized vs. expelled)?? Or is #1 just too low and bird shot will NOT cycle period on #1 no matter what we do?? Edited May 11, 2012 by IPvFletch Quote Link to post Share on other sites
Mullet Man 2,114 Posted May 11, 2012 Report Share Posted May 11, 2012 Don't you mean bird shot on setting #1? My understanding is that setting #2 makes it easier to cycle (more gas is utilized vs. expelled)?? No, i mean setting #2. Setting #1 is for high power loads like the slugs you were using. The high power loads need less gas to cycle the action since they create more gas and pressure when discharged. Setting #2 is to be used with low power loads because that position allows more gas to enter into the gas block, which is needed since low power loads produce less gas. Its not ideal to be firing slugs and heavy buck loads on setting #2. Unscrew your gas regulator and look at it in correlation to when the numbers are in the correct position when installed. The only time you would want to run slugs or heavy buck loads on setting #2 is when they fail to work on setting #1. 1 Quote Link to post Share on other sites
IPvFletch 2 Posted May 11, 2012 Author Report Share Posted May 11, 2012 (edited) OK, understood, but isn't worst case scenario low power/low recoil bird shot and gas setting #1? Or does everyone just give in and use #2 for that and not bother trying to get it to work with #1? I'd rather set the gas once and forget about it, honestly. So I was thinking about leaving it on #1 (always/for everything), but if I truly need #2 for bird shot or low recoil type ammo, then I suppose I'll have to plan to switch it occasionally.. Edited May 11, 2012 by IPvFletch Quote Link to post Share on other sites
Mullet Man 2,114 Posted May 11, 2012 Report Share Posted May 11, 2012 Nope. Worst case scenario is slugs and heavy buck only cycling on setting #2, or low power light bird shot working on setting #1. The first scenario is easier to remedy. The second is mush less common. Quote Link to post Share on other sites
IPvFletch 2 Posted May 11, 2012 Author Report Share Posted May 11, 2012 (edited) Yeah the latter is not a common problem cuz you can just move it to setting #2 (or even open it up further if you want to drill or swap out gas plugs right?) So it sounds like its at least a good sign it cycled slugs on #1... yay!! But I really want to know what a low velocity bird shot would do on #2 or even #1 if I really want to push it.. This is my first easily-adjustable gas-powered gun and it has mixed ammo options to boot, so this gas stuff really gets confusing. Hence my desire to try to just set it (on #1) and forget it.. I also read somewhere NOT to use 3" higher power or even magnum rounds on setting #2. That is to prevent the weapon from being damaged internally, right? What about regular (semi-low power) slugs or buckshot or HD expanding ammo though? BTW, thanks for all the comments and insight Mullet Man!! Edited May 11, 2012 by IPvFletch Quote Link to post Share on other sites
Mullet Man 2,114 Posted May 11, 2012 Report Share Posted May 11, 2012 (edited) Low power loads on setting #1 means when running high power loads on setting #1, its potentially allowing too much gas thru which over time can effect long term wear and tear and possibly other issues. Its adjustable for a reason. If its cycling low power stuff on setting #1, then putting it on setting #2 would be the same difference as what i just mentioned, as far as wear and tear. There is a balance you want to achieve since there is such a broad range of shotgun ammo available. That balance is handled thru adjustability. Just remember... Setting #2 allows more gas and is for low power light weight loads. Setting #1 allows less gas thru and is for high power heavy loads. Edited May 11, 2012 by Mullet Man 2 Quote Link to post Share on other sites
The_Caged_Bird 474 Posted May 11, 2012 Report Share Posted May 11, 2012 Listen to the man... Quote Link to post Share on other sites
lebednik 1 Posted May 12, 2012 Report Share Posted May 12, 2012 Reds rocks but wont let u shoot shot. Slugs only. Which Reds u go to, North or South? I have always preferred South since I can shoot hg and rifles at the same booth. Quote Link to post Share on other sites
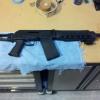
IPvFletch 2 Posted May 12, 2012 Author Report Share Posted May 12, 2012 (edited) South, and I will likely never go back if I don't have to. I have a private range in Johnson City, and also I'm a member of LSGR, so I have options, it's just a longer drive... BTW, thanks to the Man and everyone else, including all of the silent folks like Carolina Shooter's videos, and some other conversion threads/pics/videos I've seen... It's all done... With any luck, it should work out at the range... Just finished... Carolina Shooters Raptor Stock ACE Button-Activated Folding Mechanism ACE Internal Receiver Block Tromix Basic Conversion Kit w/ Tapco SAW Grip Carolina Shooters SS Trigger Guard Modified Bolt Hold Open Axis Pin Retaining Plate (HIGHLY recommended) Phoenix Technology Tri-Rail Laser Sight with tail button 1/2" Limbsaver Pad Need some REAL magazines still... Blue Locktite EVERYWHERE... We also modified my buddy's S12 in the same manner, but he used the Tapco collapsible stock, so didn't have to trim the rear tang... Overall, it was a CRAZY time, but I HIGHLY recommend every man do this at least once in their life. It was a blast. I wish I had better tools, and a drill press though. The drilling of the 2 rear stock trigger rivets and milling out those 4 holes was by far the hardest part (with a Makita cordless and dull bits at least). Using a Dremel is HIGHLY recommend on the trigger guard screws. That will save you at LEAST an hour!! After not knowing what the heck we were doing, we got through it and during re-assembly we realized just how simple this gun is to re-assemble. The BHO sping is hard and so is the shepherd's crook (we did his with the crook, and mine with the axis pin retaining plate). I highly recommend the plate. Edited May 14, 2012 by IPvFletch 1 Quote Link to post Share on other sites
Bigchris 31 Posted May 13, 2012 Report Share Posted May 13, 2012 That turned out really nice!! Quote Link to post Share on other sites
IPvFletch 2 Posted May 13, 2012 Author Report Share Posted May 13, 2012 The only thing I dislike is the ACE folding mechanism is NOT very snug when folded open. It is VERY rigid when closed in place. But when you fold it, it DOES lock but there is a lot of play. I'm going to try and rig up something to have it catch on near the magazine area. Maybe some velcro or maybe wrap some para cord around the stock and that will add some width there for it to snug up against the receiver. I dunno yet... But it was kind of disappointing for spending $90 on it... Quote Link to post Share on other sites
The_Caged_Bird 474 Posted May 13, 2012 Report Share Posted May 13, 2012 I'm jealous of that stock, that thing looks great!!! Quote Link to post Share on other sites
IPvFletch 2 Posted May 13, 2012 Author Report Share Posted May 13, 2012 (edited) Magpul AFG2 (Black) on the way... found black in stock at Del-Ton!! Some more tips on the conversion, the modified BHO seems to be a requirement. We couldn't figure out why exactly, because the Safety doesn't move, and neither does the BHO itself. Our stock S12s had the BHO already installed, but no notch. We couldn't get it back together without notching them... *shrug* Also, we notched the BHO where the BHO spring sits. Basically to really let it get in there and have a "wall" on each side of it. I wish I took a pic. We're joked that innovating and we're still newbz, wtf?!?! Also, MUCH care was taken on this conversion to avoid bending or tweaking the entire gun. We were mindful of where the barrel meets the receiver, not to apply pressure there, and also on the gas line. We used a TON of blue painters tape and also that 4" wide "masking paper" tape on parts we were drilling or dremeling and also inside the receiver to prevent extra internal flakes, and also all over the gun when painting the bottom with the hi temp BBQ paint. Be sure to plug the barrel and gas stuff too!! BTW, the BBQ paint sucked. It looked thin and ended up VERY dull. This was the Krylon brand. *shrug* Anyways if I did that again I would use gloss black to match the factory look, maybe even some grit to texture it. We used a metal table vise and let me tell you this is how people likely screw up their conversions. This thing is durable, the gun, not so much. The guy in Carolina Shooters videos has these plastic things in between the teeth. We didn't, so we used cardboard it works great and crushes before the gun does. We also used the "Tipton Best Gun Vise" which I got for free and let me tell you IT SUCKS. It seems like it is made poorly and also it is really wobble, one of the quick-release knobs is stripped, it just plain sucked. BUT, it made for a GREAT stand, and anyways we didn't want a lot of pressure on the gun to begin with. But yeah the conversion was more of an art than anything else.. For example the rear tang was easy to get off for my Ace internal block to sit - BUT, the butt of the receiver was actually NOT flat itself. In fact, I had to shave it down with the Dremel (and brown cylindrical grinding pads) and a) make it flat (it wasn't totally) and make it shorter because the Ace internal block was so tight up against the stock trigger pin holes where the screws have to go, that it was causing the screws to twist and potentially cross-thread if we continued. So, we TOOK OUR TIME and didn't try to screw it in when we knew it was too tight.. So we shaved the face of the receiver butt down a bit (maybe 1/32" so not much) to make the whole rear receiver shorter so the Ace lined up better.. We didn't touch the gas system, and also didn't touch the rails just yet. I used some thick jelly oil on the rails and bolt, so hopefully it will smoothen up in time as it gets worn in... Otherwise, I'm happy. ps. I'm asking for a Drill Press for Christmas.. Edited May 13, 2012 by IPvFletch Quote Link to post Share on other sites
The_Caged_Bird 474 Posted May 13, 2012 Report Share Posted May 13, 2012 I use Rustoleum textured paint. It seems to match the factory finish really well. If you want it good and cured, throw the weapon in the oven for a couple of hours at around 300 degrees... Right now, mine is silver with a bit of a purple tint to it, but tomorrow... well, let's just say that I'm pretty sure that the finish is going to get messed up tomorrow so I'll be stripping it down and doing some camo... Quote Link to post Share on other sites
corbin 621 Posted May 13, 2012 Report Share Posted May 13, 2012 Turned out pretty nice. Some push button mechanisms have occasionally been known to get a little loose after a while. Not sure if it's just the nature of the beast or what. When I first got my S12, the way I remembered which gas setting was which was "the larger the number, the larger the gas flow". Quote Link to post Share on other sites
IPvFletch 2 Posted May 20, 2012 Author Report Share Posted May 20, 2012 (edited) Update: It runs fine post-conversion. *phew* I did have problems cycling cheap Winchester Bird Shot on both 1 *and* 2 gas settings. I don't even think the bolt moved, LOL!!! I might try some Federal shot at some point but I don't care that much about bird shot ammo really, I'm certainly no bird hunter.. It most likely would have acted this way pre-conversion, as I haven't touched the gas stuff just yet. I was just never able to test that bird shot before I did the conversion. Only tested some other rounds (indoor range rules). I was careful not to vise on the gun or hit it hard or mess with the bolt or gas or rails during the conversion process, just to be on the safe side.. I read a lot of horror stories of improper use of a vise. So anyways, I need to pull the plug out and take a look with a mirror shard, to see how many ports I have/uncovered. Honestly, I'll probably never shoot bird shot, only if I want to save money for like at a range or clays. I can manually charge it if I need to. I can also take a dremel to things or open up the gas plugs a little larger. But I might just leave it alone and not worry too much about it. We'll see. Also, I checked, and my (new/2011) Saiga does in fact have the upper barrel hood/shroud - at the breech (just above where the round goes into the chamber) to help with loading/unloading of varying sized shells. Worked great on 2 3/4, 3, and 3 1/4 even.. Overall, the gun is a DREAM to shoot with ammo that cycles, even slugs. There is little kick now with the folding stock extended and with the 1/2" limb saver pad. Shooting it folded though, it is quite challenging. It's easy to shoot once, but the gun wants to kind of contort out of your hands for the recoil. Even with my AFG2 mounted, although I'm still learning how to hold it on its side kind of.. The contortion is likely because of the way I was bracing my arm/elbow against my side. Anyways, I don't know that I'll ever really fire or need to fire this folded. Also I still have yet to address the issue of the loose folding ACE stock bracket (with the button). I paid $89 for it and it's rock solid and you can tell it's durable, BUT when it is folded it locks but leaves it loose banging up against the receiver basically. This is SO annoying that I might remove the folder and make this a fixed Raptor setup instead. I am looking into using some neodymium magnets on the stock (aluminum) and having those lock the stock (when folded) up against the receiver real nice and tight. Anyways like I said I might not ever really want/need to shoot this folded. But it is nice to have it on there I suppose... I'll try to post an updated pic when I get things figured out, and also my "faux" cheek rest, which I think you guys will really like... Edited May 20, 2012 by IPvFletch Quote Link to post Share on other sites
Recommended Posts
Join the conversation
You can post now and register later. If you have an account, sign in now to post with your account.