

sherm2954
-
Content Count
23 -
Joined
-
Last visited
Content Type
Profiles
Forums
Gallery
Blogs
Calendar
Store
Posts posted by sherm2954
-
-
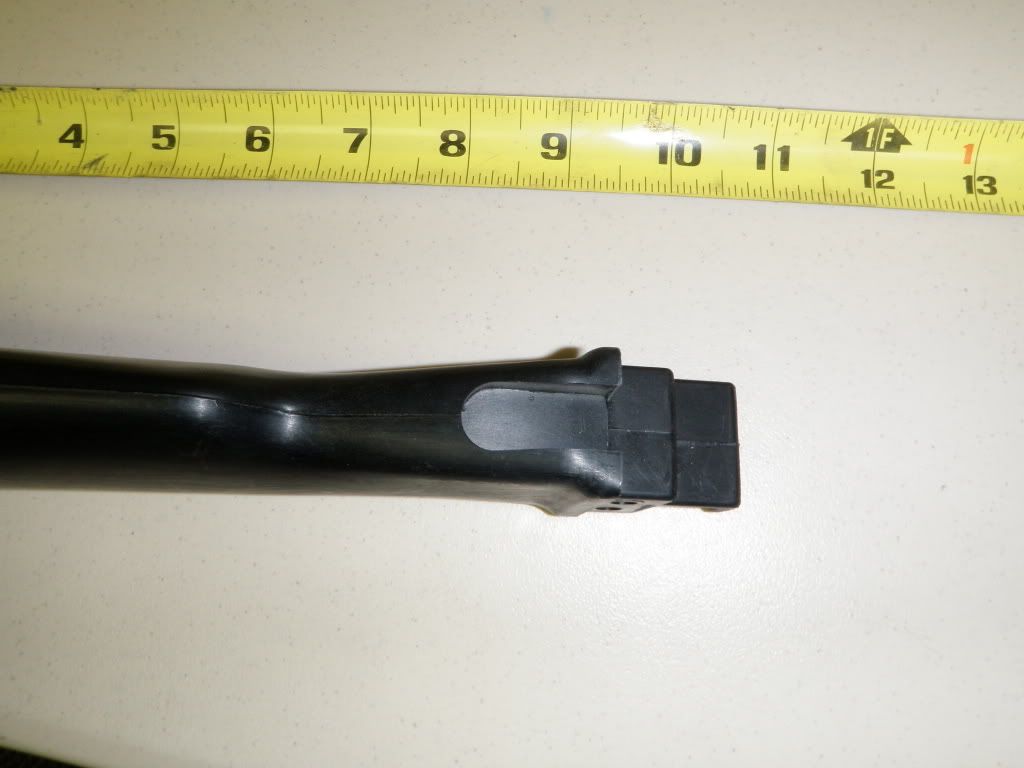
Need this ASAP! Pin for my magazine latch....matches part number 37 in the diagram linked below.
Thank you!
-
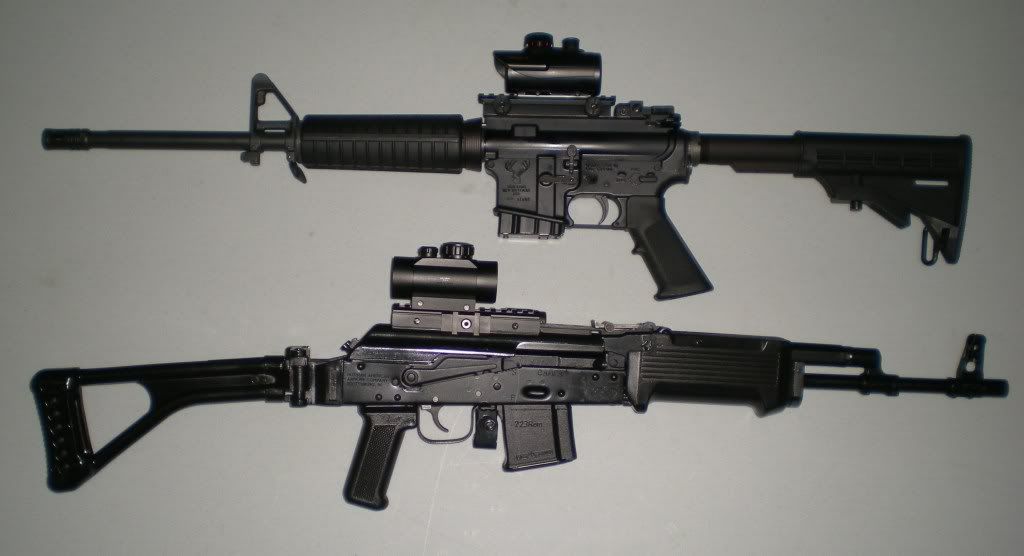
Here is my Saiga, first thing I put on her was a UTG quick detachable scope mount with two rails, then this past week "with the aide of a school rebate check" I bought the Saiga skeleton stock and the UTG Quad rail/handguard. The only additions left to obtain are a foldable bipod and foregrip, Im pushing the term sporter rifle to the limits, but hey, there are some nasty varmints out there

your setup looks good! but i'd strongly encourage you to do the conversion...i am very mechanically disinclined and i did it in 3 hours with a buddy who had a shop available...pm me for pictures!
-
Thank you all for the warm welcome! I have done a bit of reading on this forum, and have ordered the conversion parts from dinzag, and also a raddlock magazine lock. I live in California. Now I just realized how I'm am I going to reload when I go shooting.
 in califonia, if we have a pistol grip on our rifles, we are not allowed to detach our magazine at all.
That is some crazy law..
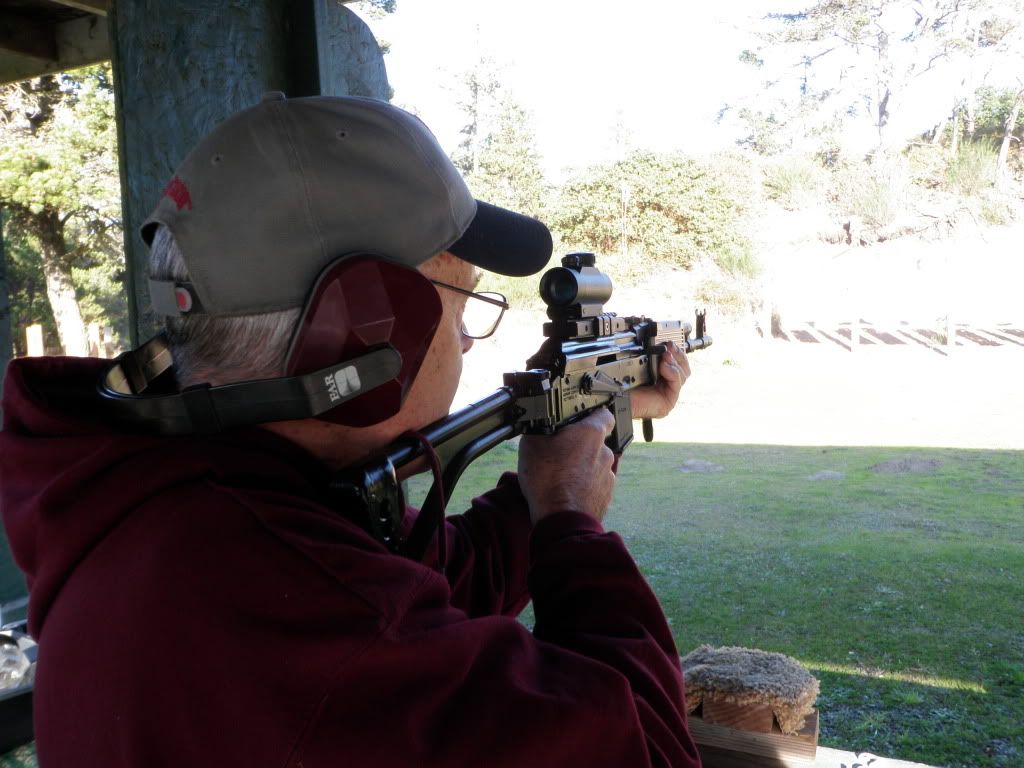
Crazy law...yes...but you can reload! the law says that the magazine is considered "fixed" if it takes a tool to remove it...and the law specifies that the tip of a bullet or cartridge is considered a tool. I take mine to a local range and no one raises an eyebrow...and I am in No. California! enjoy the conversion, the trigger and balance improvement is amazing!
-
Good job!
Thanks for the photos, always good to see photos!
Just wondering, if the mag is fixed, how do they load it?
Sorry to admit it, but for now I am in KKKKKKalifornia...only for now...so you can skip the explanation, or read on...
In this "state" you can't hvae more than 10 rounds in your mag (there are some exceptions, but let's just stick wtih the basics)
If your rifle has any "evil" features (pistol grip, flash suppressor, folding or collapsible stock, fore grip, etc) it is considered an illegal assault weapon...unless
the magazine is "fixed"
the law says the mag is fixed if it takes a tool to remove it in order to reload...and the law specifies that a bullet or the tip of a bullet is a tool...so there is a "maglock" shroud over the mag release that forces the shooter to use a bullet, key, pen, stick, whatever to manipulate the release...
so, with a "fixed" mag, I can have all the "evil" features...except....(holy christ, here we go again)
the overall length in the shortest configuration can be no less than 30 inches...if I folded the tapco folding stock, my saiga is 28.5 inches long...so I disassembled the mechanism, added a bushing and reassembled...now it won't fold so, voila, it's legal...
To sum it up, KKKKKKKKalifornia sucks, I can't wait to retire and move, but I will comply with the law, because that's what good citizens do...if I don't like the law in CA, I can (and will) move...
-
I cant wait to see your pics...you could also pm me with specific build info...I have a friend who is a great fabricator, and you hit right on one of my concerns...having to crank down on the retainer to get it to hold...thanks for your help!!!!!
-
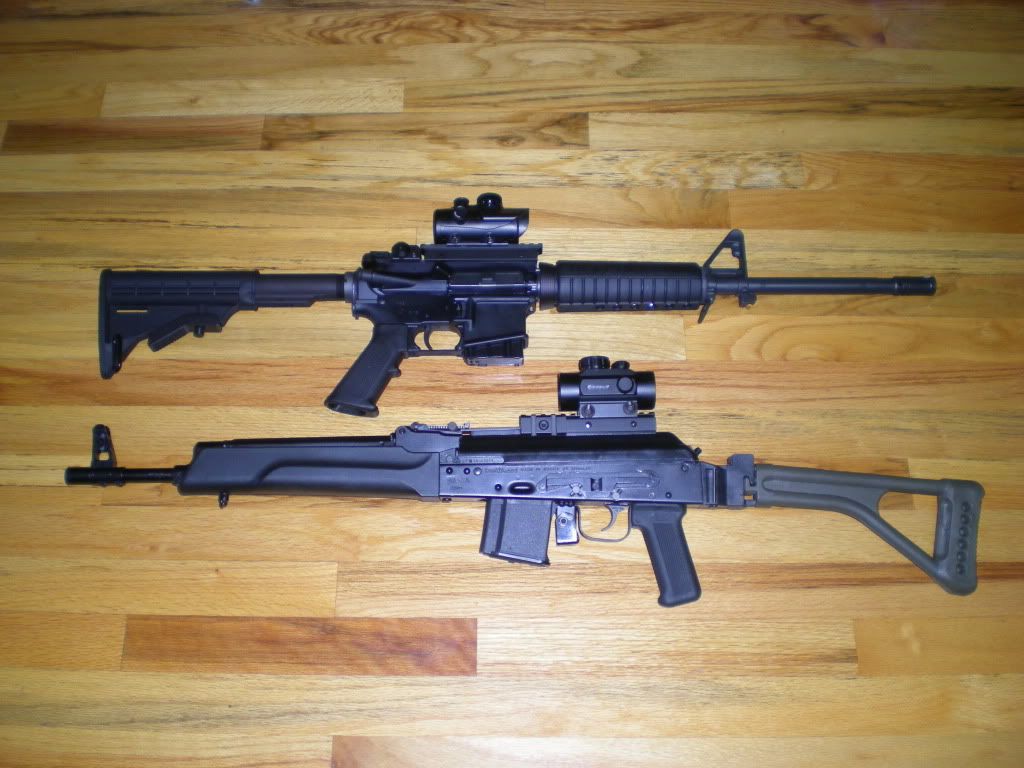
She's a really sweet looking rilfe. CONGRATS!!
 . . . . . . . . .
 Thanks! Feels great and looks great, too! I can't wait to move out of CA so I can get rid of the maglock (and bullet button) and also get rid of the 10 round fake galil magazine...still, I'm happy with it.
Anyone thinking about converting, just do it...I did it in 4 hours and I have only basic skills. Anyone who can change their oil, add RAM to their computer or do any basic mechanical work can handle it!
-
finally got to take my Saiga to the range. Functioned perfectly. Very happy with the conversion...the trigger is such an amazing improvment and it compliments the improved balance, handling, etc....!!!!!
-
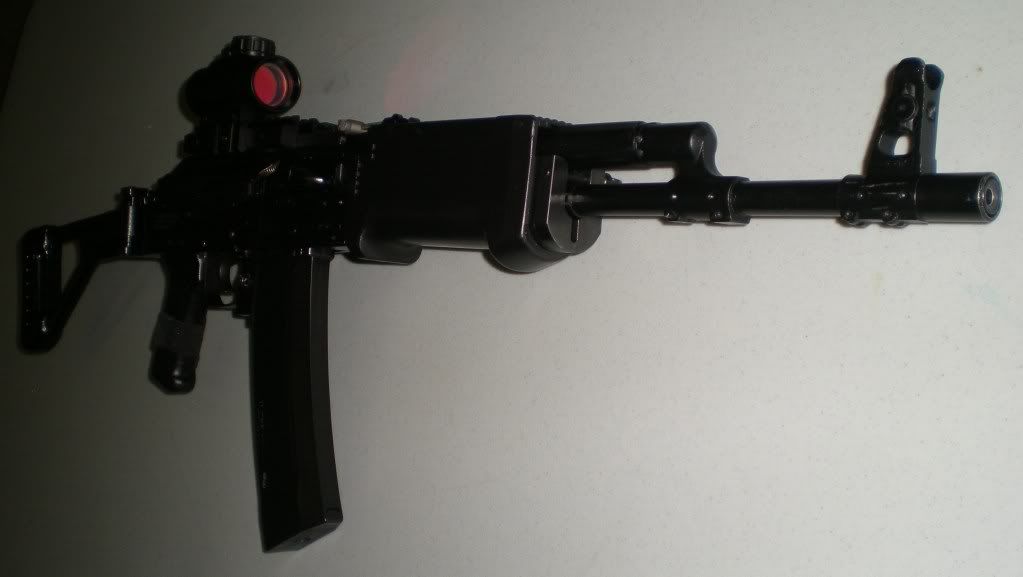
Holy crap...I got a picture posted!
-
Quite.
Kalashnikovs are not meant to be babied. Pull the charging handle all the way to the rear, and let it loose.
This is a common issue (happens every time a new FCG is used), the new fire control group will need to be broken in. You can do this by running a few hundred rounds through it.
BUT, it doesn't manifest unless you baby it. . .
thanks...very reassuring answer! I'm extremely happy with the conversion...piece of cake, and I'm no gunsmith! Where do I post info on conversions to try to tell people who haven't taken the plunge that they have nothing to worry about???? thanks again for the info!
-
Did conversion this weekend. Went well...but....
Bolt seems to hang up if I pull back charging handle and ease it forward (like when I want to catch it on BHO)...is it hanging on hammer? Does hammer need to be beveled like on original? If I charge it and release it, it slams home and strips round just fine...only hangs when I ease it forward...
Thanks!

FOR THE LOVE OF GOD...SOMEONE POINT ME TO A LINK ON ADDING PHOTOS!!!! I JUST CAN'T SEEM TO DO IT! STEP BY STEP INSTRUCTIONS...PLEASE!!!!!1
-
Got together today with a friend who is a great mechanic and fabricator. 4 hours later (I had to run off for an hour and do "family" stuff), my Saiga 223 was converted...just a couple of small tweaks needed.
Still need to:
Install the FCG retaining plate I ordered today (I'm re-using the spring right now and it's held in place by a drilled out pin),
Get out and shoot the gun to be sure it's functioning properly,
Paint the bottom of the receiver,
Install a Galil style front handguard,
Paint all plastic parts with Krylon Fusion and bake it on.
I won't rehash the basics of a conversion. However, here's what I found...
The spot weld must be made from German tank armor (someone else said that, I agree). It was a job to get it drilled!
I cut the BHO a hair too short. When it is pushed in to catch the bolt, it's darn near flush with the receiver.
Had to add a bushing to the folding stock mechanism to disable it or it would have been an "illegal" length. I'll change the brass collar to a plastic or polymer when I get ready to paint.
The maglock is pretty basic and not really that great (it does the job, though). If anyone has suggestions and links for a high quality maglock, please let me know!
Black nylon plugs from Ace Hardware look just like rivet heads! 25 cents each.
Overall, I'm thrilled that this is done. It was fun, a little challenging (everything good usually is) and turned out pretty decently. The improvement in trigger quality is worth the effort all by itself!
My buddy Rick deserves a huge thank you. His skill was invaluable!

SOMEONE! Please help me with attaching photos! Thanks
thanks for the help with the photo...i'm flailing with getting the photos into the post...
-
Got together today with a friend who is a great mechanic and fabricator. 4 hours later (I had to run off for an hour and do "family" stuff), my Saiga 223 was converted...just a couple of small tweaks needed.
Still need to:
[*]Install the FCG retaining plate I ordered today (I'm re-using the spring right now and it's held in place by a drilled out pin),
[*]Get out and shoot the gun to be sure it's functioning properly,
[*]Paint the bottom of the receiver,
[*]Install a Galil style front handguard,
[*]Paint all plastic parts with Krylon Fusion and bake it on.
I won't rehash the basics of a conversion. However, here's what I found...
[*]The spot weld must be made from German tank armor (someone else said that, I agree). It was a job to get it drilled!
[*]I cut the BHO a hair too short. When it is pushed in to catch the bolt, it's darn near flush with the receiver.
[*]Had to add a bushing to the folding stock mechanism to disable it or it would have been an "illegal" length. I'll change the brass collar to a plastic or polymer when I get ready to paint.
[*]The maglock is pretty basic and not really that great (it does the job, though). If anyone has suggestions and links for a high quality maglock, please let me know!
[*]Black nylon plugs from Ace Hardware look just like rivet heads! 25 cents each.
Overall, I'm thrilled that this is done. It was fun, a little challenging (everything good usually is) and turned out pretty decently. The improvement in trigger quality is worth the effort all by itself!
My buddy Rick deserves a huge thank you. His skill was invaluable!
Here are my pictures...I'll add info to them later this evening.
http://s909.photobucket.com/albums/ac292/sherm2954/
SOMEONE! Please help me with attaching photos! Thanks
-
Got together today with a friend who is a great mechanic and fabricator. 4 hours later (I had to run off for an hour and do "family" stuff), my Saiga 223 was converted...just a couple of small tweaks needed.
Still need to:
Install the FCG retaining plate I ordered today (I'm re-using the spring right now and it's held in place by a drilled out pin),
Get out and shoot the gun to be sure it's functioning properly,
Paint the bottom of the receiver,
Install a Galil style front handguard,
Paint all plastic parts with Krylon Fusion and bake it on.
I won't rehash the basics of a conversion. However, here's what I found...
The spot weld must be made from German tank armor (someone else said that, I agree). It was a job to get it drilled!
I cut the BHO a hair too short. When it is pushed in to catch the bolt, it's darn near flush with the receiver.
Had to add a bushing to the folding stock mechanism to disable it or it would have been an "illegal" length. I'll change the brass collar to a plastic or polymer when I get ready to paint.
The maglock is pretty basic and not really that great (it does the job, though). If anyone has suggestions and links for a high quality maglock, please let me know!
Black nylon plugs from Ace Hardware look just like rivet heads! 25 cents each.
Overall, I'm thrilled that this is done. It was fun, a little challenging (everything good usually is) and turned out pretty decently. The improvement in trigger quality is worth the effort all by itself!
My buddy Rick deserves a huge thank you. His skill was invaluable!
<a href="http://s909.photobucket.com/albums/ac292/sherm2954/?action=view¤t=034.jpg" target="_blank"><img src="http://i909.photobucket.com/albums/ac292/sherm2954/034.jpg" border="0" alt="Photobucket"></a>
SOMEONE! Please help me with attaching photos! Thanks
-
I don't have the huevos to start drilling and grinding on a new gun yet. But, being in CA, I want to get as close to a tactical look as possible. So, I will install a bullet button and then hopefull buy, from one of you great sellers, a Tapco (or similar) stock with pistol grip. if you can help me, I'd really appreciate it! Thanks much
-
So many people ask this, I decided to make a visual aid. Maybe i should contact RAA and have them amend the saiga manual to include this image. lol

Nice work...and you are 100% right.
The manual is pretty poor, so I rely on people like you all who have actual experience to help me out.
Thanks for the great visual!
-
You guys rock!
I followed the advice and (after removing the bolt carrier!), was able to remove both the forend and the gas tube...I used a soft wood block and tapped gently until the forend moved forward. Then spent some time playing with the gas tube until I found the sweet spot. Everything went back together easily and now I have the confidence of knowing what it takes to do the job.
Thanks for your patience!
-
Not to say you're this obtuse, but have you removed the bolt carrier before trying to remove the gas tube?
The hand guard has two screws holding it on. One at each end.
First, yes I have removed the bolt carrier...and I don't blame you for asking!
Second, yes I have removed both the rear screw and the screw holding the forward sling mount.
I appreciate you following up and asking.
-
For the forend I propped small part of a wood 2x4 against it (on the little rear edge) and tapped that lightly with a hammer. Did the same thign to put it back on. Used a rubber mallot to move the gas tube lever. Once the lever is all the way up, just wiggle the gas tube. Try moving the lever to different angles til its lined up right.
thanks for the advice...i'll give it a try as soon as i get done with the chores! Also, I'll let you know what progress I make. I'm also considering drilling some ventilation holes in the forend to improve cooling and give it a little bit of a custom look.....
-
I am failing at the 10% rule (you must be 10% smarter than the object you are attempting to operate)...
1. I have removed the screw that retains the fore grip...and it still wont budge...
2. I have moved the gas tube lever to the vertical position...and the gas tube wont' budge....
Any patient assistance and guidance is appreciated...and if it makes you feel better to bag on my lack of experience, please feel free. I deserve it!
Thank you!
-
Googling "Kalashnikov manual" will do the trick.
"Do not dry fire" is "lawyer talk". You won't hurt a thing by dry firing it.
Can't find the "stickies"? If you can't see them at the top of every subforum here, there's nothing we can help you with.
thanks for the quick reply. So, I guess the "stickies" are the "important topics"...
I appreciate the guidance.
-
First, I am new to forums and I apologize in advance if I didnt find the topics without help!
So, here we go!
I just got my first Saiga 223. It looks great and I can't wait to get it out and shoot it. I brought it home and did a basic disassembly to check it out and be sure it was clean and clear, etc. Very simple to clean, as far as I can tell. However, the manual is painful to read, with disjointed, broken English and unclear instructions.
Can anyone direct me to a basic manual with pictures for cleaning, disassembly, etc?
Secondly, there is a comment in the manual that implies that the gun should not be "dry fired", though they use a different term. If you shouldn't dry fire, how do you test for proper function after disassembly and cleaning? Also, if you have operated the bolt and the gun is ready to fire, is it harmful to leave the gun "charged" ? Is there a method for relieving the tension on the firing mechanism?
Again, forgive me if I sound ignorant, it's just that I am....
I couldn't find the "sticky" posts....help me, please!
Your kind and patient assistance is greatly appreciated!
I hope to be a responsible member of this forum and will keep posting as I gain experience!
Thanks again!
wts kvar upper handgaurd and gas tube and unconverted saiga stocks
in Firearm Parts & Accessories (WTS / WTT)
Posted
Sent pm....