

rickyblaze
-
Content Count
20 -
Joined
-
Last visited
Content Type
Profiles
Forums
Gallery
Blogs
Calendar
Store
Posts posted by rickyblaze
-
-
Thank you, not bad for the first time. If I were to do it again I think I would have more of the khaki tan. I left the gun it's natural black then added the camo. When I started the camo and only had stripes of tan over the black it was very broken up and blended in with the osb board I was using to spray on.
-
 I guess I'm a little anal about stuff like this. I had an old 20ga Ithaca 37 that had a poly choke installed back in the early 60's and the reference mark was on top and was part of the vented rib. It just looks better to me, I have read through several posts on different forums and the consensus says it is fine. I only had to back it off less than a quarter turn as it turned out to make the reference mark on top. I did use the red locktite as I don't intend on doing any more to it than I have. The gap between the coke and the barrel is barely detectable using my finger in the bore. I finished the camo job on it and I'm ready to re-sight it in. Planning on doing that tomorrow so that it is ready for opening day of Deer season next Saturday. Thanks for all your responses
 -
I am looking for some comments on the installation of a standard poly choke I just got. I screwed it onto the barrel of my Saiga 12 and when I tighten it all the reference hole that I thought should be on top is turned past the top at about a 5 o'clock position looking at the muzzle. This makes it hard to see what choke setting you're on. So I soaked the threads really good with some red locktite and left it so the reference hole is on top. After doing this I was looking at the installation guide (I know Bass Ackwards) and it says something the effect that on Saigas to tighten all the way down. So has anybody experienced this besides me and if you did what did you do and how's it holding up if you did the same as I did. Thanks for any help
Rick
-
when I googled k12 it came up with kindergarten classes lol
-
 1
1
-
-
Sorry, page 3 lower right. It lists the exact shell sold in the walmart bulk pack.
-
Squish,
Found this online look at the table lower right : http://www.federalpremium.com/pdf/FP294_ShotshellReloadingData.pdf
-
You're still using the same weight payload or smaller with the birdslug so there is no difference to the shell casing. Even so the shell casing is supported by the gun's chamber and that's what contains the pressure not the brass. I thought I read somewhere that the high brass and low brass were only made for identification purposes, could be wrong .
-
1
-
-
I had recently bought the Tac-47 auto plug and while my S12 would shoot the value pak 8's and 7 1/2's it had to be on setting 2 and shouldered tight . Then it would not always cycle them from a drum or hip shooting. I took off my gas block thinking I might have the hidden 4th hole after trying to set up the Auto plug and failing. What I found were 3 ports. I don't know for sure what the holes were before I started but I drilled them out to .096 and then the Autoplug set up problem was fixed. Now it shoots with fail any failures, kinda cool having a mixed load mag with no failures.
-
FYI, I have tried a hand held pipe cutter and it simply crushes the shell instead of cutting it. I don't know why since I bought it new an dpresumeably sharp, but I couldn't get it to work on shotgun shells.
Oh well, just a thought. I had seen the PVC pipe cutter being used on other shotshell reloading threads in other forums, however it was to "reclaim the components" when the hull got FUBAR'ed and was deformed during reloading/crimping etc. And in that case, they were cutting just above the brass where the shotshell was much more supported, and were only interested in recovering the powder, primer, wad, and shot because the hull was already a loss.
I thought it might work for snipping the end off cleanly, since others had already been dumping shot by plier-crusing the shot & wad area already. Oh well.
Kineti-Dump® in it's infancy:
1-3/4"x10" black steel pipe (handle)
2-3/4" black caps
1-3/4"x3" nipple (shot end)
1-3/4"x3" brass nipple (shell end) the brass was closer to fitting the o.d. of the shell
1-3/4" brass cap (over the shell)
2-garden hose washers for the brass cap to keep shell from bouncing
Worked very well with one good solid hit to a solid surface. Be sure to tighten the shot end nipple and cap very securely
This is beautiful work.
Now I'm just thinking aloud as to how it could be made even "faster" since screwing and unscrewing the cap holding the shell base in for the down-swing would be a bit time-consuming. Something like interrupted threads? Or maybe grinding down that end-cap so only 1-2 turns of the thread actually need engage, since the down-swing retention isn't very stressed.
I'd probably want both methods. The kinetic pipe fitting hammer for the workshop, but still pick hulls open with an awl, because I can do that quietly sitting next to Mrs. Dual watching TV, so I'm not in the basement workshop "ignoring her" and getting in the doghouse.

There are a lot of areas the hammer can be improved on from the prototype I agree. The rubber garden hose washer in the cap take up a lot of the space when you screw it on and off. I my self am going to work on one made of some sort of plastic or polymer (Delrin?) as the metal hammer is heavier than it needs to be for shot reclamation. It's the weight of the shot that over comes the crimp not the weight of the hammer,plus being metal it is loud. And I understand the workshop and together time with the Mrs.

-
Ricky Blaze wastes no time in getting a working proto-type together, great job. And, unlike my overly complicated idea it requires no welding, made from parts readily available from the local hardware store.

Thanks Squishy,I love to tinker with things and this just so happen to get my attention. Making the birdslugs is a great way to put together cheap ammo for some fun with the S12. Now that I have a cheaper slug ammo source I need to work on fine tuning the gas system on mine. Got three holer that needs a little lovin'
-
Kineti-Dump® in it's infancy:
1-3/4"x10" black steel pipe (handle)
2-3/4" black caps
1-3/4"x3" nipple (shot end)
1-3/4"x3" brass nipple (shell end) the brass was closer to fitting the o.d. of the shell
1-3/4" brass cap (over the shell)
2-garden hose washers for the brass cap to keep shell from bouncing
Worked very well with one good solid hit to a solid surface. Be sure to tighten the shot end nipple and cap very securely
-
3
-
-
The pipe I used was 3/4" galvanized pipe but regular 3/4" steel pipe should work also. Should be readily available at your local hardware store. What I had invisioned for my 'kineti-dump' was using 2- 3/4x3" close nipples screwed into a 3/4" tee with a cap on each end. The cap on the shell end could have a hole drilled in the center exposing the primer and the other end just screwed tight. Then on the tee side use a 3/4"x 12" pipe for the handle,then you insert a shell on the shell end screw the cap down to keep the shell from bouncing up when you strike the shot end on a solid surface. Then unscrew the shell cap extract the empty shell and dump the shot. It's not the length of the pipe that the shell is in that matters it's the velocity of the shell when it contacts the solid surface.
I'll try to get one together and show you what I had in mind when I started using this method.
-
Yes the kinetic energy from swiftly moving the shell forward then abruptly stopping it is released through the shot exiting the front of the shell. An object in motion tends to stay in motion, Newton. Here's what an acual bullet puller would look like http://www.cabelas.com/tools-accessories-cabelas-bullet-puller-3.shtml
There are improvements I will make eventually but this was a free piece of pipe laying around so I used it in this rudimentary form.
-
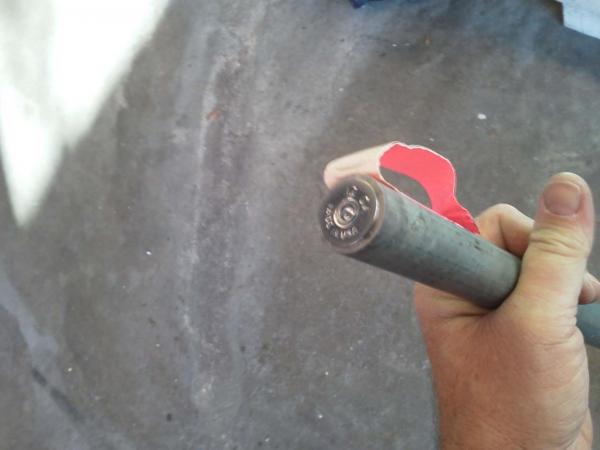
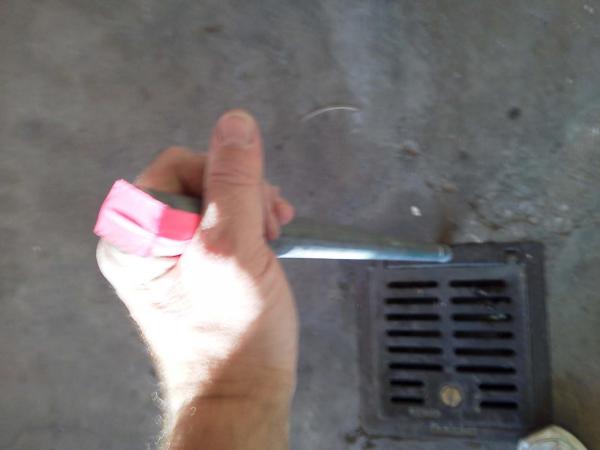
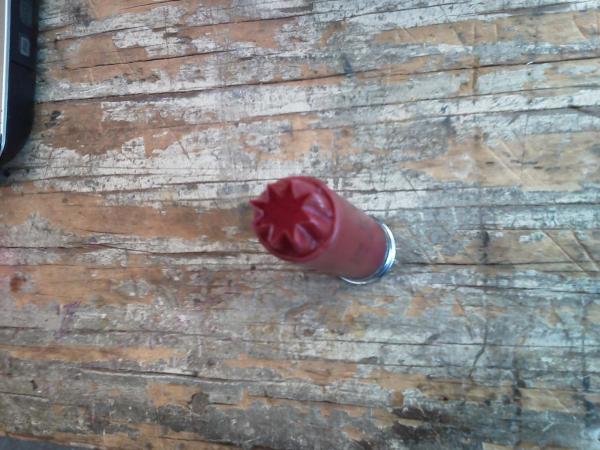
I've been following this thread for a while and have got everything and have been replacing the shot with my Lee slugs. The one thing that's a pain in the butt is opening the crimp and getting the shot out. I got to thinking and a solution came to mind. I use to have a kinetic bullet puller that I used to pull bullets from bad reloads and the like. That made me think "why would'nt it work with a shot gun shell?" So while at the station I found an old piece of 3/4" galv water pipe with the ends sawn off. Well lets see if a shell fits in it, it does. Now lets plug the end with something and I did. Now lets hold a shell in the tube with some tape and give the pluged end a nice solid rap on a soild surface (the plugged end,not the shell end) I did and the shot came out. The straight piece of pipe works just fine but I was thinking when I get time I'll make one that more resembles a hammer made with a tee section with a handle and two pieces of pipe that holds the shell and shot. After the crimp is open it's a lot easier to expand it for the slug with what ever means you want to use.
-
3
-
-
-
I had a USAS12 for quite a few years up untill about 3 years ago and sold it to buy a motorcycle. Then I lost all my cool guns in my divorce from biggest bitch in the world. I was going through the web one day last Jan and saw these S12's and what guys were doing to them and had to have one. My new wife is the best and she said "Honey if you really want one go ahead and get it" I love that woman.And I love my Saiga12, the USAS was cool but it was real finnicky about the ammo used
-
 I found a dimpled receiver with a threaded barrel at a gun shop close by. Only problem is I did'nt take it with me and put it on layaway. I'll have it next week, can't wait to see what it has
-
I bought the cart before the horse and ordered mine last Friday. It was shipped today, I also bought my Saiga12 on Gunbroker today.

Welcome
Thanks, Great place to find anything you need to know about these weapons.
-
I bought the cart before the horse and ordered mine last Friday. It was shipped today, I also bought my Saiga12 on Gunbroker today.


promag magazines, pros and cons
in Saiga-12
Posted
I have two of the 12 round drums that work flawlessly, with target birdslugs. The stick mags have never gave me any problems as of yet.