
FunkedOut
-
Content Count
262 -
Joined
-
Last visited
-
Days Won
1
Content Type
Profiles
Forums
Gallery
Blogs
Calendar
Store
Posts posted by FunkedOut
-
-
^^^^^ Your S12 is beautiful, did you weld your holes on the back receiver? ^^^^^
thank you. thank you very much.
yep. MIG. thanks to a buddy that let me use his welder. after I shoot it some, I'll get it just right, then paint. prolly moly.
-
How about this? You didn't say it had to be mine

Alright. How about if that those pics are of my gun? I can't go into a 7/11 like this (w/o a T-shirt).

Thanks for the shirt. And thanks for the price!

-
Did you use the extended reinforcement plate or the polish plate with the molot grip? I ask as I would like to use the same setup but unsure which one I need. AK builders lists the combo pack with the polish plate but they show an extended plate for the shotgun. Thanks in advance.
extended. when you order the combo pack, you get the option of either.
-
if you convert the weapon from it's "sporter" configuration to an "non-sporting" configuration, you need to make sure the weapon has a maximum of 10 foreign parts.
the conversion to a "non-sporting" config can be as simple as inserting a magazine with capacity higher than 5 shells.
i'm not a lawyer, do your own research. don't take my word for it.
these links might help you understand 922r better:
http://gunwiki.net/Gunwiki/BuildSaigaShotgunVerifyCompliance
http://forum.saiga-12.com/index.php?/forum/65-saiga-922r-compliance-the-law/
-
-
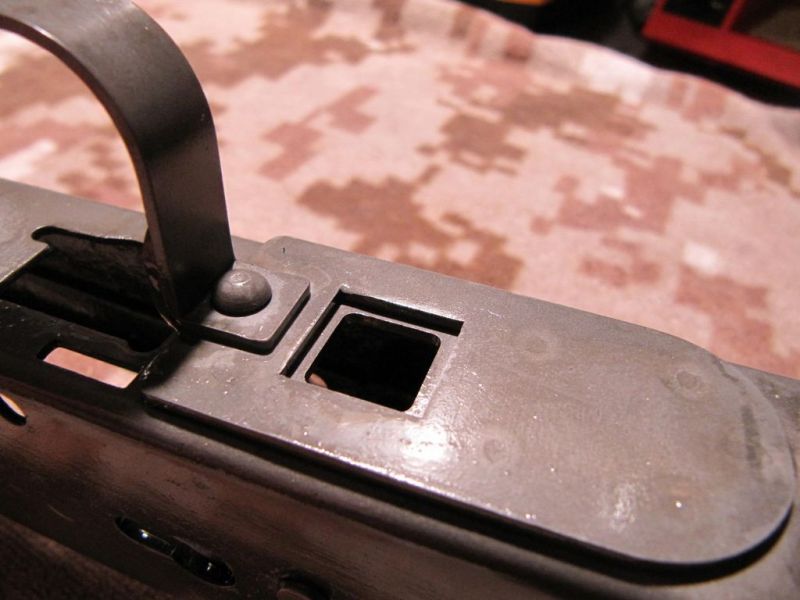
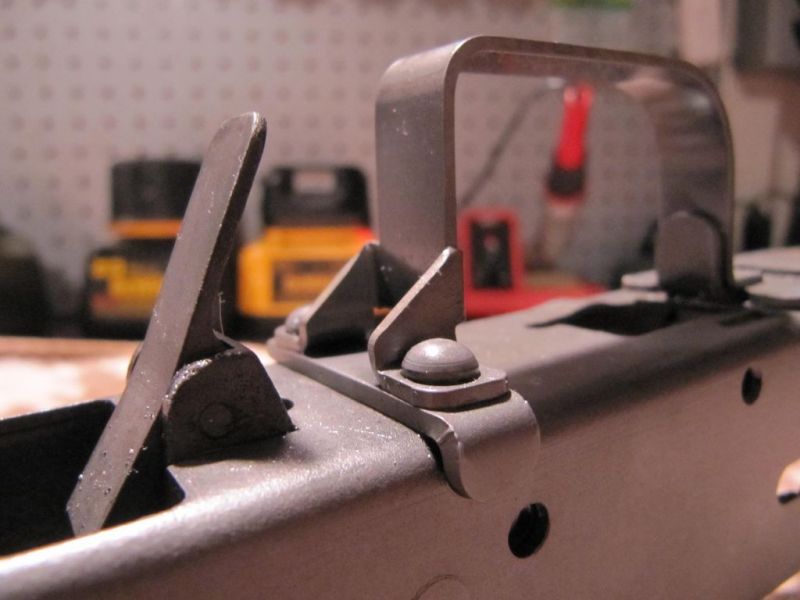
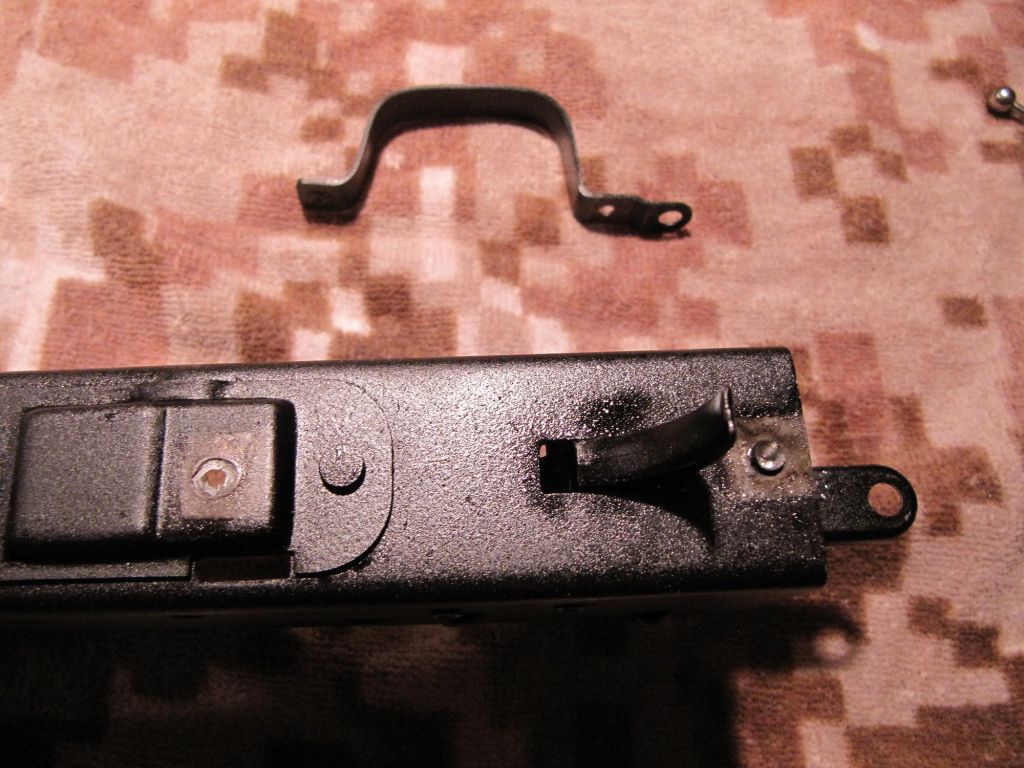
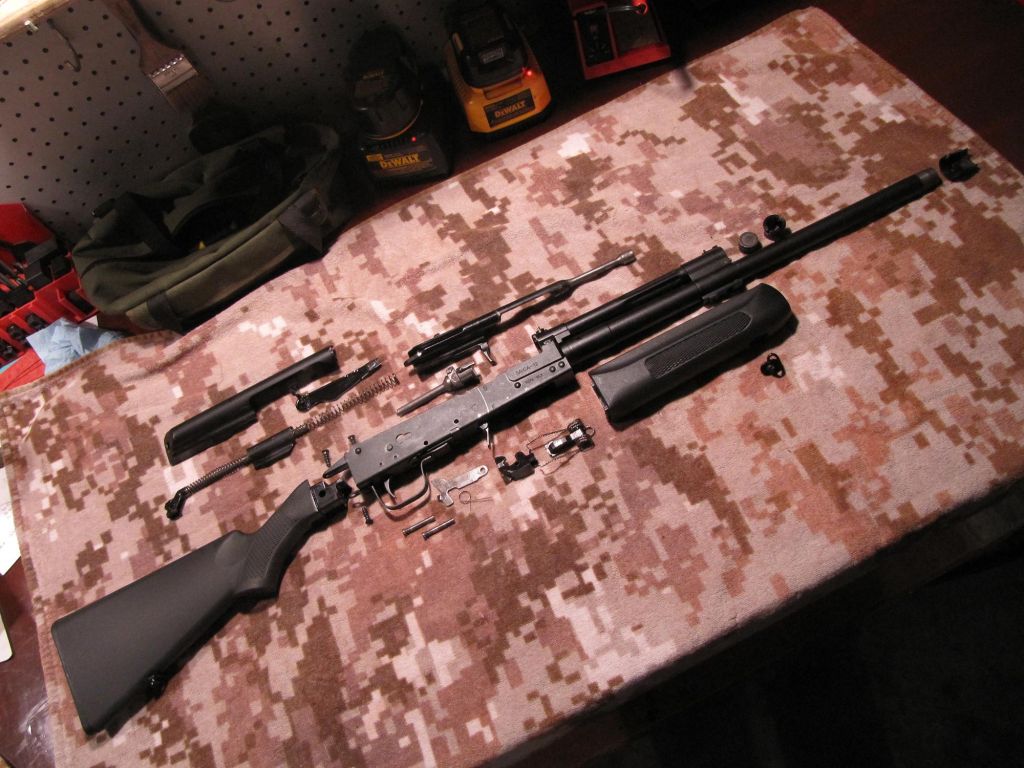
I notched the BHO lever to clear the safety selector so I could install the safety last. Easiest way to do this is to install the hammer pin and the BHO lever. Use your finger to hold the lever against the receiver and press the lever up until it stops at the rail. Now scribe the portion of the BHO lever that is visible from the safety selector hole.
the notched BHO lever should look something like this:
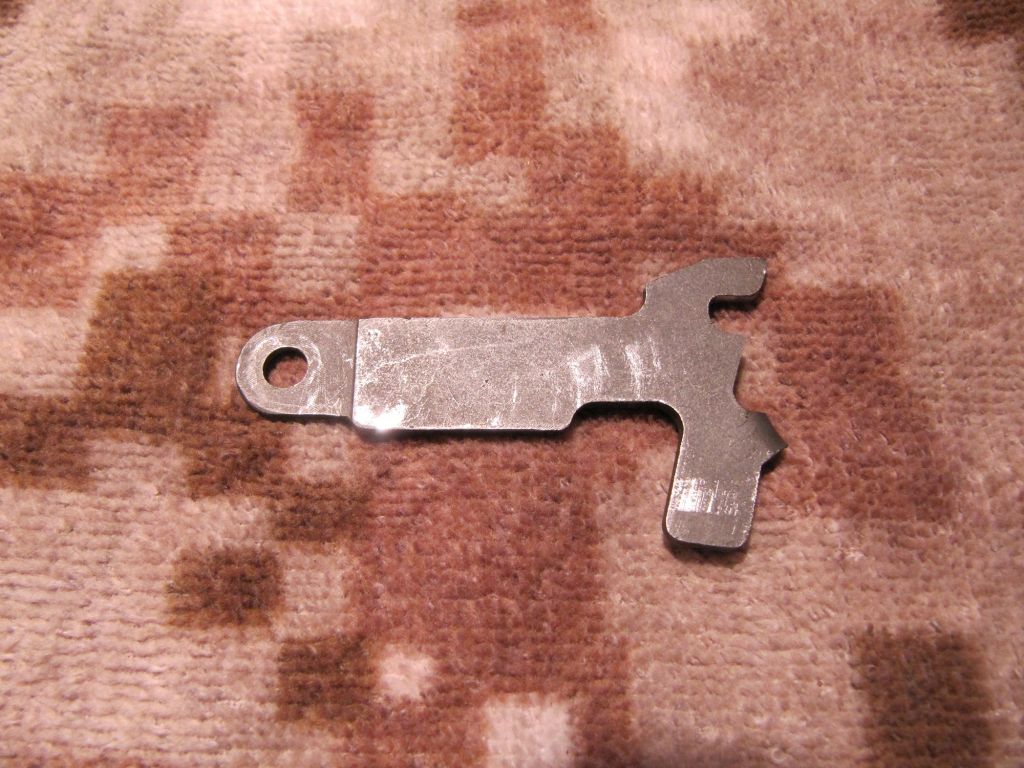
and while we're at it, let's notch this thing so the spring won't jump off it:
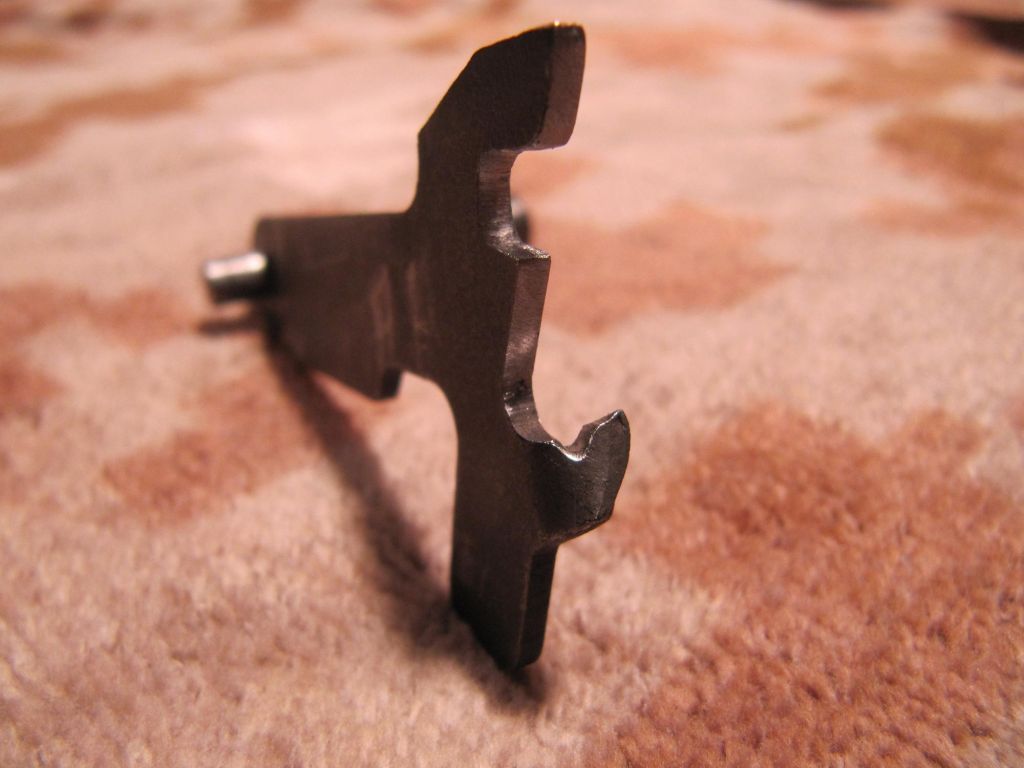
That's it. Everything should come together real easy now.
I've read where many complain that the BHO level stabs their trigger finger when firing. This is my first AK with BHO so I will give it a try before I re-profile my lever.
-
 2
2
-
-
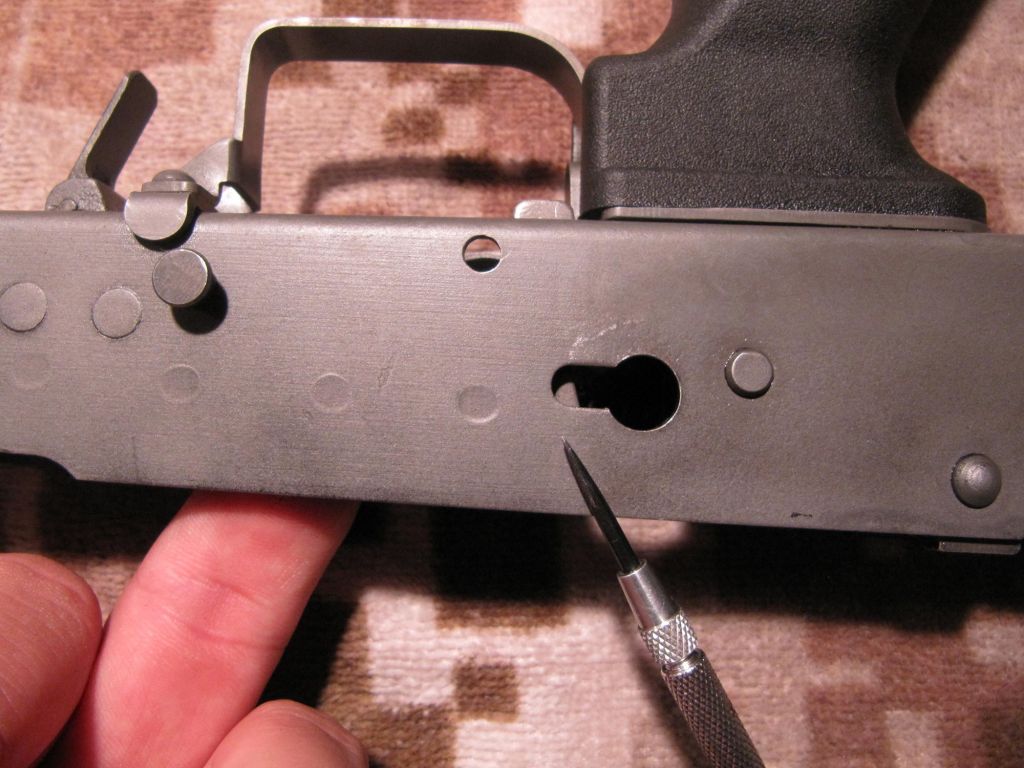
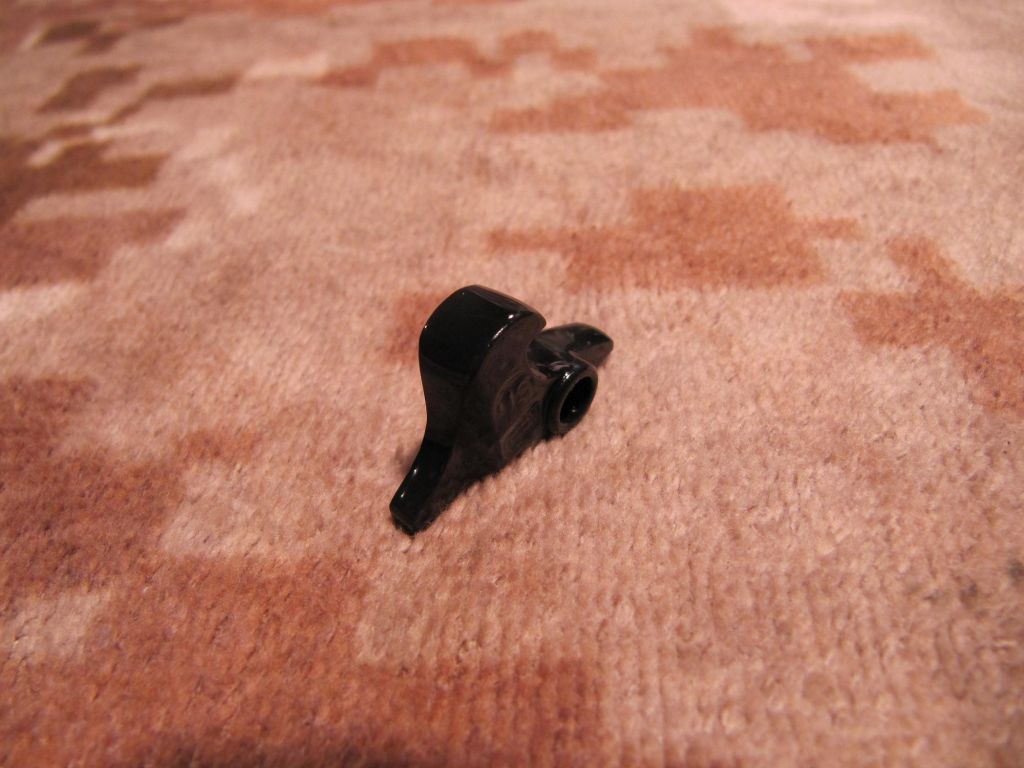
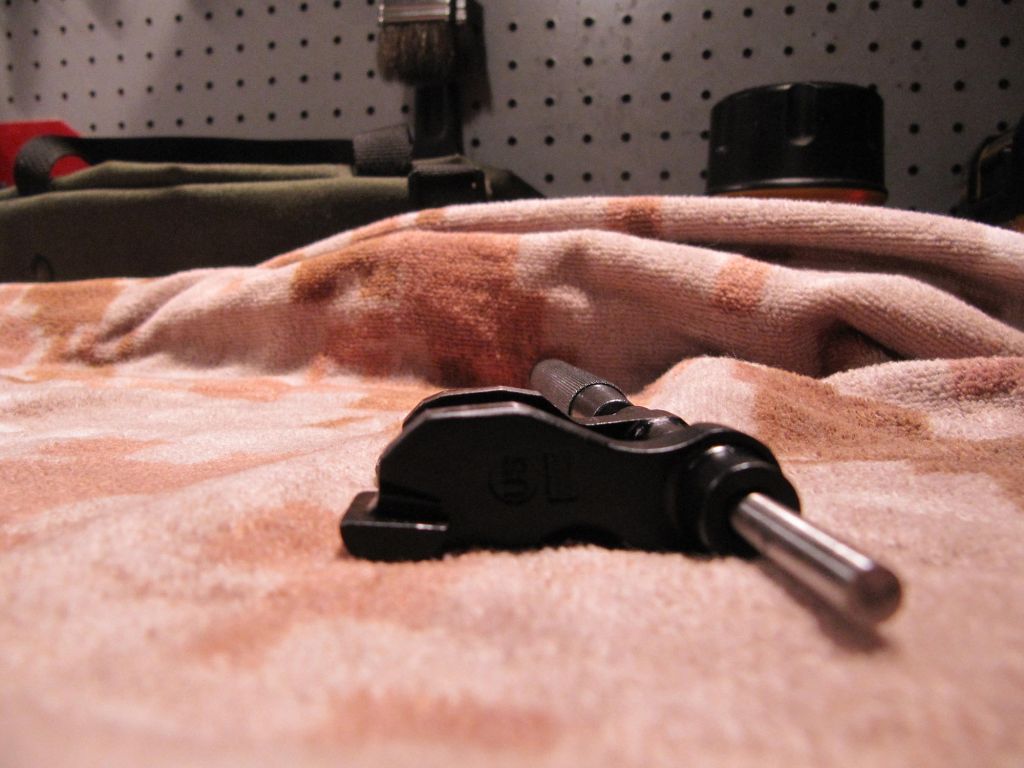
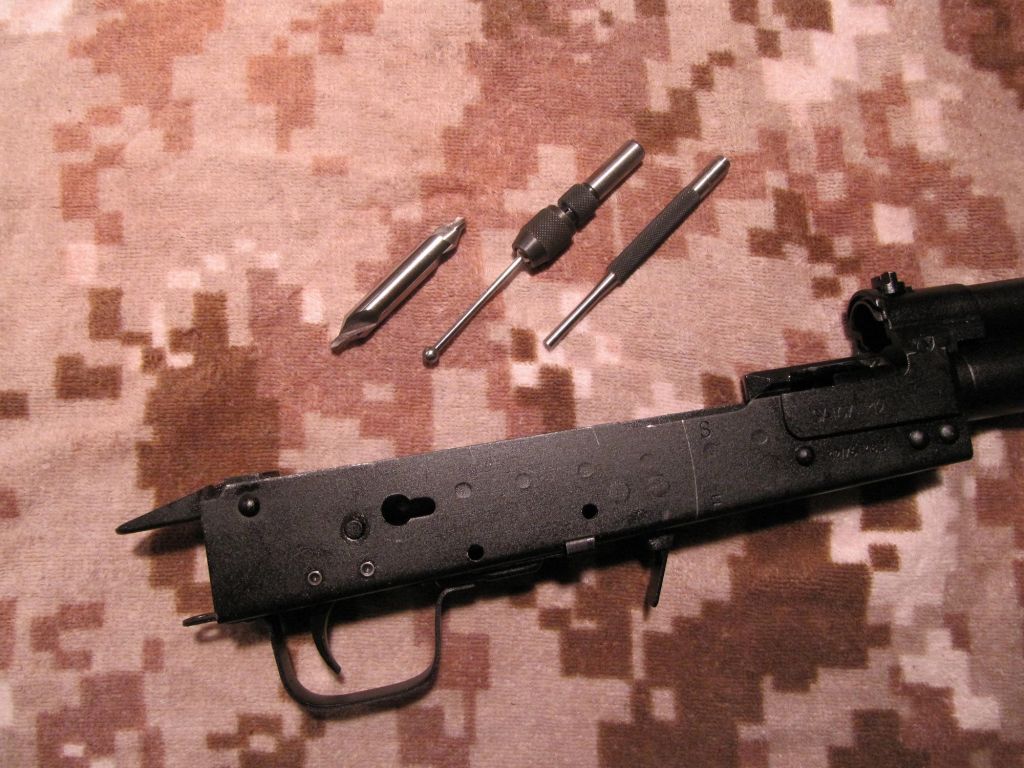
All of the Arsenal trigger groups I've installed, needed to have the back of the disconnector fitted to allow the safety selector to rotate past it when installed. Yes, even when pulling the trigger, it doesn't clear. I'd rather fit the parts that I can replace easily than the parts I cannot.
First thing to do is install the trigger, disconnector and spring with the trigger pin in the receiver. Insert the safety selector, pull the trigger and rotate the safety selector until it stops against the disconnector. Scribe a line on the disconnector at the safety selector's edge as seen in this next pic:

remove the disconnector, grind down the back of the disconnector with a dremel sanding drum (the larger diameter variety). check fit and repeat as needed. a little cold blue and it's good to go.
-
2
-
-
I wanted to install an Arsenal trigger group. I use these on my AKM's and like them. I was interested when I saw they offered a Saiga 12 version and bit the hook.

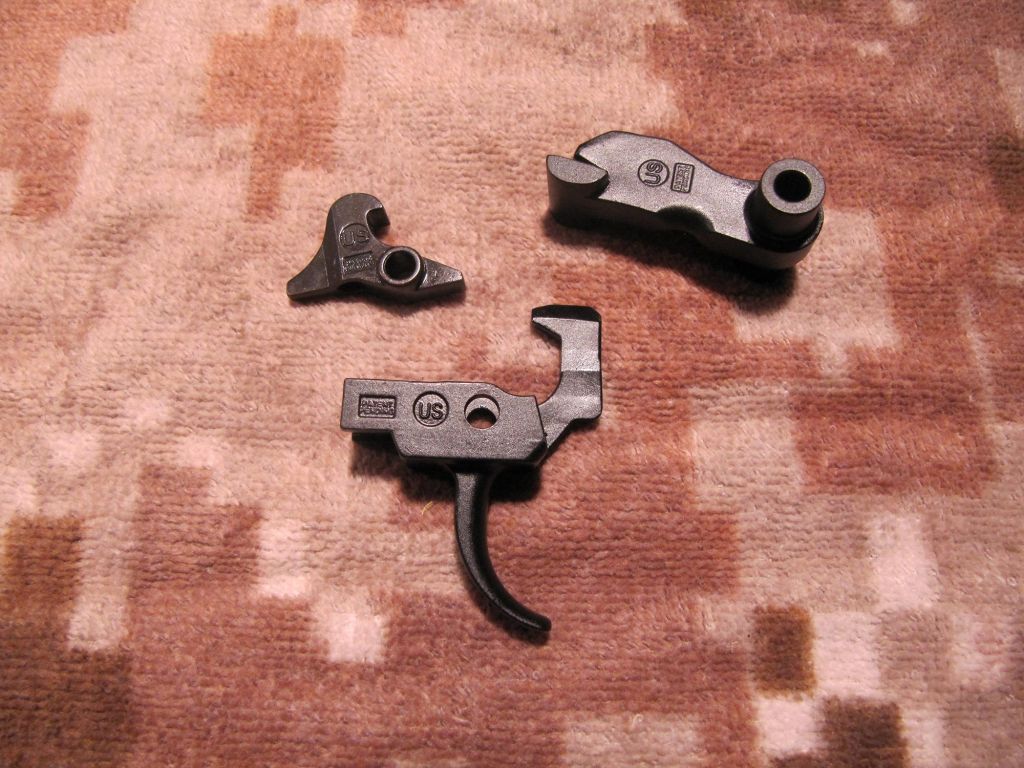
Here's a couple of comparison pics with the Arsenal hammer on the left and the Izhmash factory hammer on the right:
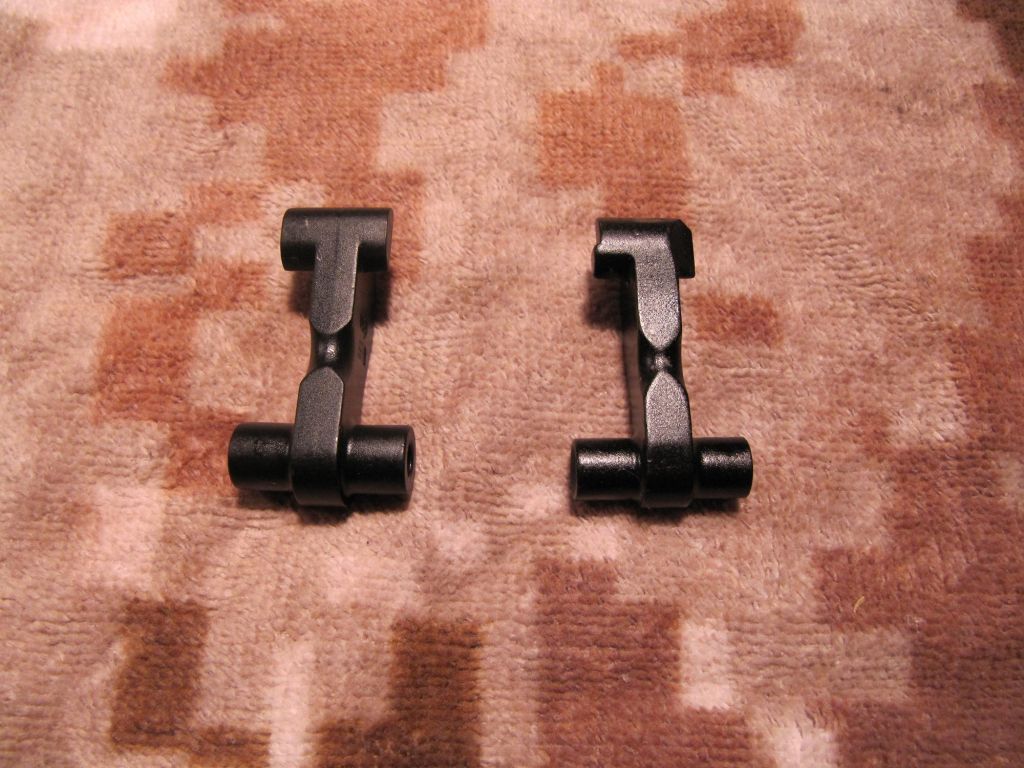
No need to remove any metal from the hammer for clearing the BHO lever. The Arsenal hammer is actually 15 thou narrower than the Izhmash factory hammer.
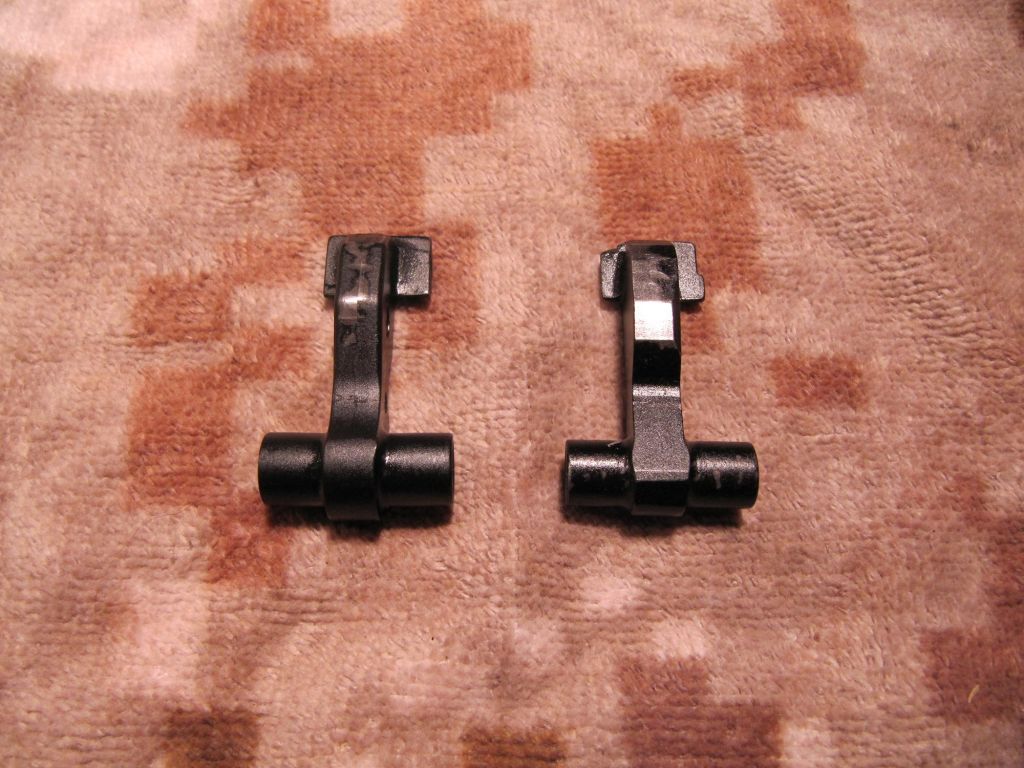
Arsenal up front on this one:
I think I'll leave any profiling and polishing for later. I want to shoot it first and let the marks show me how the surfaces are working against each other.
That Pauly sure does beautiful work.

-
3
-
-
you tightened it? i figured the op rods were pinned like the piston is on an AKM carrier. i'll have to look at mine when i get home...
-
I'm in if it's not too late.
somewhere between 1-5 depending on cash flow...
-
-
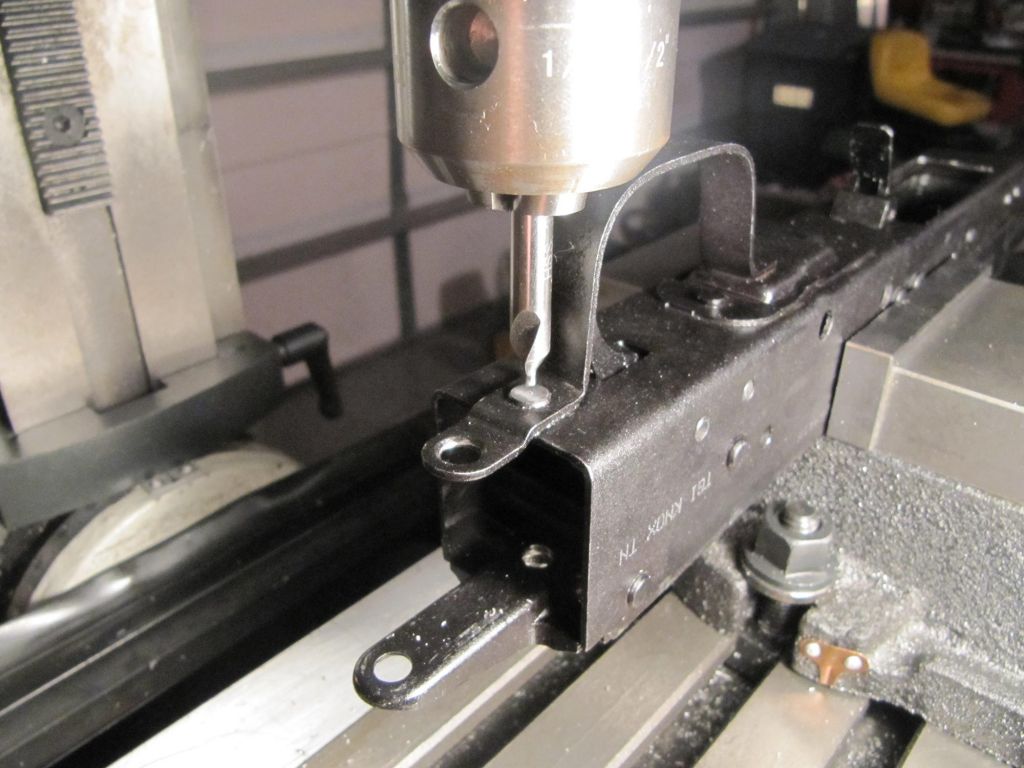
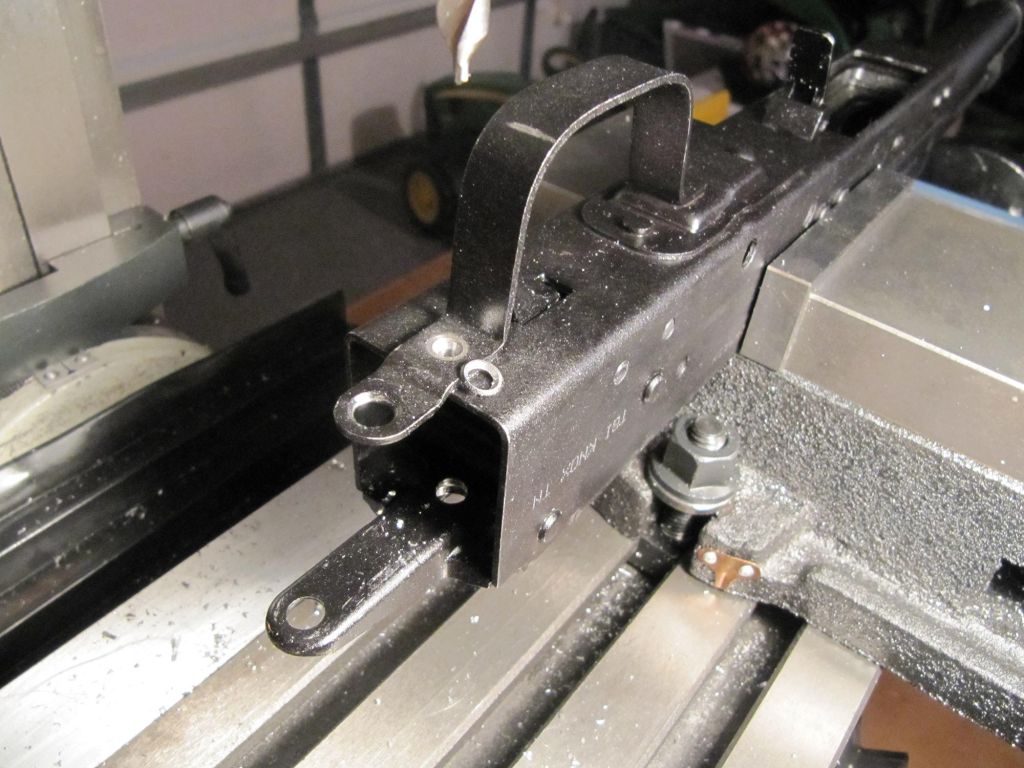
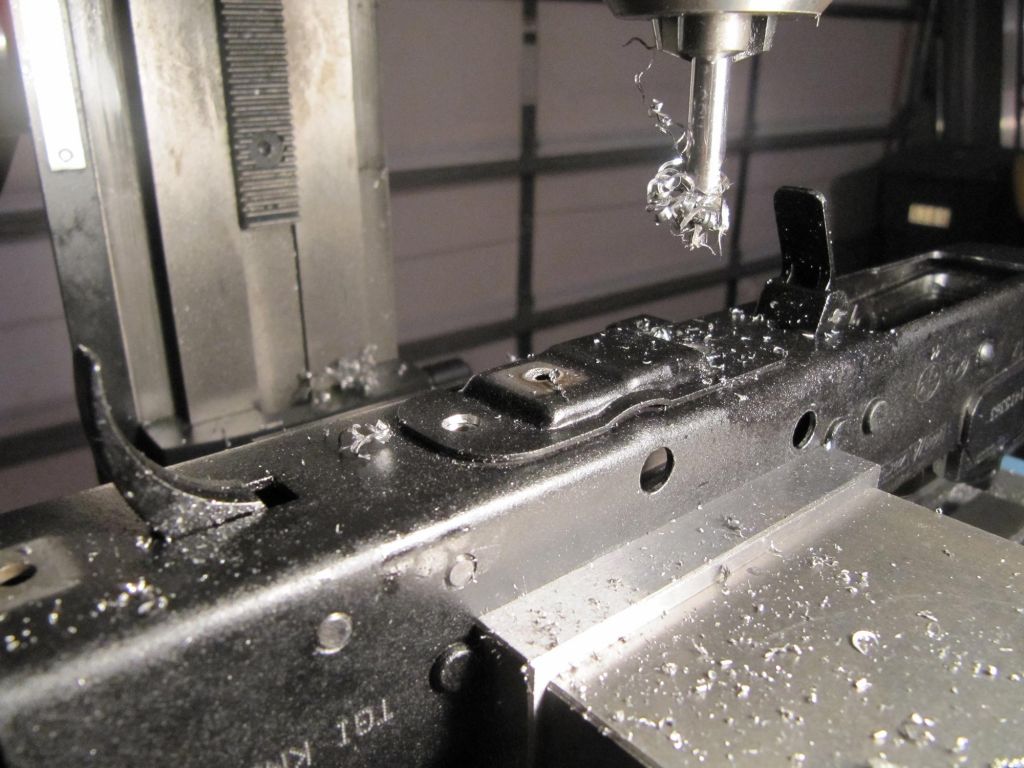
then it was back to the mill to cut out the pistol grip hole.
i'd say you're better off doing this before installing the trigger guard. i did it like i did it because the timing was right; have tools, use them.
1st, i indicated off of the rear trigger guard rivet and drilled the center of the pistol grip hole with a 3/8" drill bit:
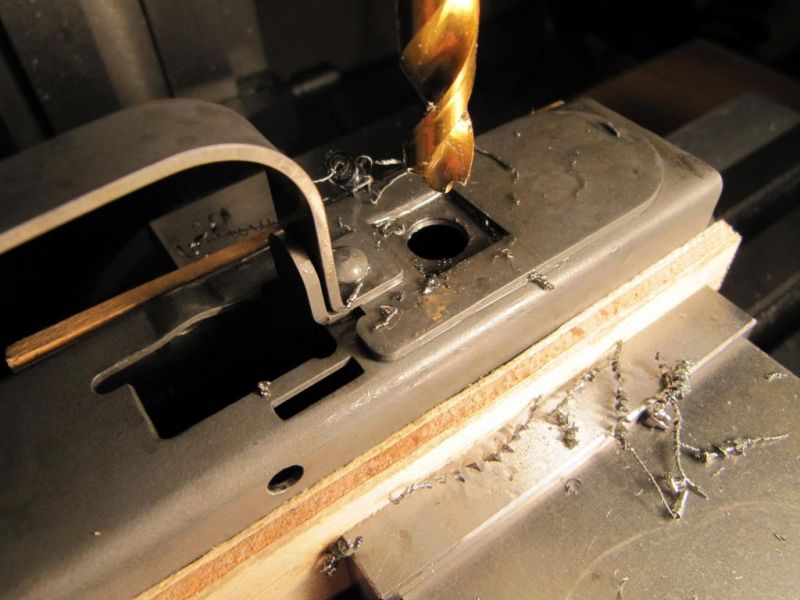
then removed most of the remaining steel with a 1/4" end mill:
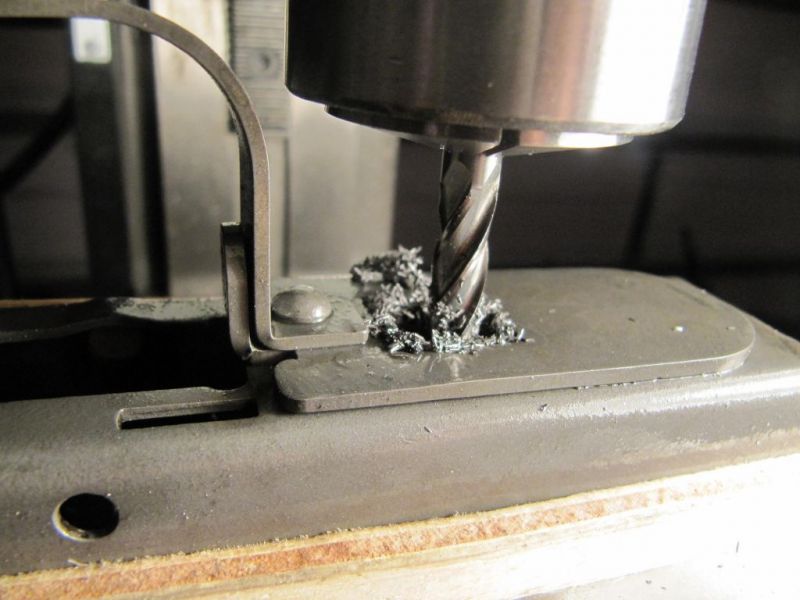
finally cleaned up the corners with an 1/8" end mill:
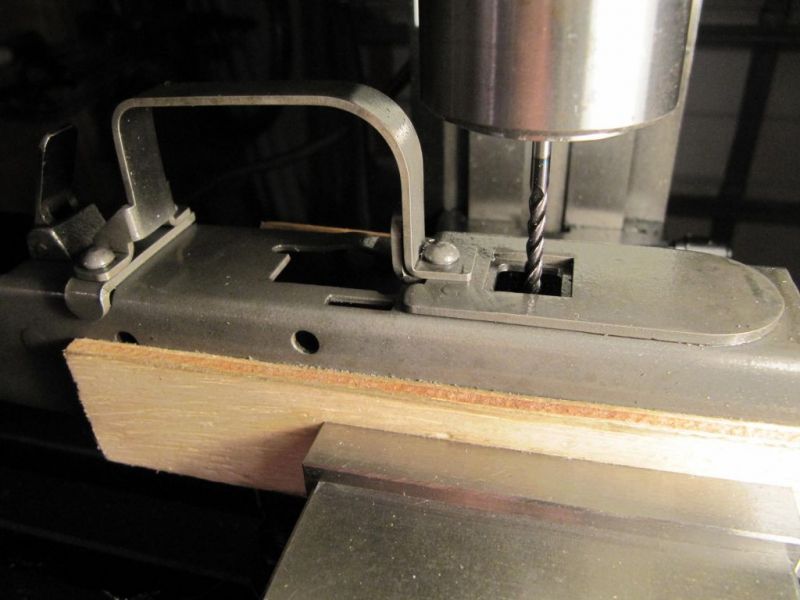
not exactly square corners (.0625" radius), but it looks good and works perfectly.
-
1
-
-
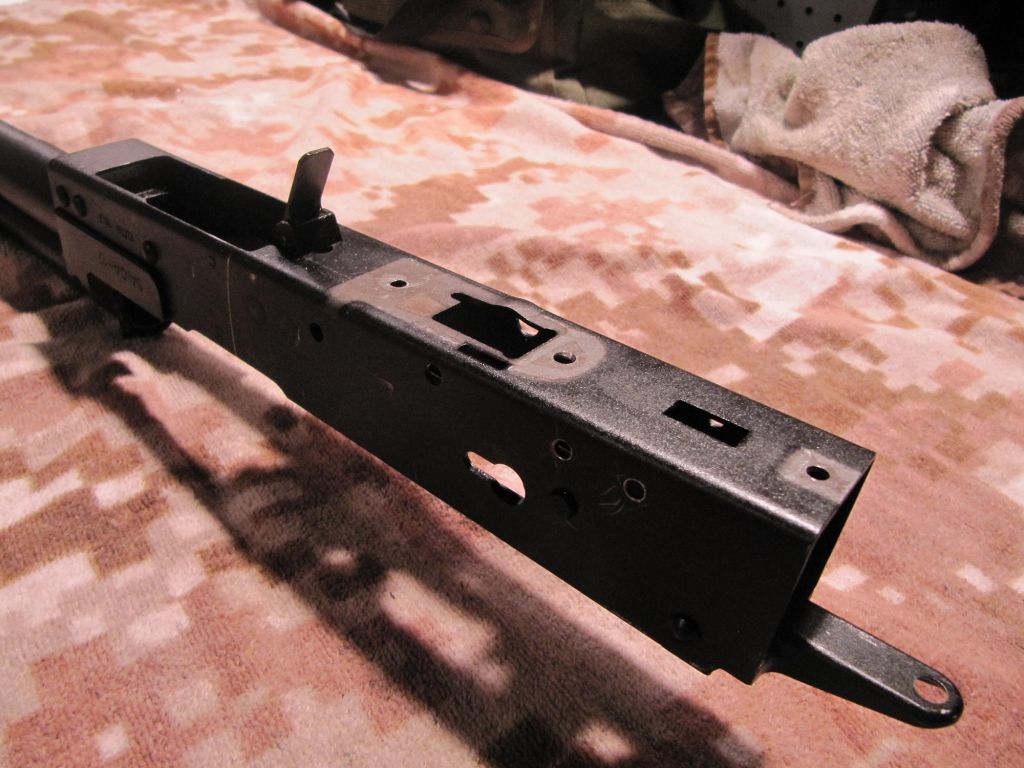
had access to some tools and an extra set of hands so i went to town.
- MIG'ed and blended any extra holes
- put 5 spot welds and 2 plug welds (up front) on AK-builder's extended reinforcement plate
- riveted AK-builder's trigger guard in place
- quickly blasted the receiver
- KG K-PHOS with an airbrush. this stuff works really well. i was pleasantly surprised.
-
1
- MIG'ed and blended any extra holes
-
so i decided to use the mini-mill on this one.
taking the head off rivet:
drilling through that rivet:
and a nice little ring popped off:
then i tried to bend the trigger guard out of the way so i could get at the next rivet and the spot weld just gave.

it made life easier to finish up:
it was easier for me to set up for the trigger pins with the trigger guard gone:
warranty voided.

-
2
-
-
-
-
i'd agree. if you can cycle low power shells on setting 1, you are over gassed.
what 00B were you shooting?
i found Fiocci to be underpowered. my shoulder could tell the difference.
-
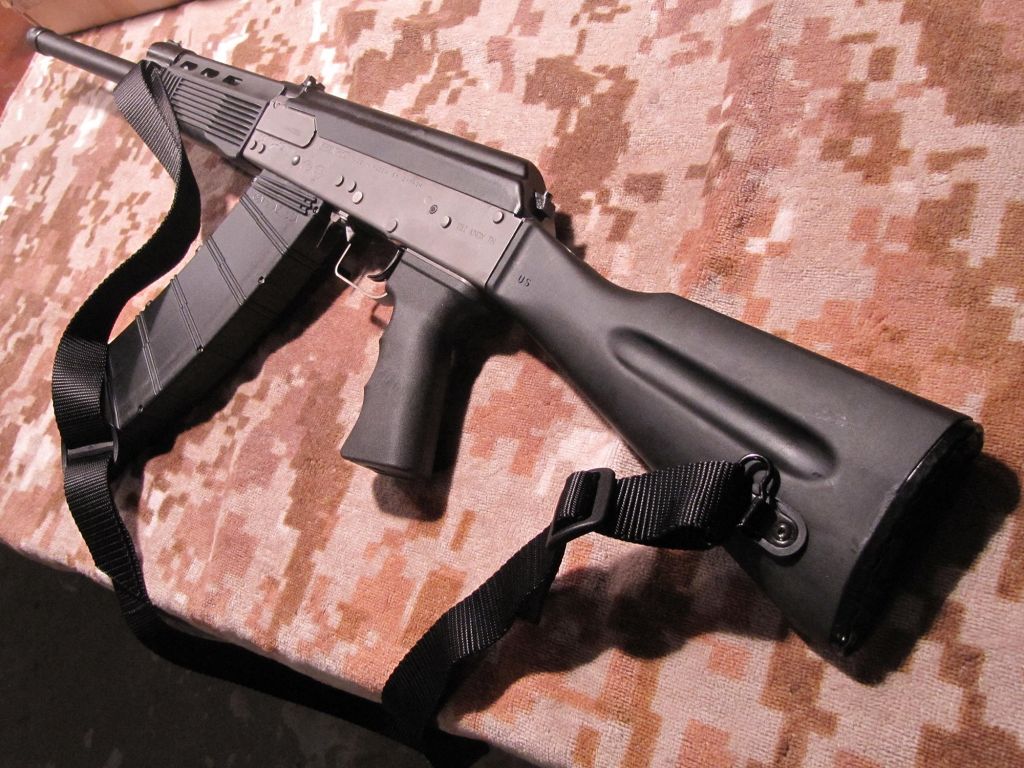
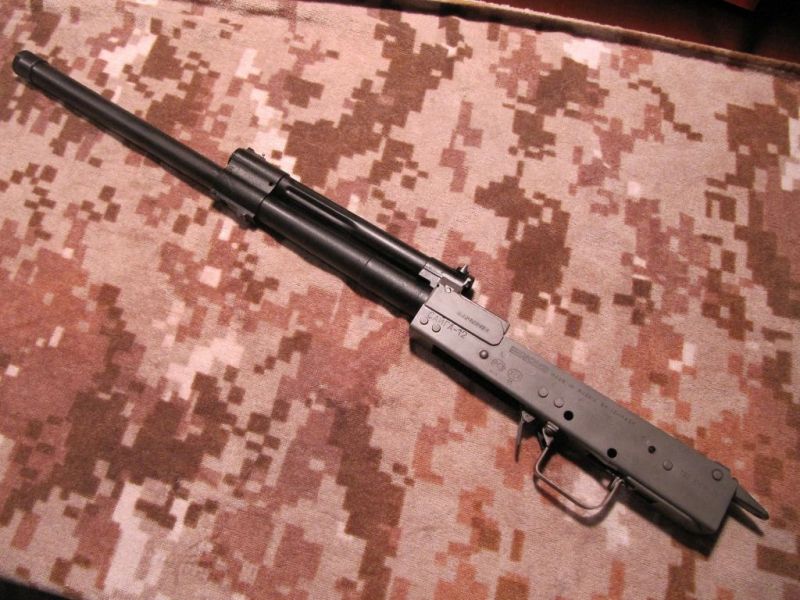
Thanks for the warm welcome.
...and don't worry, "pictures of my new weapon son" are sure to follow...
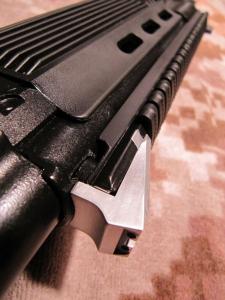
How about this slant brake?
It's cheap and should help protect my threads until I get a thread protector ordered.
It might even stay on better than the factory plastic one did?

-
1
-
-
cleaned it good and shot it.
after 50 shells of 00B, this gun cycled perfectly:
- Winchester 2-3/4" 00B on setting 1
- Winchester 3" 00B on setting 1
- Winchester 2-3/4" Super Speed Xtra | 1oz. | 8 shot | 1350fps | on setting 2
- Winchester 2-3/4" Super-Target | 1-1/8oz. | 8 shot | 1200fps | on setting 2
the gun would FTE with lo-brass on setting 1; a good thing.
the gun would not cycle Fiocci Exacta Nickel-Plated 00B on setting 1; cycled fine on setting 2. i felt way less recoil out of these shells.
all of the 3" extracted fine with the extended barrel hood. it was only 14 shells; that's what i had.
total count of about 200 shells. i think this gun is gassed properly.

now it's time to convert this pig. the factory trigger is awful. first ten shots or so, it would not reset. i had to smack it for the reset.
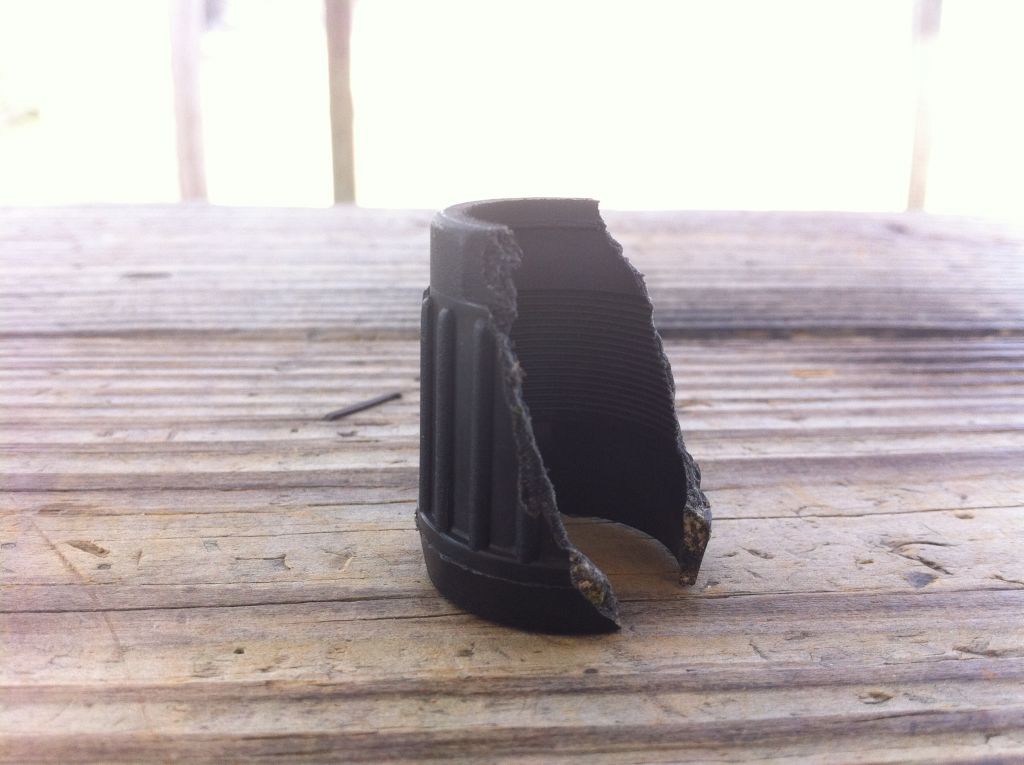
at first, i thought the plastic thread protector was shite. then i warmed up to it and figured i'd keep it on. looks like this gun had other plans.
to anyone interested in keeping the plastic thread protector, tighten it real good. i thought if i tightened it anymore, i'd strip it. i do that.
(eta: I think I finally got this picture posting thing figured out...)
- Winchester 2-3/4" 00B on setting 1
-
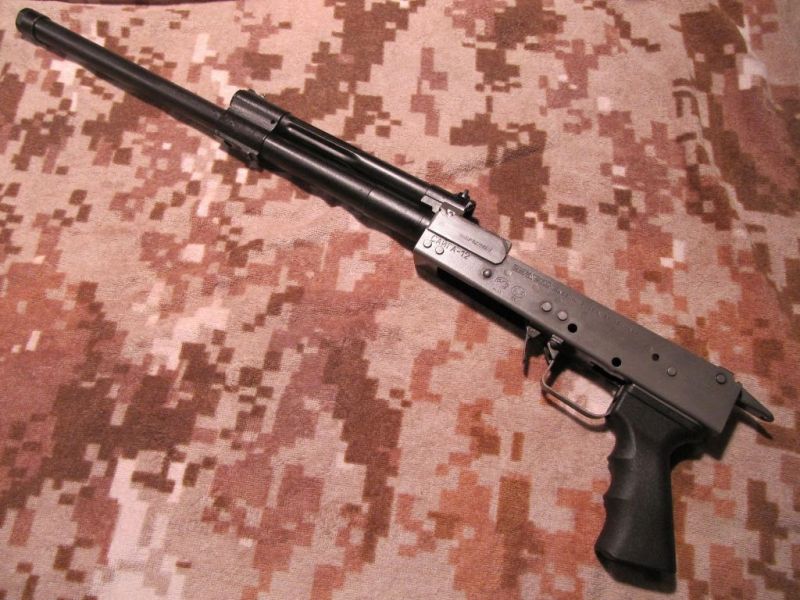
2011 production, 2011 acceptance certificate
4 ports look good
runs hi and lo brass fine. have to change gas setting to 2 for lo.
-
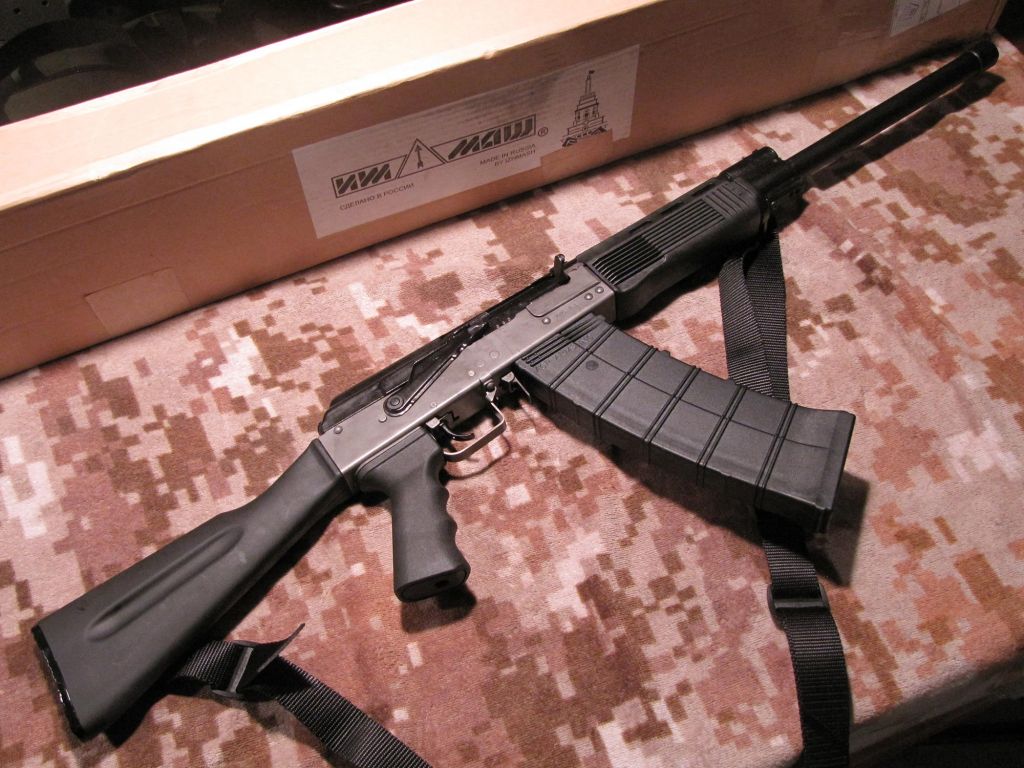
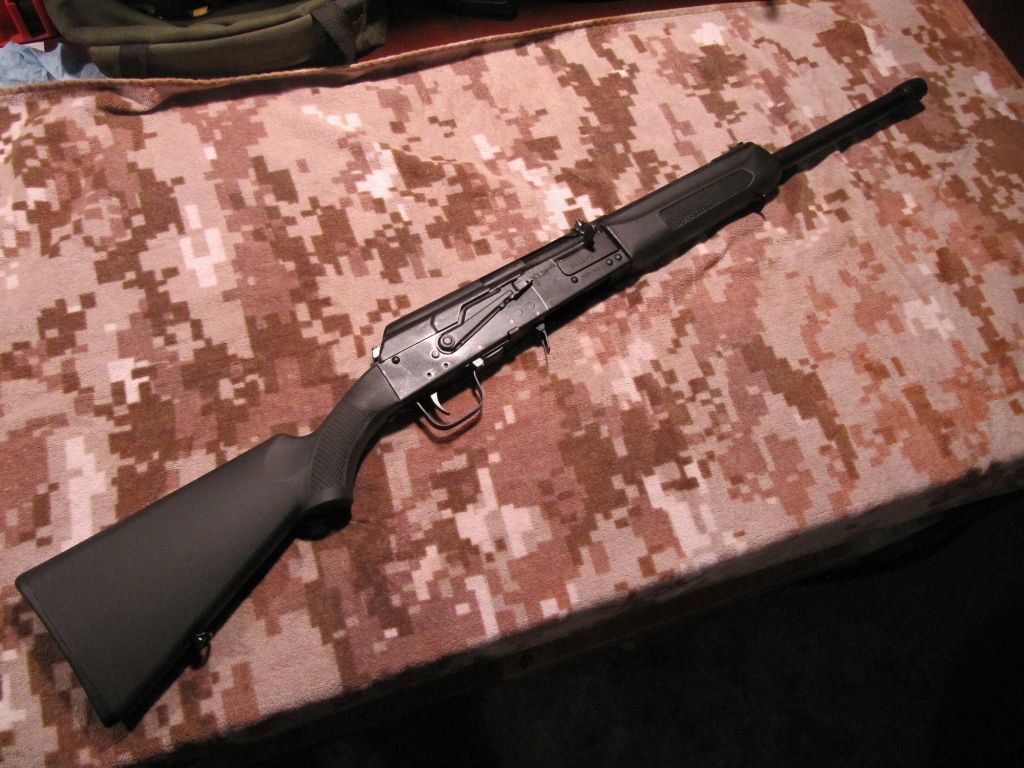
1st post. cheers.
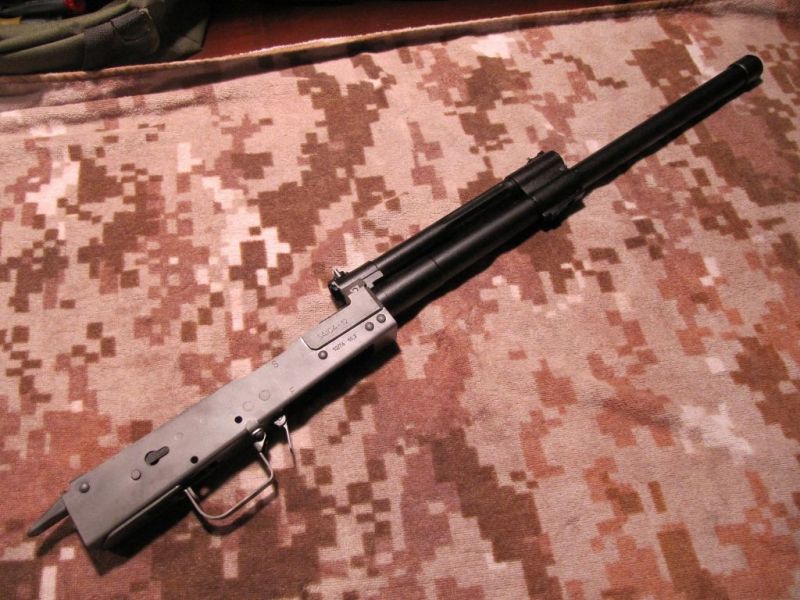
got an IZ-111 from classic arms. importer is TGI. S/N shows it's 2011 production. Acceptance certificate dated 11/10/11.
- 19" threaded barrel
- plastic thread protector
- 4 ports - nice looking holes, at least the 3 i can see. the 4th is hidden from view but feels fine (unobstructed).
- extended barrel hood
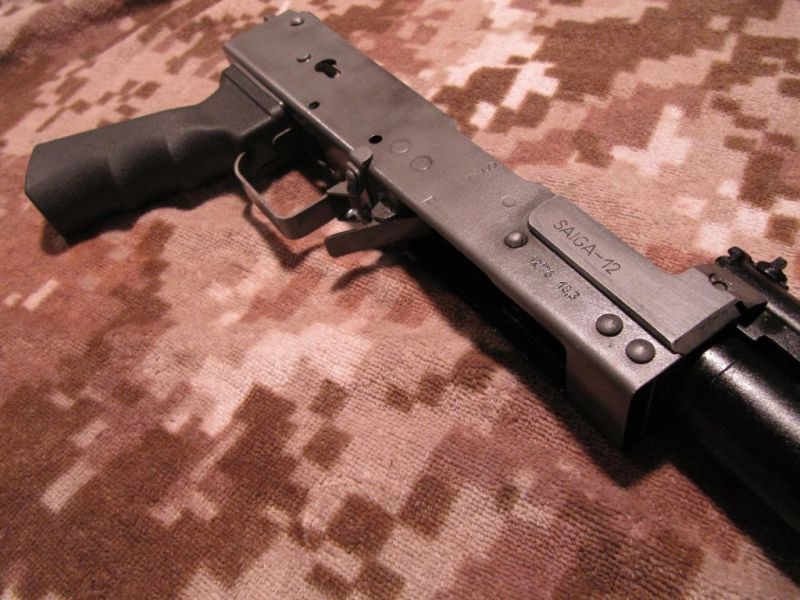
- Manual BHO
- No optics rail
The box had a QR code that contains the following information:
Wolf Performance ArmsSo, I guess Wolf would handle any warranty work for this shotgun?
-
1
- 19" threaded barrel


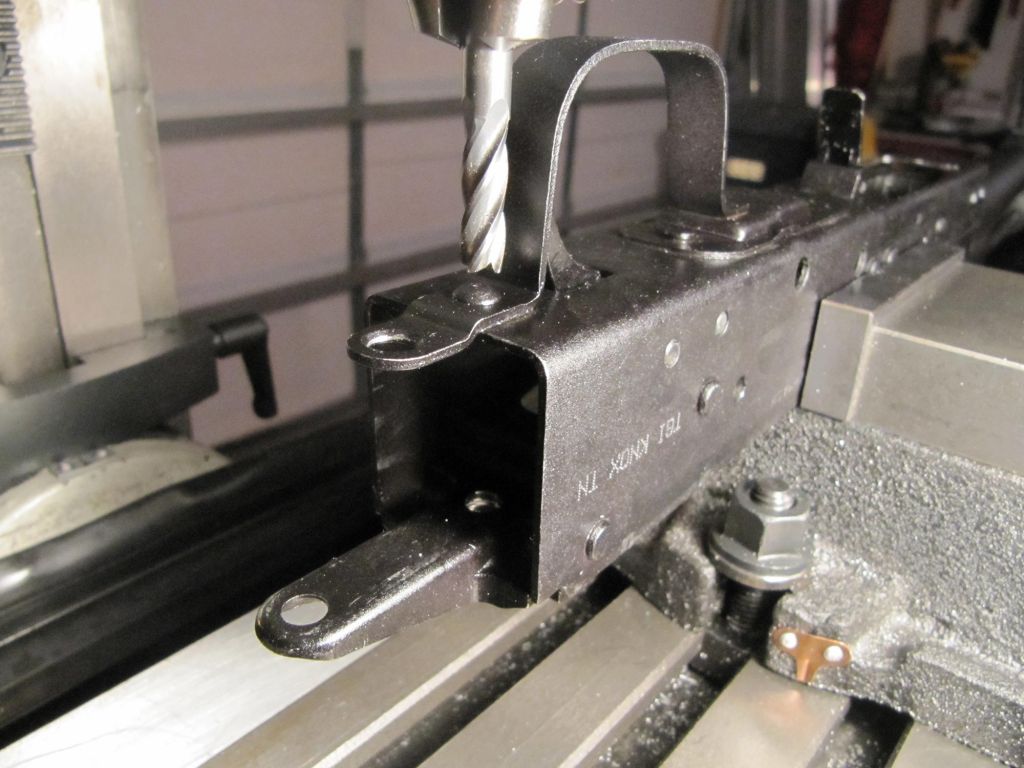
WTK Does cutting receiver for PG nut weaken reciever?
in Saiga-12
Posted · Edited by FunkedOut
you could always add a reinforcement plate. I did.
(I don't know how to add a pic from my phone. I'll get one up later tonight)
(got it)