

loner42
-
Content Count
91 -
Joined
-
Last visited
Content Type
Profiles
Forums
Gallery
Blogs
Calendar
Store
Posts posted by loner42
-
-
Wow, that 7 bore is bad ass. Was that from a kit or what ? Very nice looking work.
I'm thinkin you did'nt have to get a tax stamp for that one, eh ?
-
Thanks Mike and all others who chimed in. Guess I'll contact them and see about getting something in writing before going forward with it.............
-
Mike, I guess you misunderstood me. I meant building an SBS only ( 10" ), and on one specific gun with the stipulated specs on the form 1. I would think an individual should be able to do all this while waiting for the stamp as long as the barrel was not in the receiver at any time until the stamp is in hand.
Does that sound kosher ?
-
I assume you chucked the barrel in the lathe before you cut it to length with the receiver hanging out towards the tailstock , otherwise you'd have to have a lathe with a very big spindle hole or a big 4 jaw and some labor intensive fixturing and a steady rest.
Did you wind up with .083 gas port holes with the finished version or did you have to go bigger ?
That little tab on the back of the gas tube flange looks like a good trick to include. I've wondered about that happening with the gas piston being gone.
-
Having read the posts which proceeded this one - I think its worth mentioning again that this is NOT a DIY proposition, and appropriate licensing is required to do the work. While the S12 forum is a great place for information on conversions and Saiga 12 shotguns in general, this subject goes way beyond the scope of work a do it yourself-er, or even a non SOT gunsmith may lawfully perform
Are you saying that no one other than a 2SOT holder can legally perform the above mentioned work , if they are an experienced individual in metal fab / machinework and gunsmithing and are modifying their own personal SBS , doing all the barrel work with the barrel OUT of the receiver, and do not install the barrel back into the receiver for any testing or experimenting until after they have their tax stamp for the SBS ?
-
Good job................could you give some specifics on some of the mods you did to the barrel and related parts with maybe some pics ?
Like :
How many gas port holes did you drill and what size ?
How far back did you move the gas block ?
What did you do as far as modifying the bolt carrier, gas piston , and gas tube ?
Thanks...........
-
Hey man, thanks for the info! I was curious if you knew what size the barrel diameter around the Saiga 5.45(iz240) is at the FSB, not sure if they use the AK-74 barrel or not.
Sorry , haven't had one to measure yet.................
When you say 'chamber outside diameter', is that measured at the spot where the barrel presses into the front trunnion?
Yes ....................
-
bigsal, need more info for a quote. PM me for options and prices and my phone number.
-
Thanks, I like the E.Germans best for the Tula Krinks. I'm PM'ing you a list of the options and prices.
-
Beautiful work loner!

Damn I want a Krink!
Thanks Dave
-
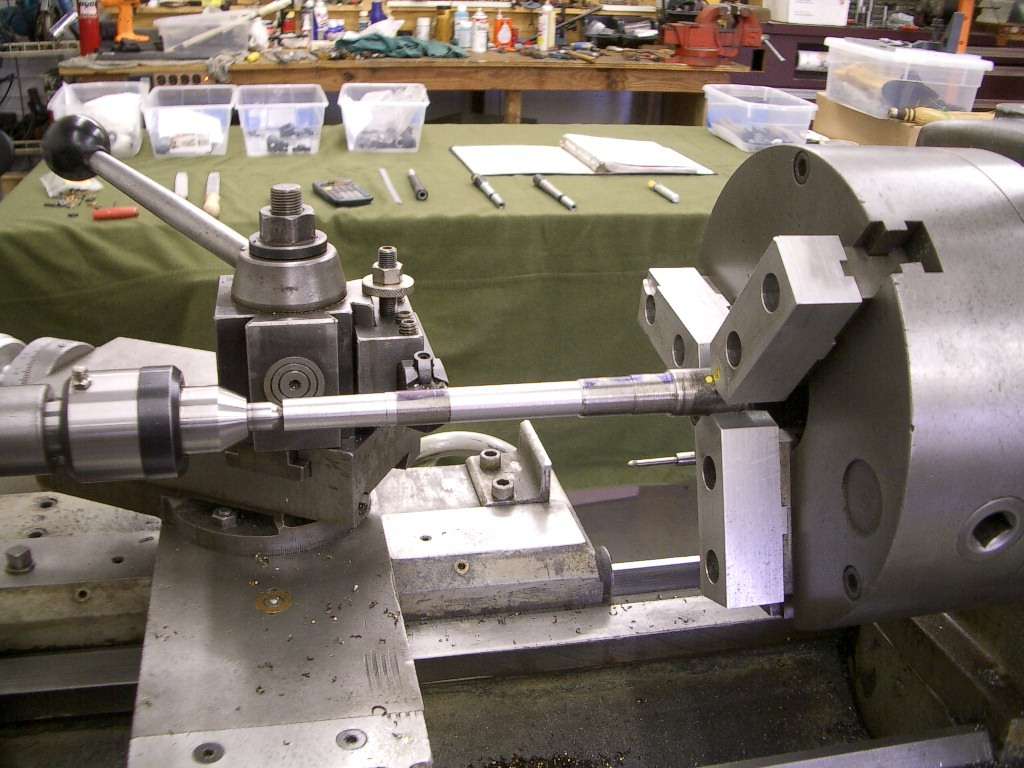
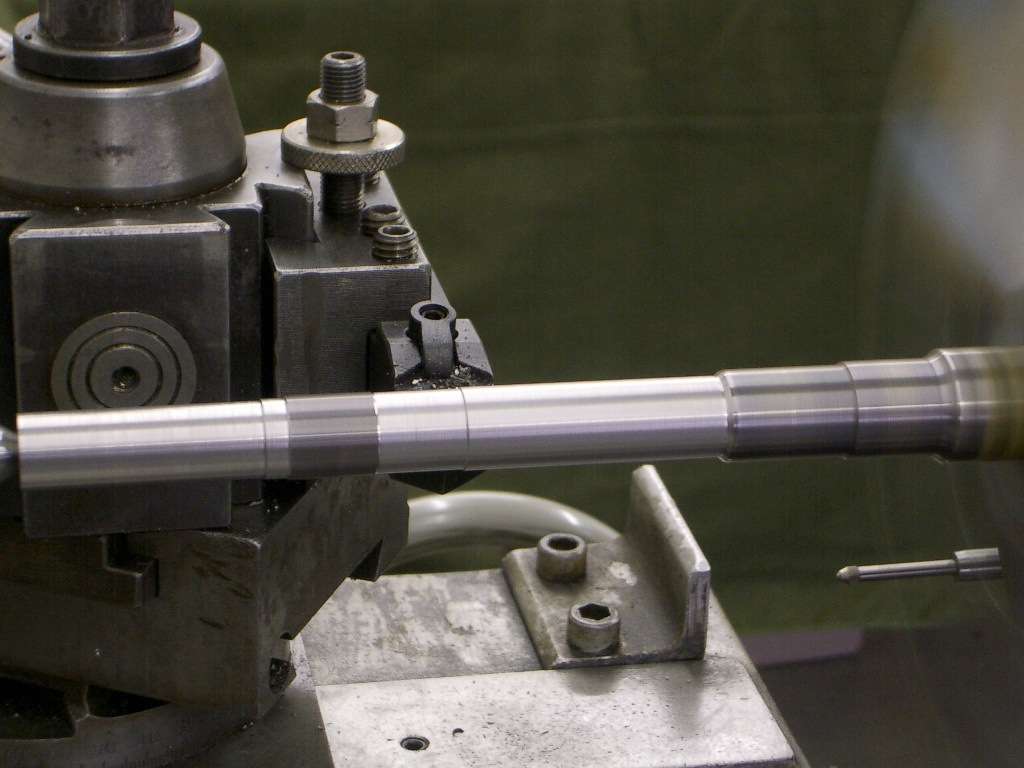
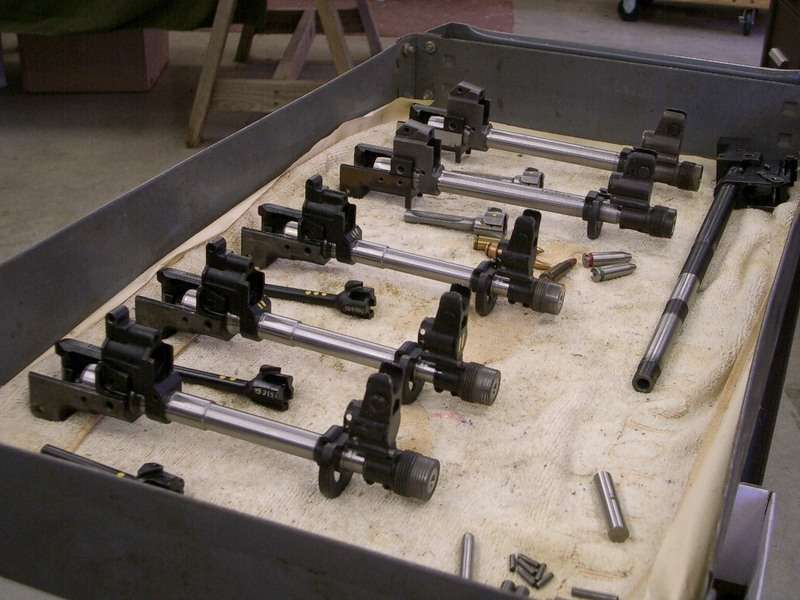
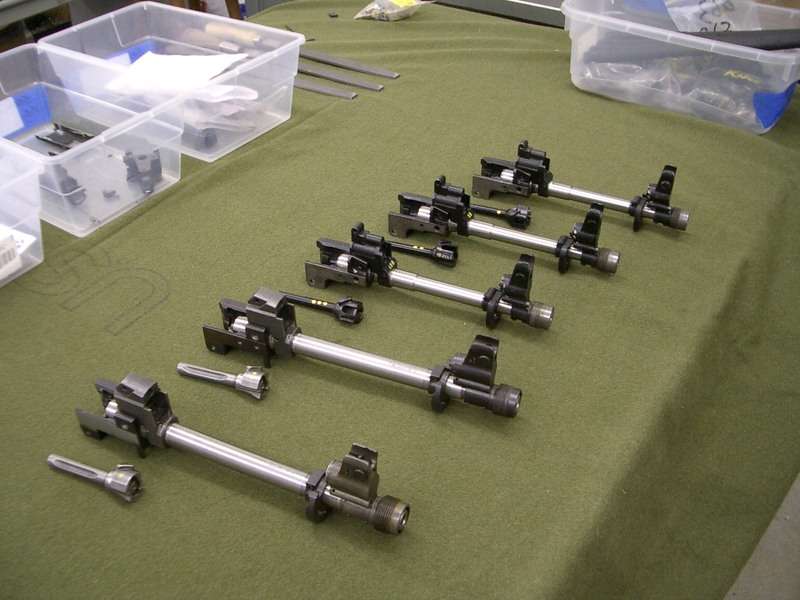
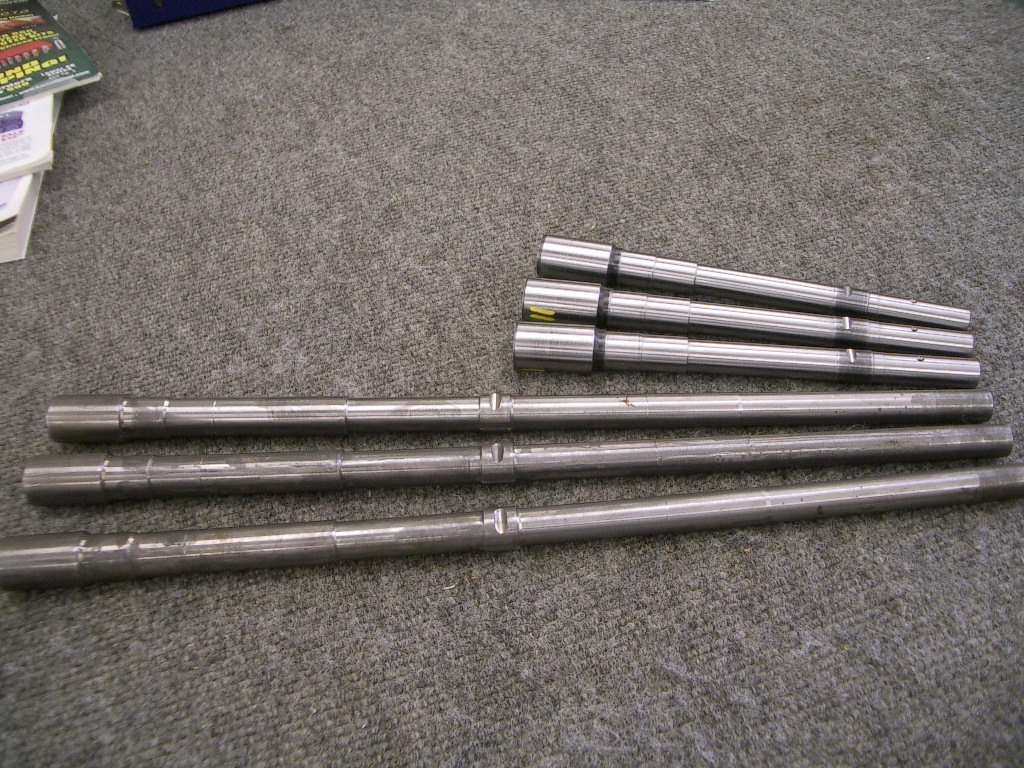
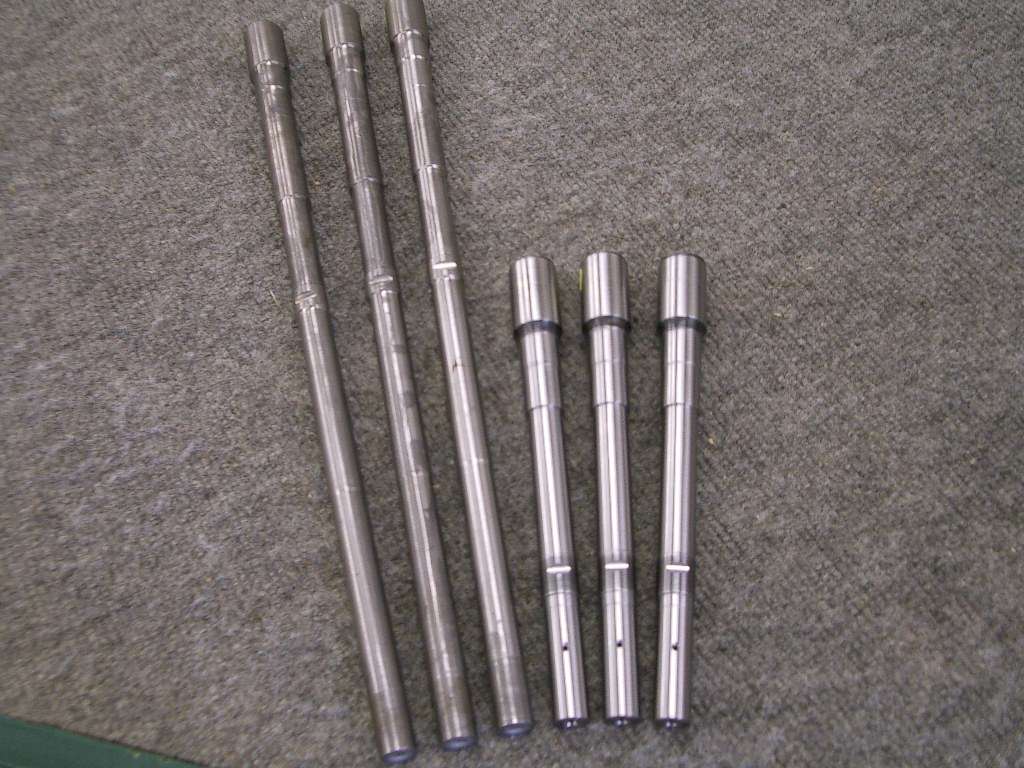
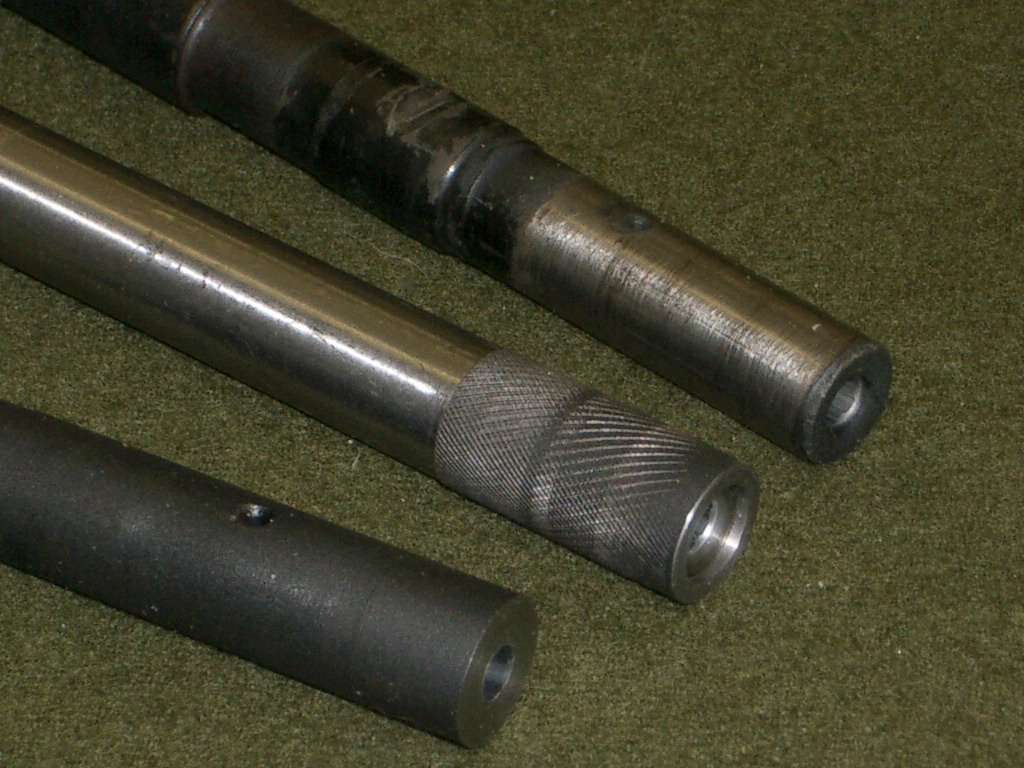
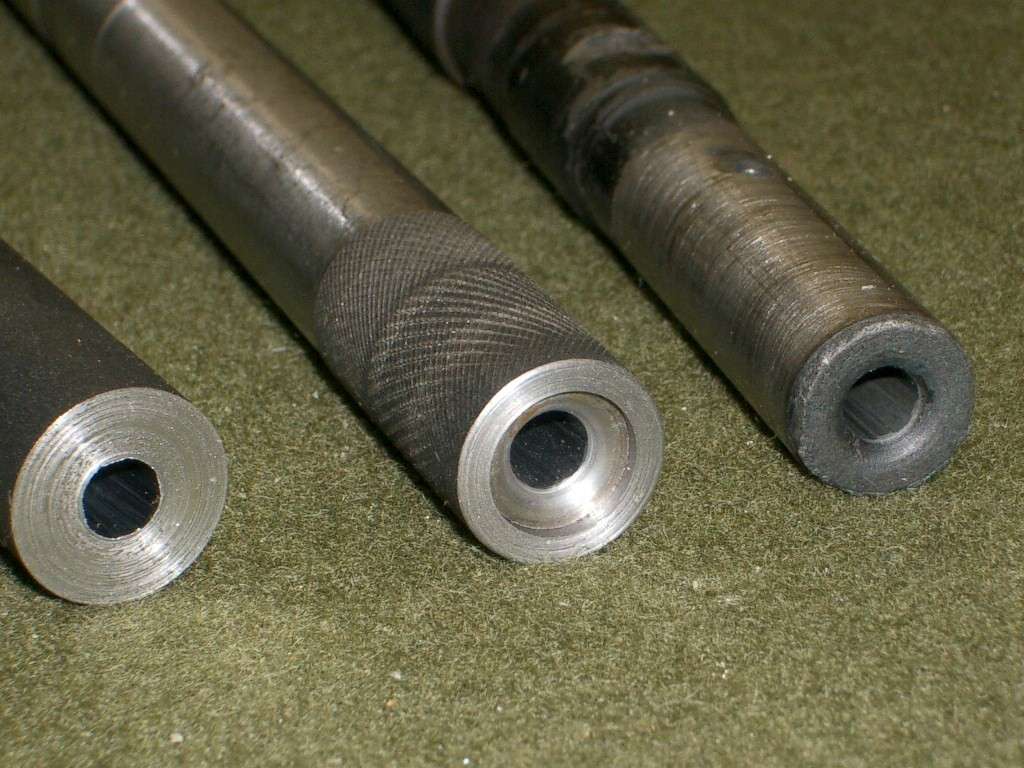
Wanted to share some Krink barrel porn with all you Krinkheads out there. I just finished up these 3 Tulas and 2 M92s that I started on last Thurs.
The 3 Tulas were made from Virgin E.German barrels and the 2 M92s were Virgin kits.
All belong to members except 1 of the M92s , and it is mine and not for sale.
I'll be starting on 4 Bulg. 74 barrels, 1 Bulg. Krink barrel , 3 E.german barrels, and a couple cleaning rods to shorten and rethread Fri.
That should keep me busy for a week or so........................enjoy :twisted:
Uploaded with ImageShack.us

Uploaded with ImageShack.us
Uploaded with ImageShack.us

Uploaded with ImageShack.us
Uploaded with ImageShack.us

Uploaded with ImageShack.us
Uploaded with ImageShack.us
Uploaded with ImageShack.us
Uploaded with ImageShack.us
Uploaded with ImageShack.us

Uploaded with ImageShack.us
-
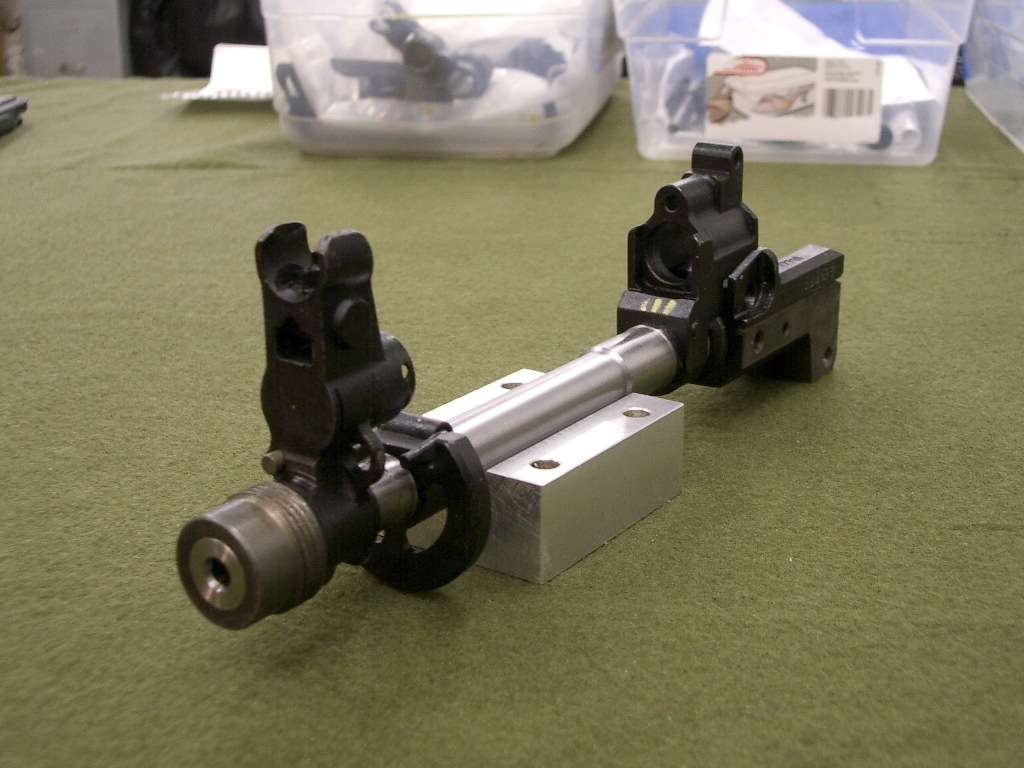
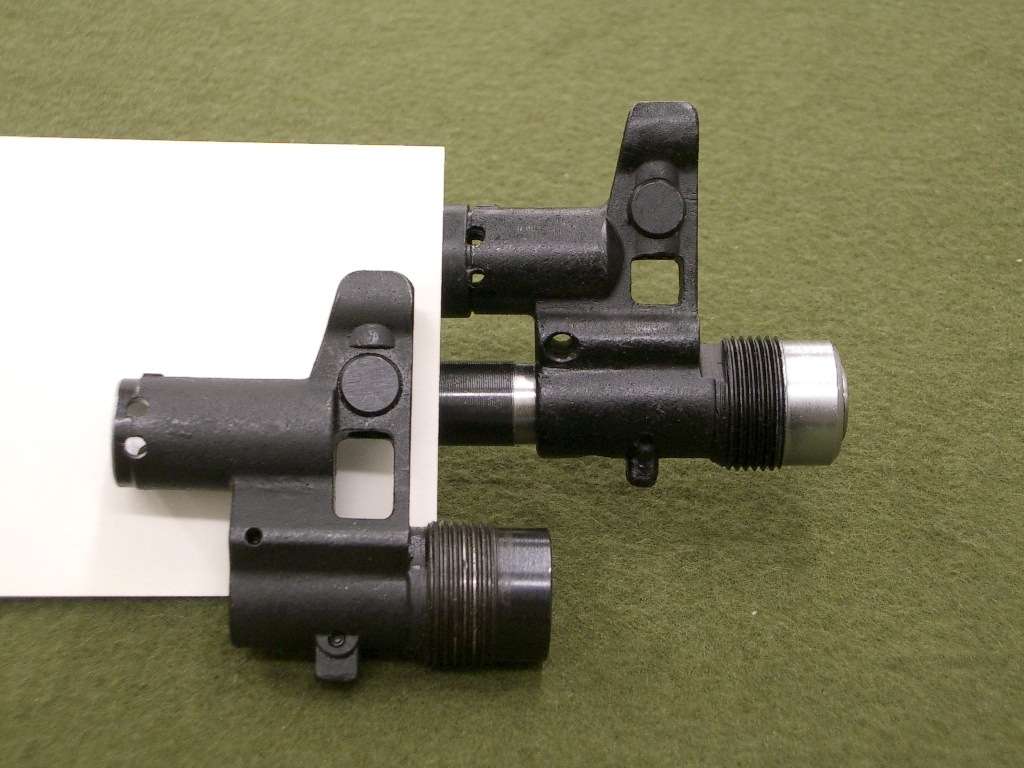
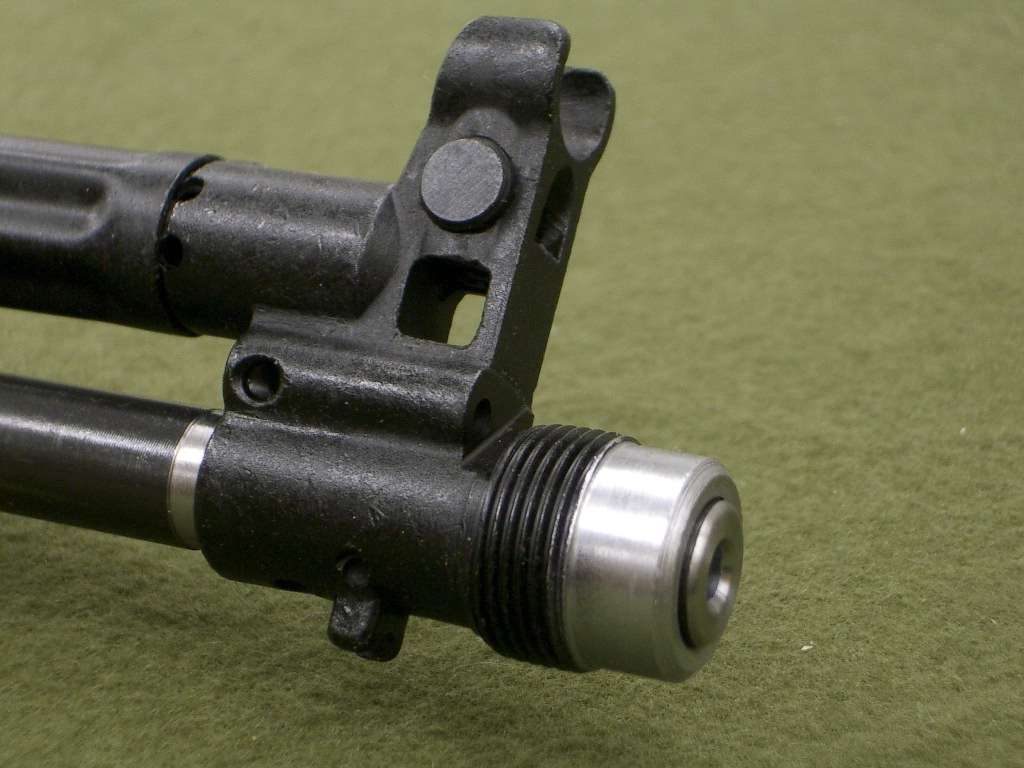
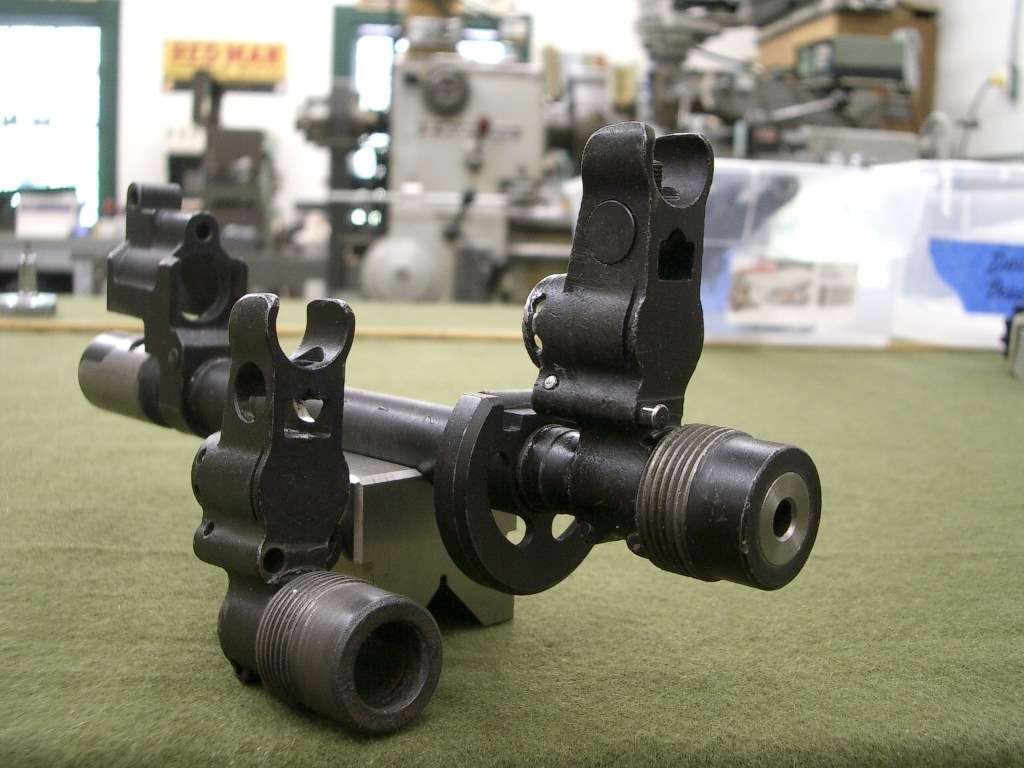
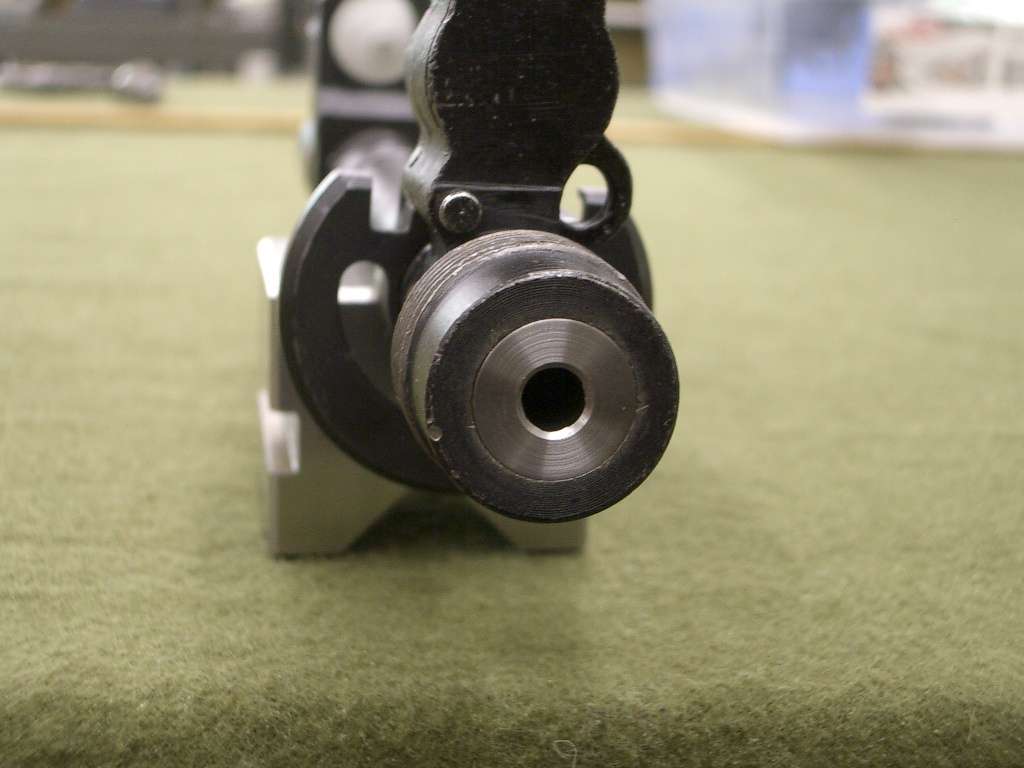
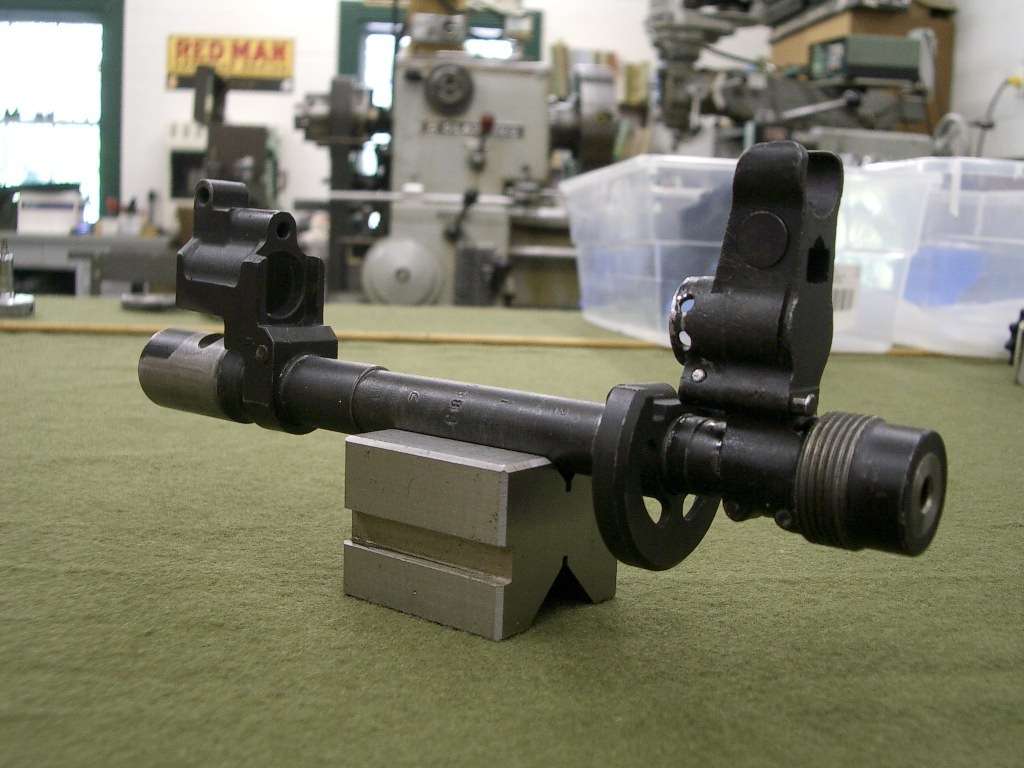
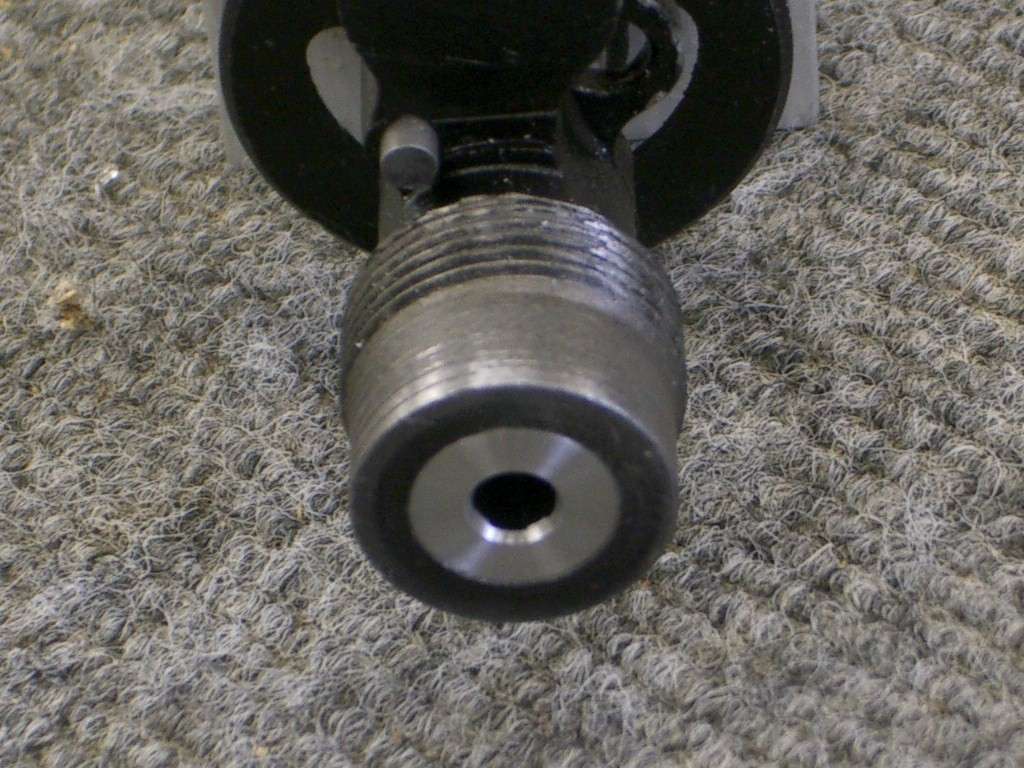
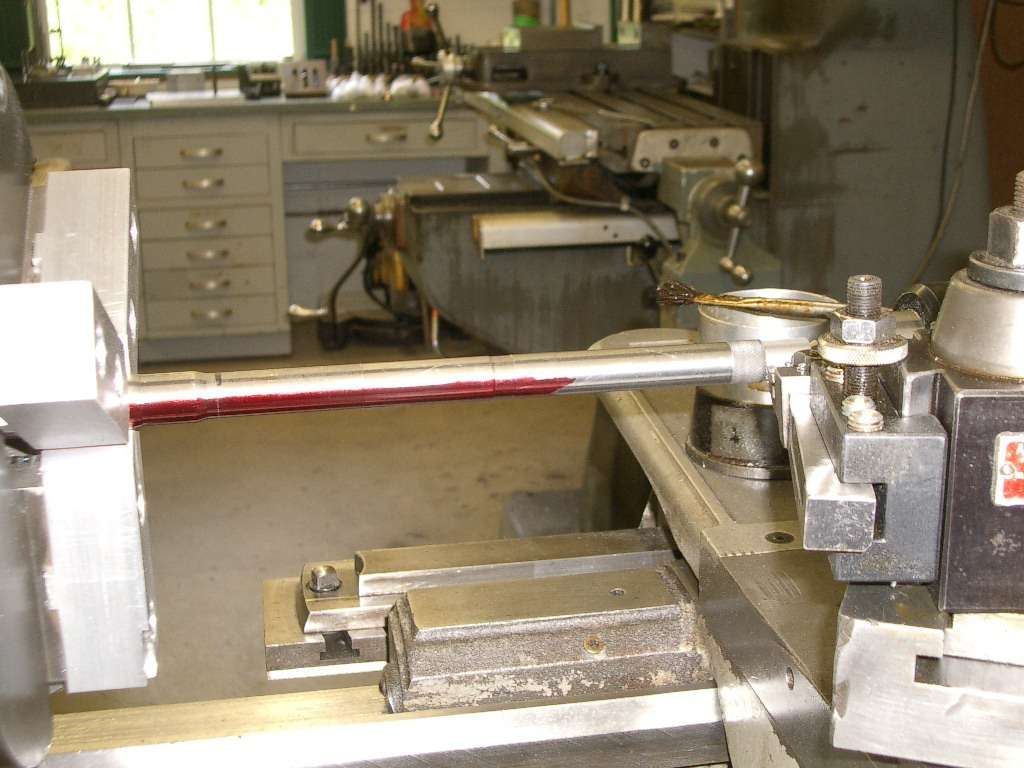
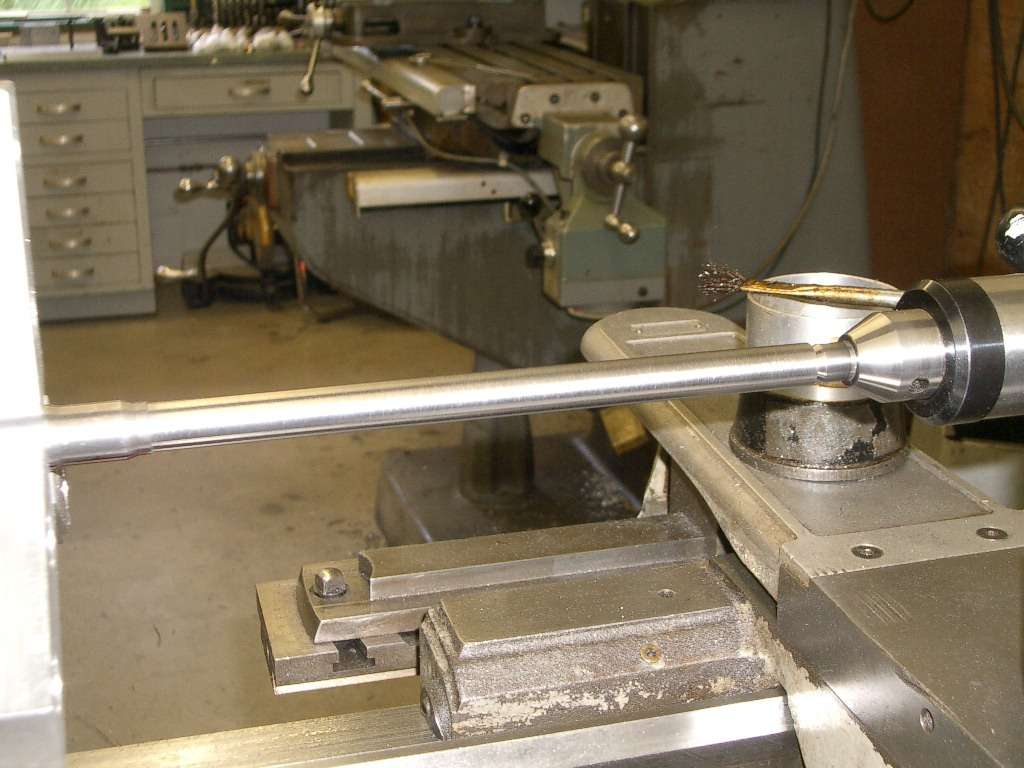
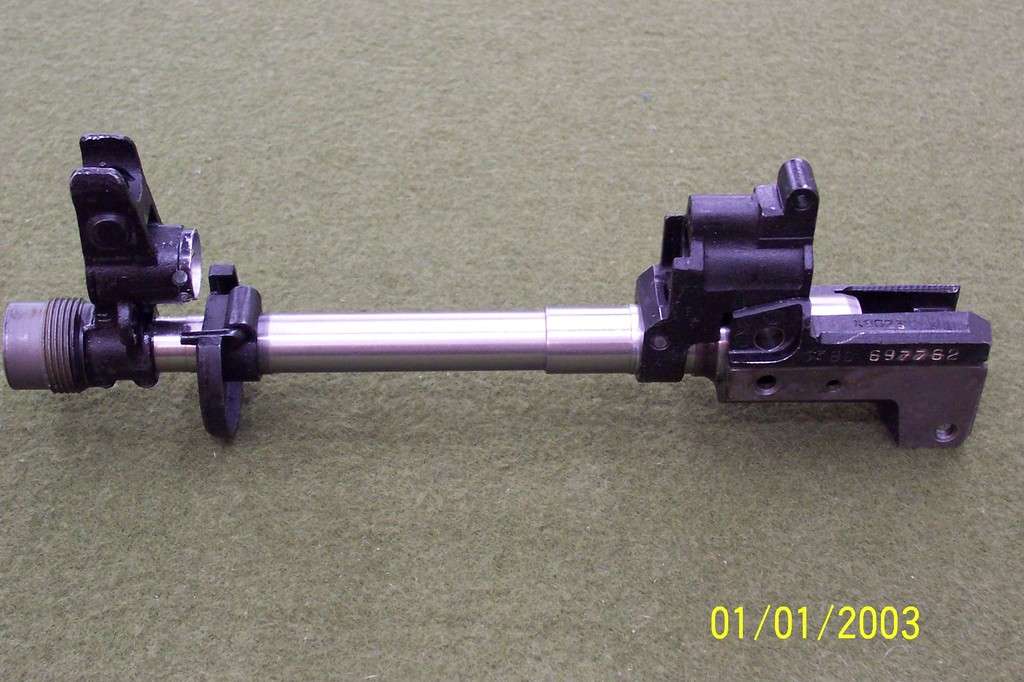
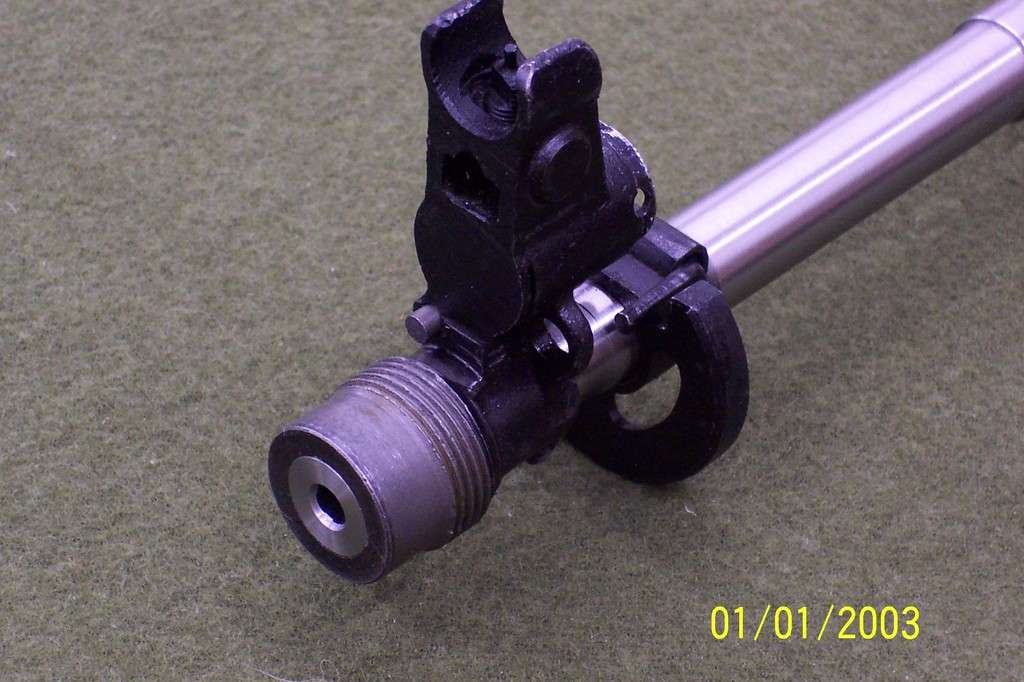
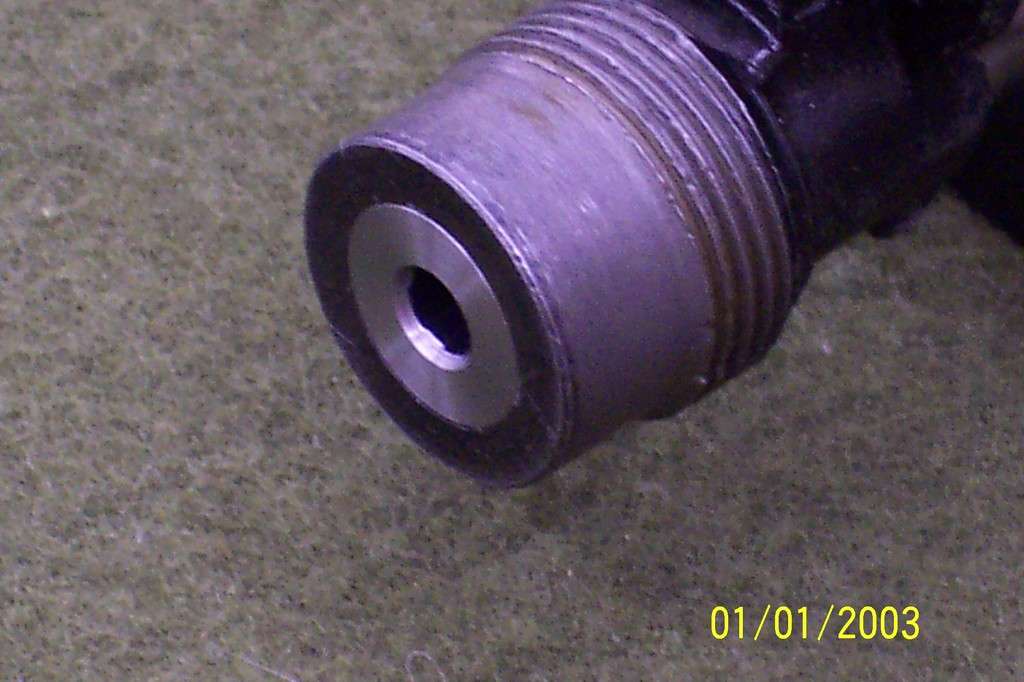
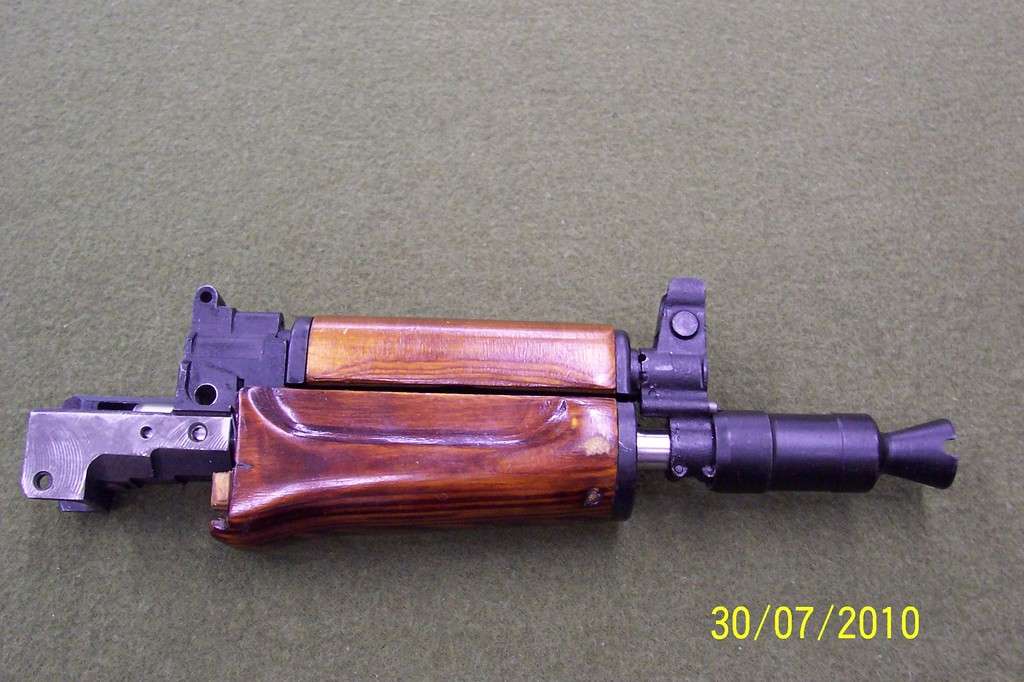
Here's a few pics on the latest 2 projects. First one is an AK105 barrel assembly from Kvar that the member wanted to replace the Bulg. FSB combo with an original mint cond. unissued Russian unit. He requested that the barrel protrude past the face of the FSB per a picture he sent me of a Russian 105 barrel, and that the barrel be recrowned to the same configuration as the Russian barrel and the gas tube fit without having to be modified.
In order to accomplish this the barrel had to be shortened .125, and the gas port moved .166 to the rear.
Here are some pics of the finished assembly.......................
Uploaded with ImageShack.us
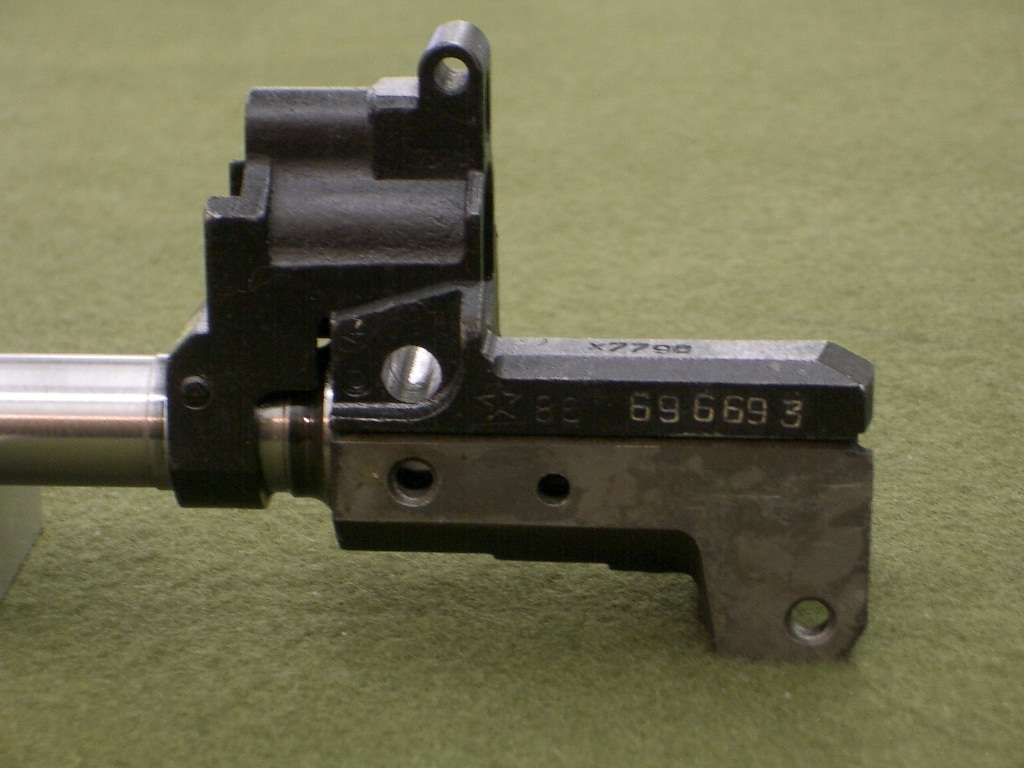
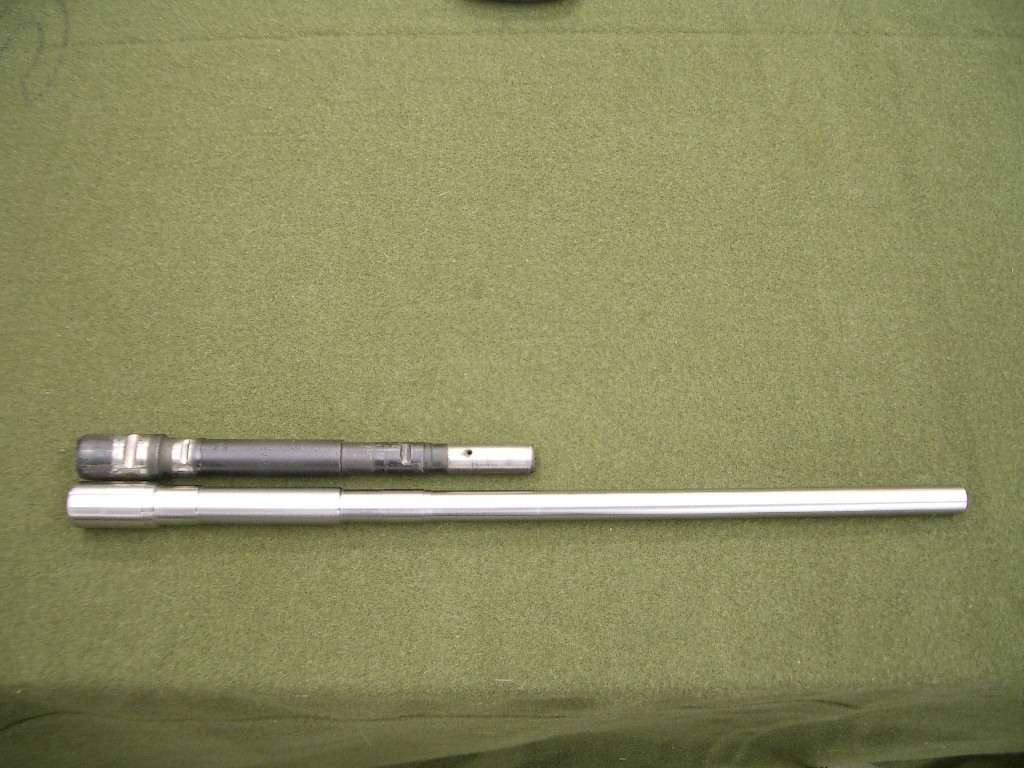
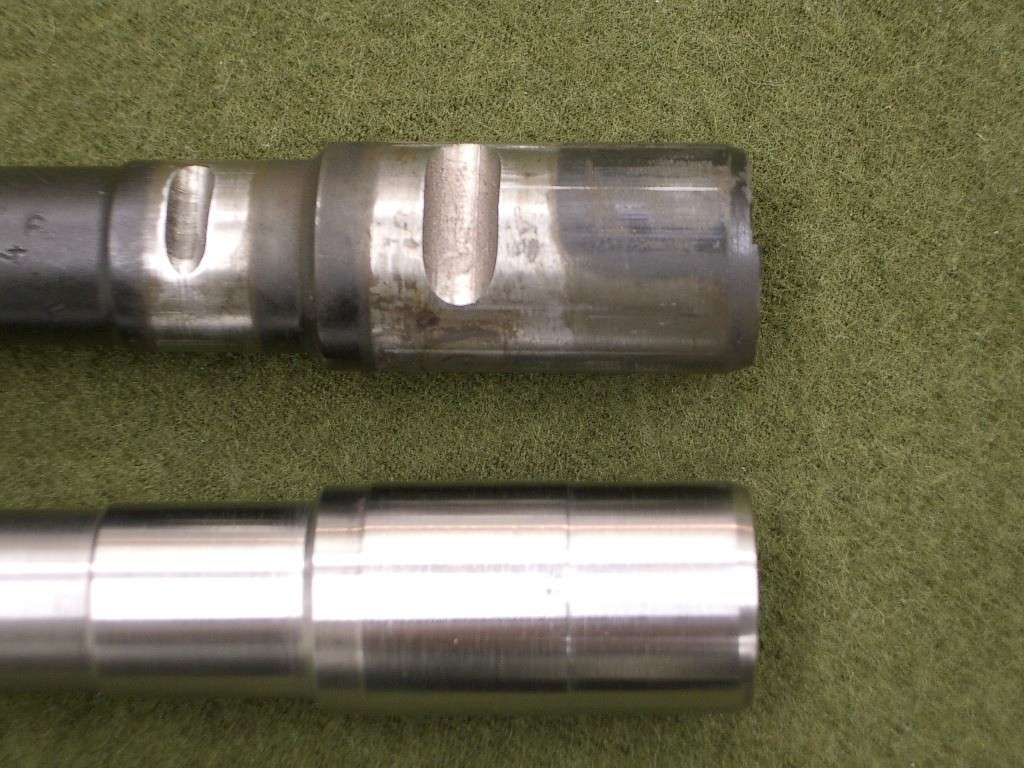
This is showing the differences of the 2 FSBs with the Russian installed and the Bulg. in the foreground.
Uploaded with ImageShack.us
Uploaded with ImageShack.us

Uploaded with ImageShack.us
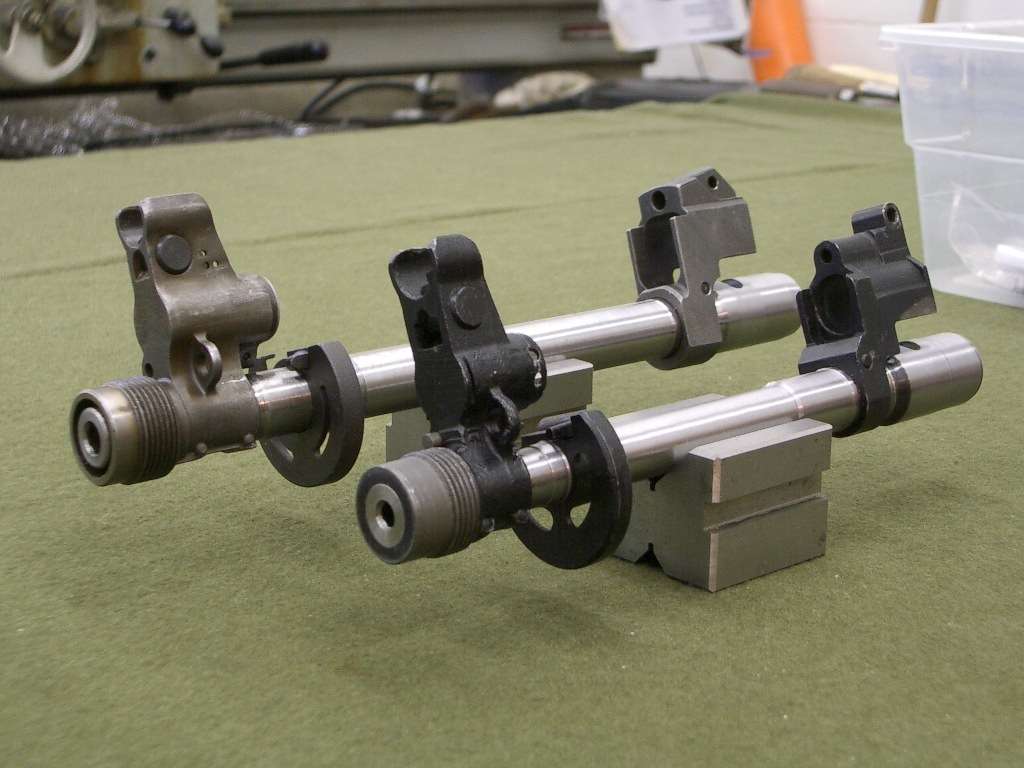
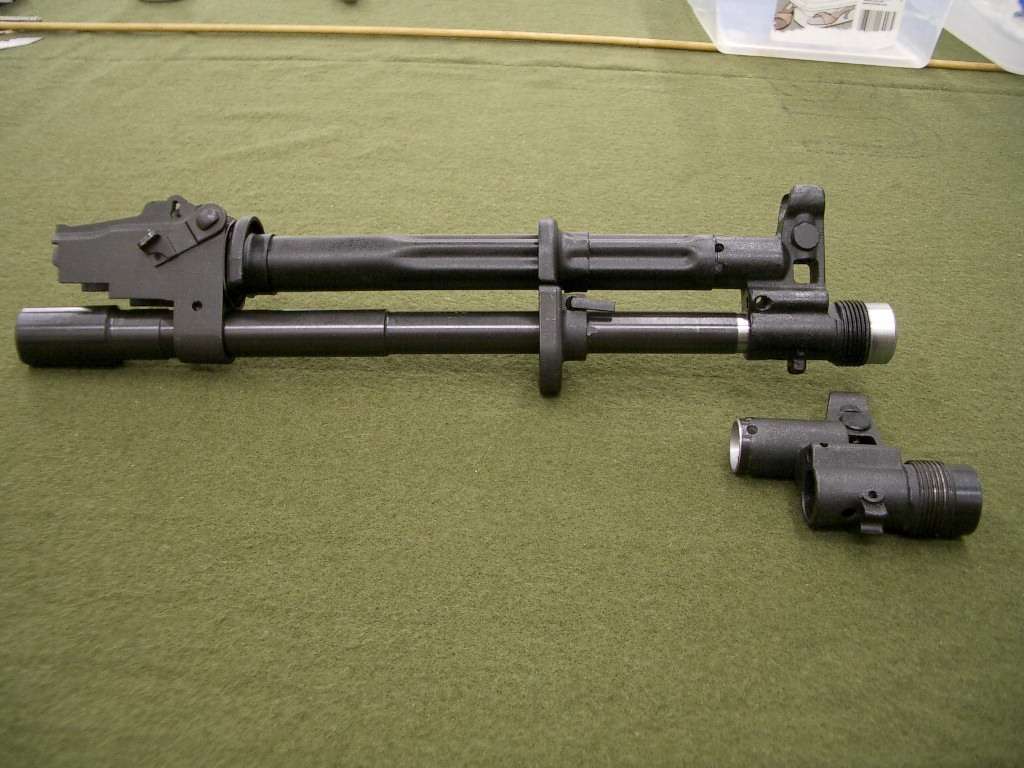
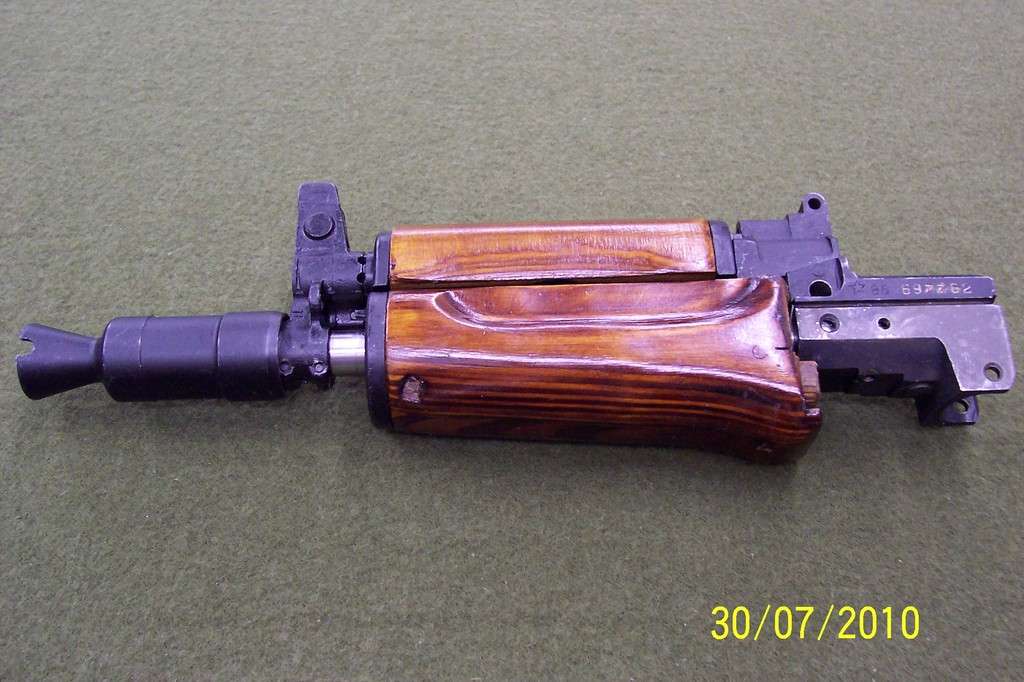
This second set is a Bulgy Krink barrel that the member bought and wanted the Bulg. FSB that had been bubba'd by someone who had unsuccesfully attempted to blind pin it to the barrel removed and replaced with a Russian Krink FSB Combo unit. The barrel had to be shortened .100 and recrowned . The gas port still lined up with the new FSB when installed. Both of these barrels had to be stripped of the RSB and R hinge block in order to get them up inside the spindle to do the lathe work needed and then reinstalled . Included a few pics of the bubba'd FSB.
Enjoy...................................
Uploaded with ImageShack.us
Uploaded with ImageShack.us
Uploaded with ImageShack.us

Uploaded with ImageShack.us

Uploaded with ImageShack.us
-
 1
1
-
-
I've been told by class 3 dealers that if you have the tax stamp for a SBR or any other NFA, you are NOT required to have 922 parts. So,who knows the actual facts ? " Only the Shadow knows "

-
Try to take lots of pics of the build Wade. No
one has so far on any of the forums that I know of. And most important is of course " a range report on the accuracy of a cut down E.German barrel."
Just don't expect any tight groups @ 300 yds.

-
Thanks Wade....................
beefcakeb0...................Just LMK when you're ready.
-
Here are some pics of the latest " chop jobs "................
The 3 US barrels from Arms of America that were referenced in the 5.45 barrel alert thread and 3 Virgin E.German barrels that I reprofiled for Bob in Iowa.
Uploaded with ImageShack.us

Uploaded with ImageShack.us
Uploaded with ImageShack.us
And this one was the " Whole Enchilada " for NineRider , done from an E.German Virgin. These were all shipped today......................Hope you guys enjoy them.
Uploaded with ImageShack.us

Uploaded with ImageShack.us
Uploaded with ImageShack.us
-
There's lotsa days when there's pretty "slim pickins ", if ya know what I mean..................

-
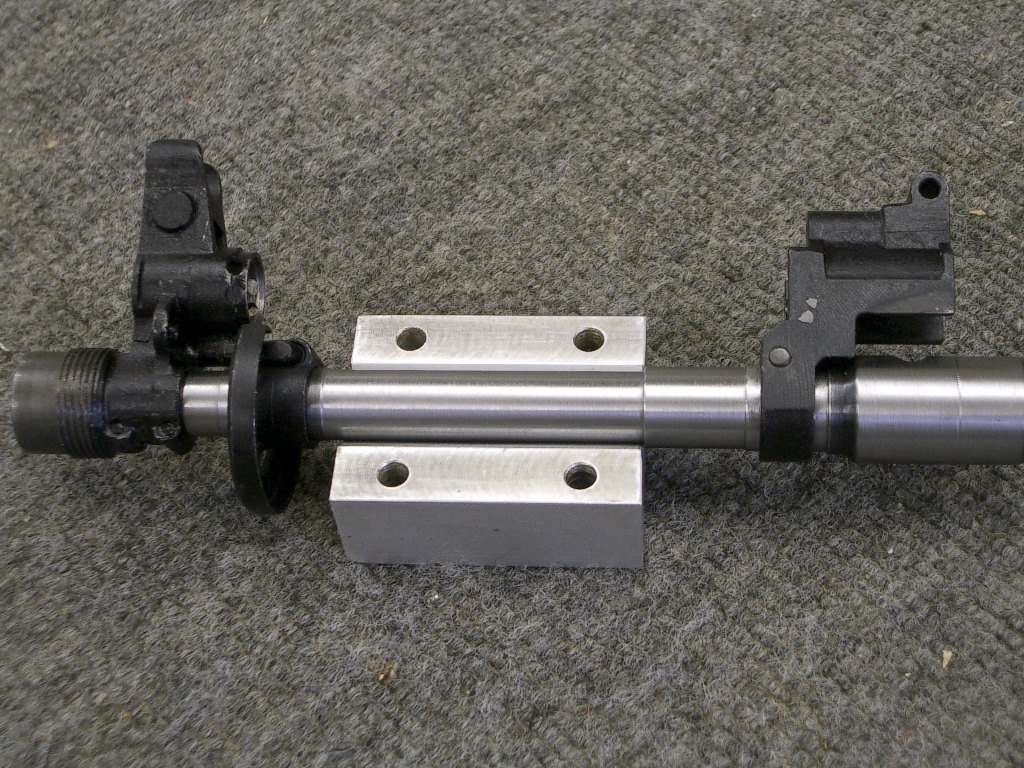
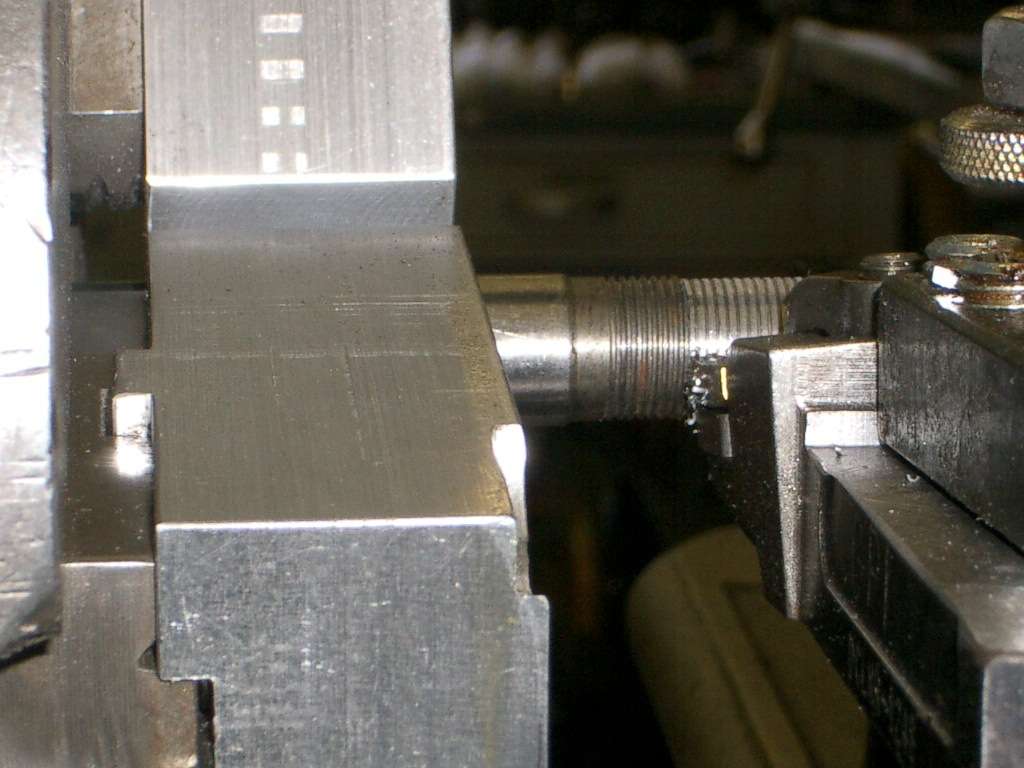
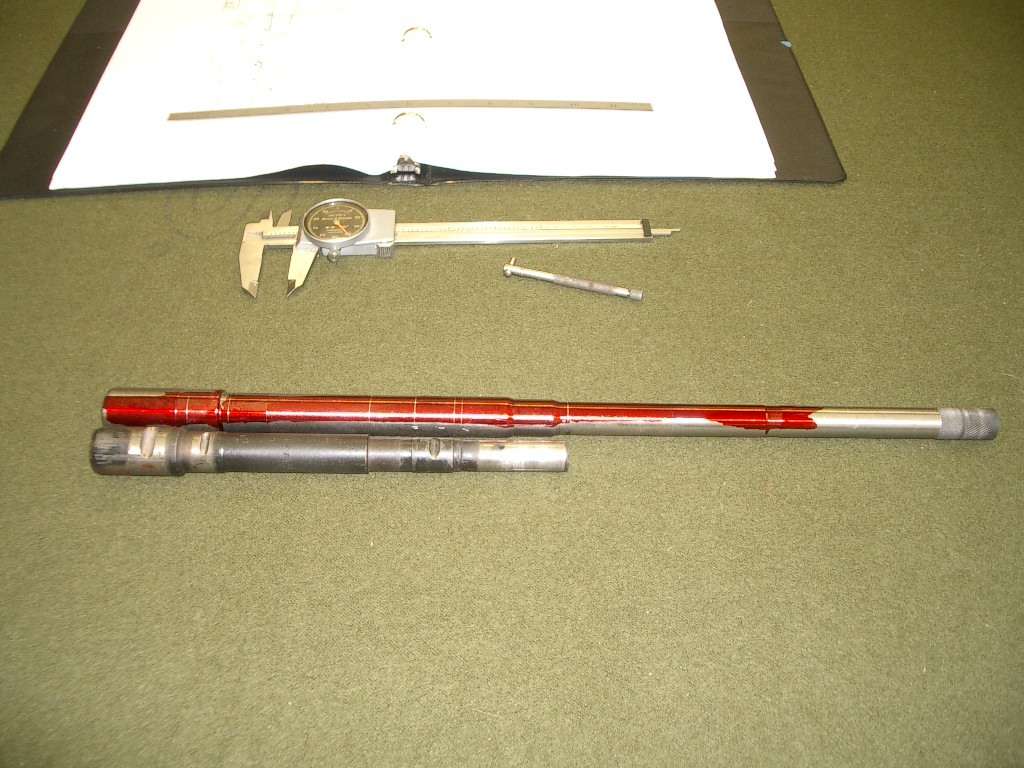
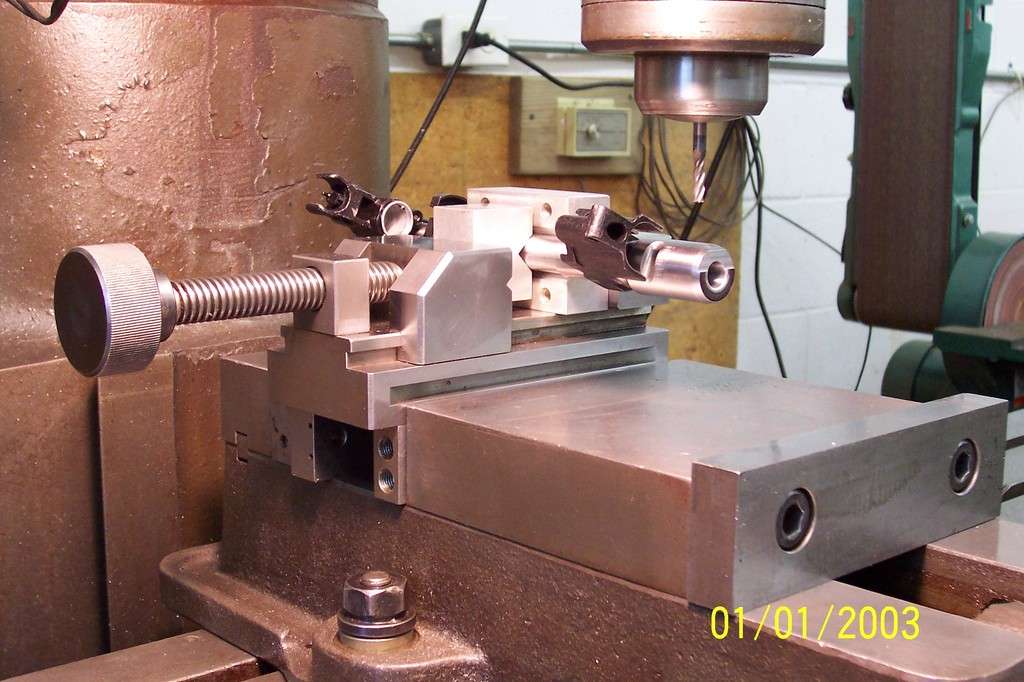
Here's some pics of the latest project barrel assembly just completed.
It started out as a Bulg. .223 Krink barrel assembly, but the parts were canted on the barrel and the owner wanted them removed and reinstalled on a 16" Virgin Weiger .223 barrel, barrel pressed into the trunnion and headspaced , barrel pin hole drilled and reamed, and then removed. He also requested that the muzzle threads on the Weiger be removed somehow but without cutting the barrel.
I decided to turn the threads off and reduce the dia. enough to press a sleeve of sufficient wall thickness on it and then turn the barrel back down to the proper size all the way back to the FSB/GB. Made the sleeve from a piece of cut off Bulg. barrel .
Uploaded with ImageShack.us
Uploaded with ImageShack.us
After sleeve was pressed onto barrel.............and the orig. Bulgy barrel and cut off barrel for sleeve donor

Uploaded with ImageShack.us
Uploaded with ImageShack.us
Uploaded with ImageShack.us
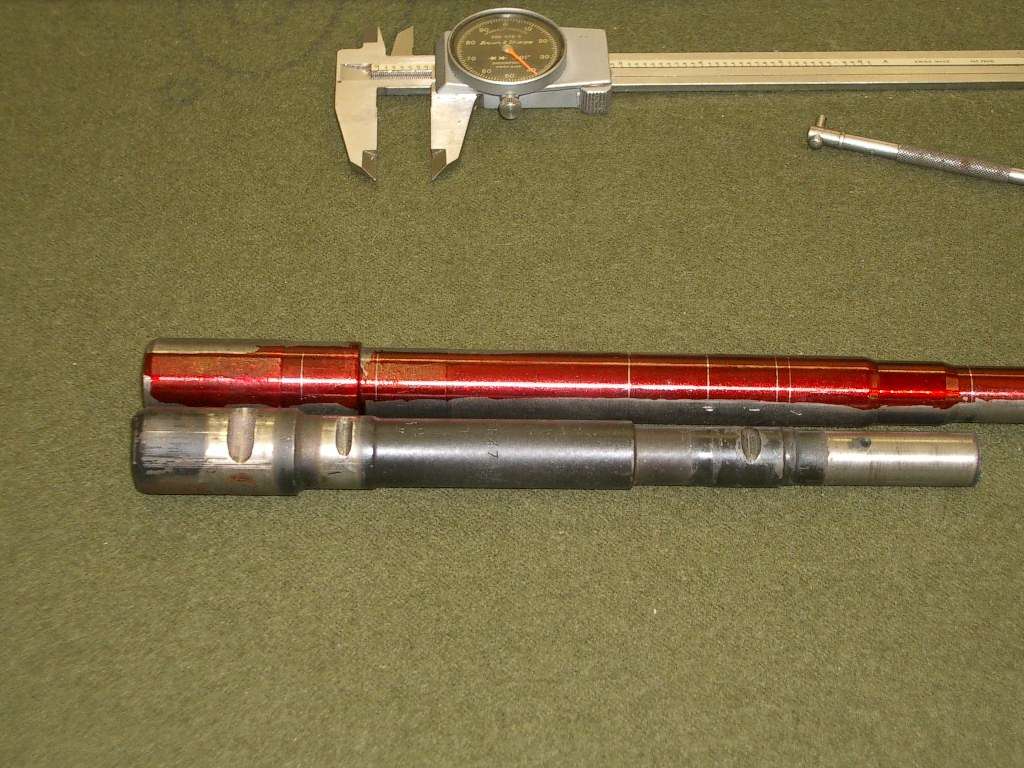
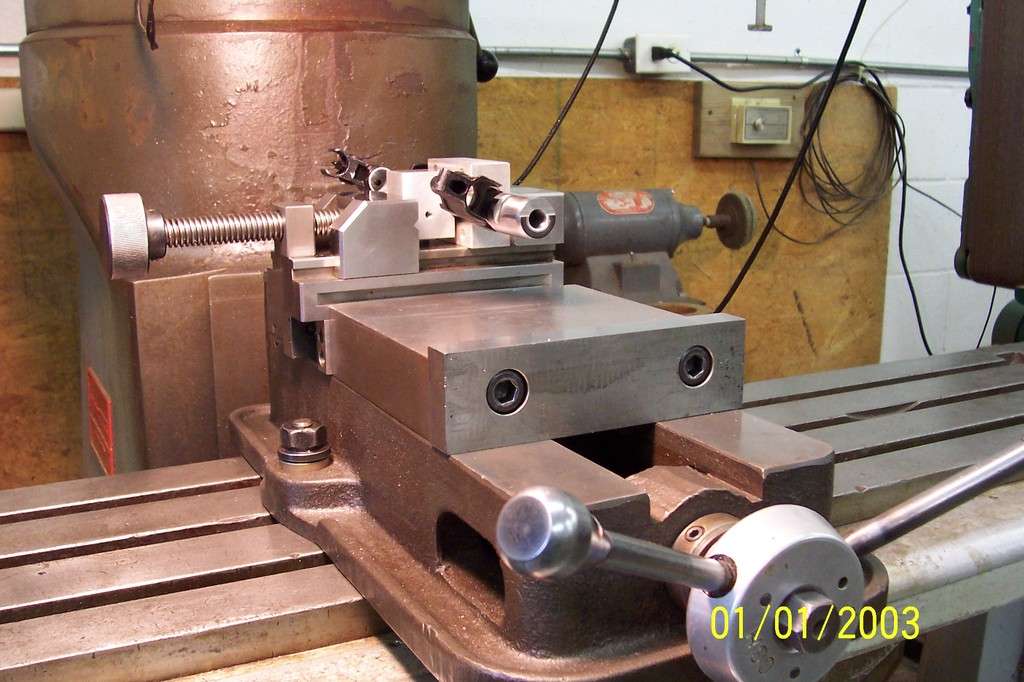
Orig. Bulgy 223 barrel next to the Weiger barrel. Turning down the sleeve and barrel back to FSB/GB journal.
Uploaded with ImageShack.us
Uploaded with ImageShack.us
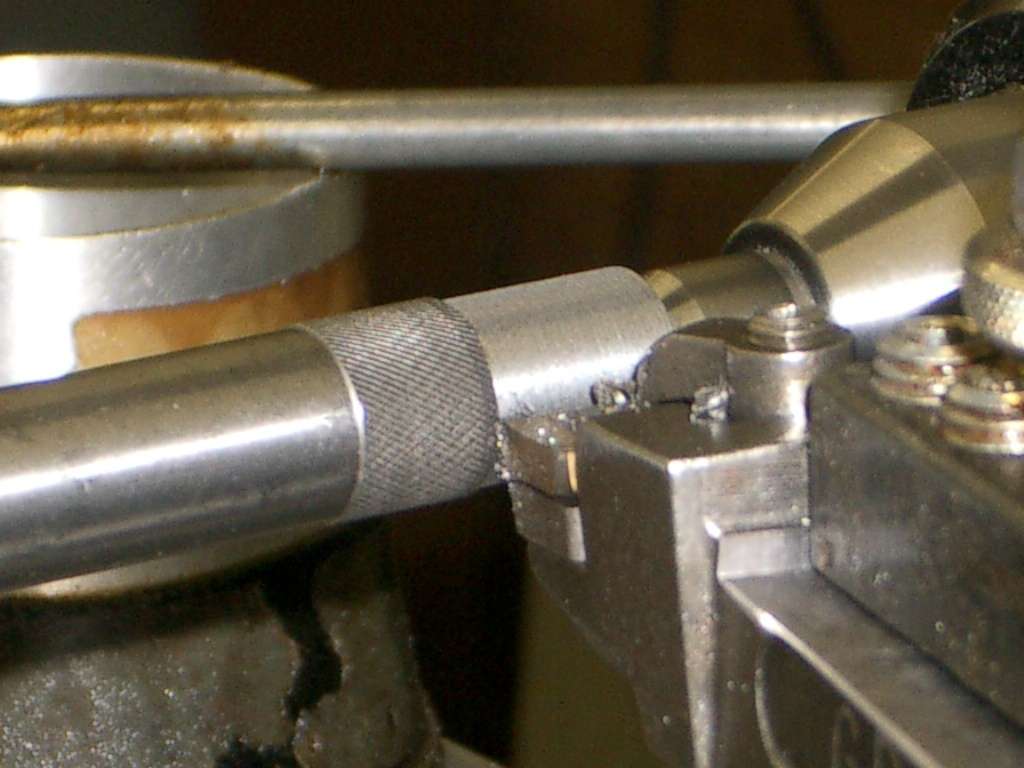
Uploaded with ImageShack.us
Uploaded with ImageShack.us
Uploaded with ImageShack.us
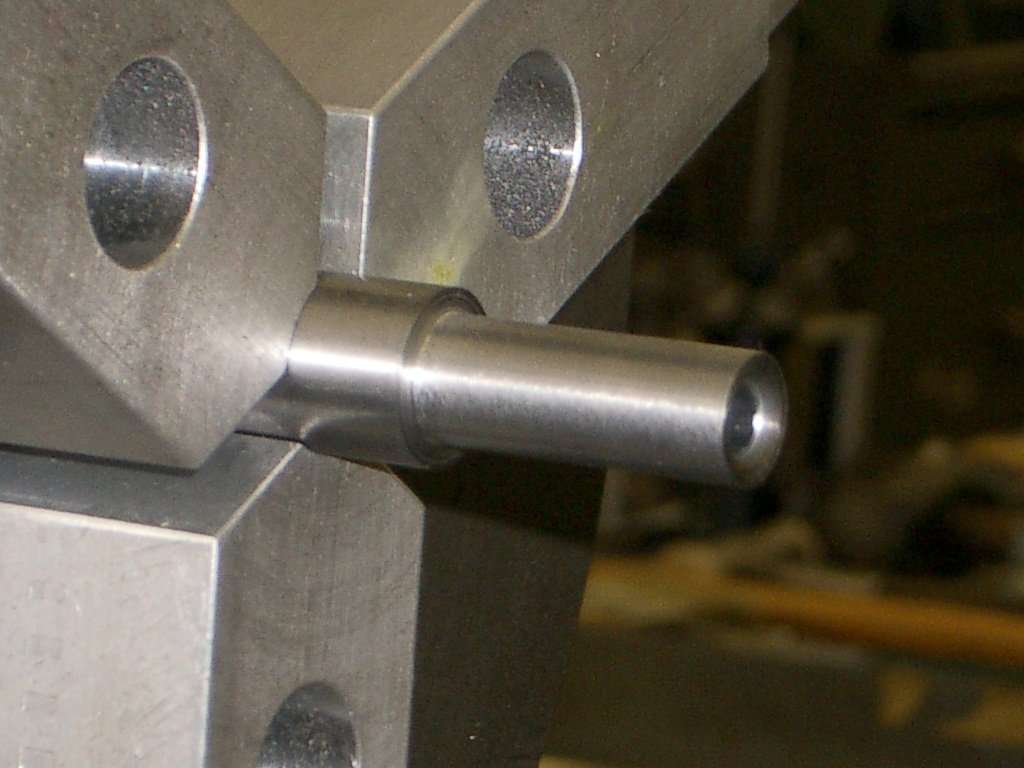
The finished profile and the re-assembled barrel after headspacing and removal.
Uploaded with ImageShack.us

Uploaded with ImageShack.us

Uploaded with ImageShack.us
Uploaded with ImageShack.us
Uploaded with ImageShack.us
Uploaded with ImageShack.us

Uploaded with ImageShack.us

Uploaded with ImageShack.us

Uploaded with ImageShack.us
Uploaded with ImageShack.us
-
Well, someone finally has finished a build and did give a somewhat range report, not in great detail but he seemed to be content with the accuracy for the distance and type of shooting he was doing. Hope you can view this if you are'nt registered there. This particular build was done with one of the six Bulg. barrels pictured in the above post. It starts in post #26
-
Just for the record..................it's M24x1.5 RH
-
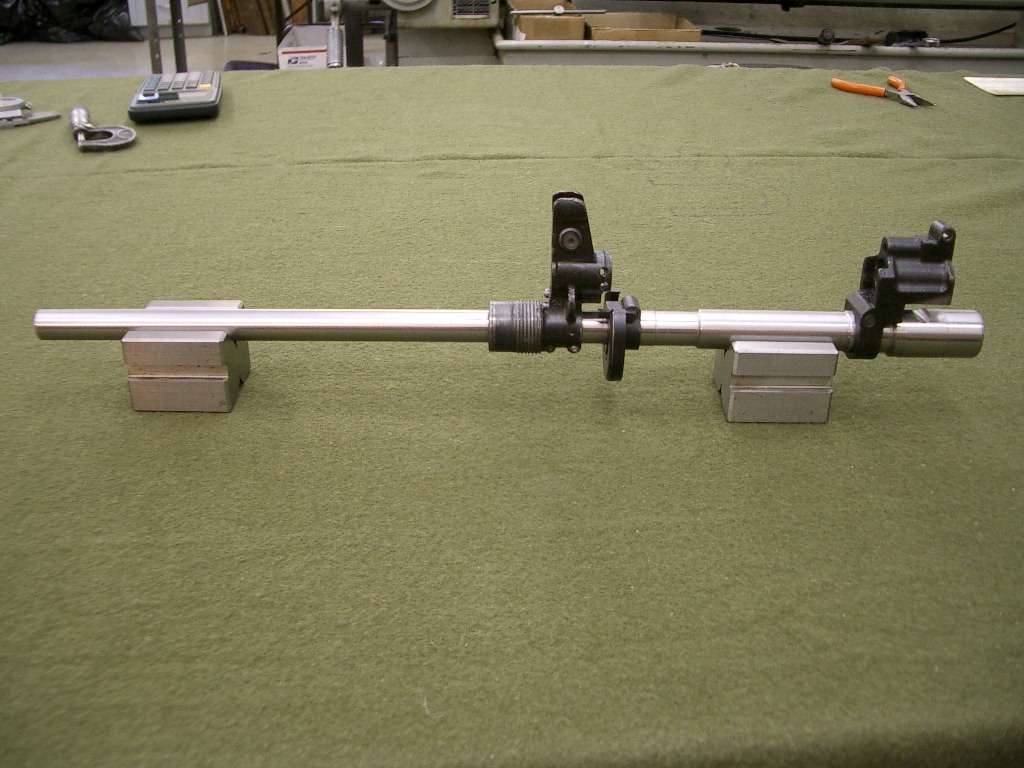
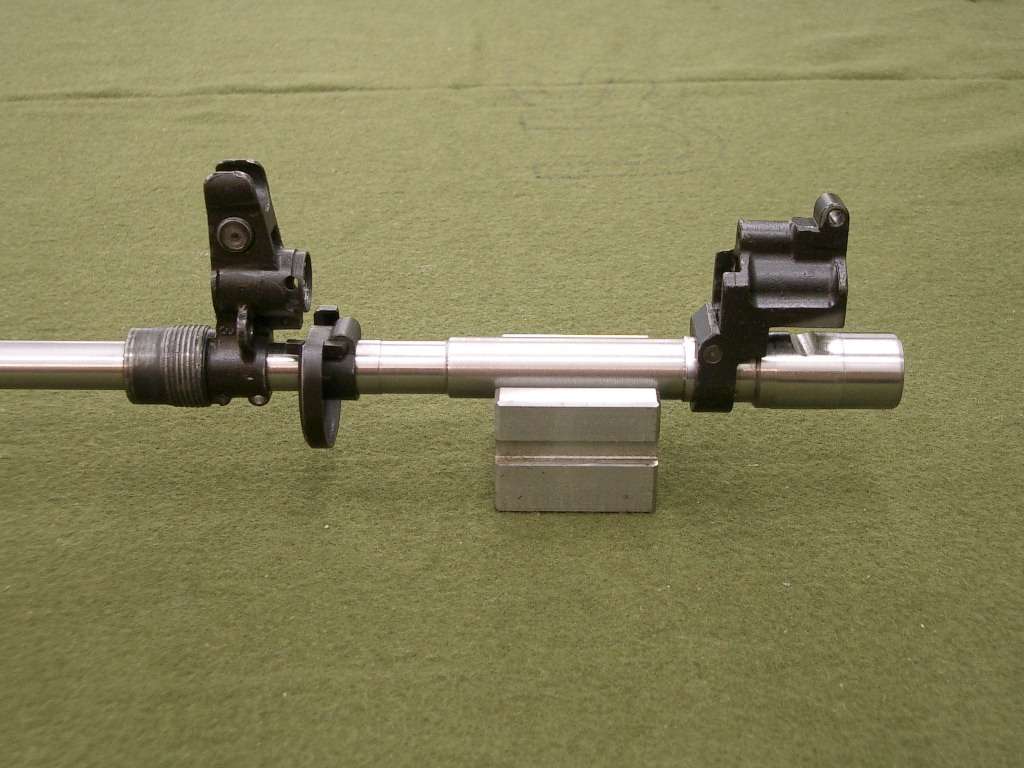
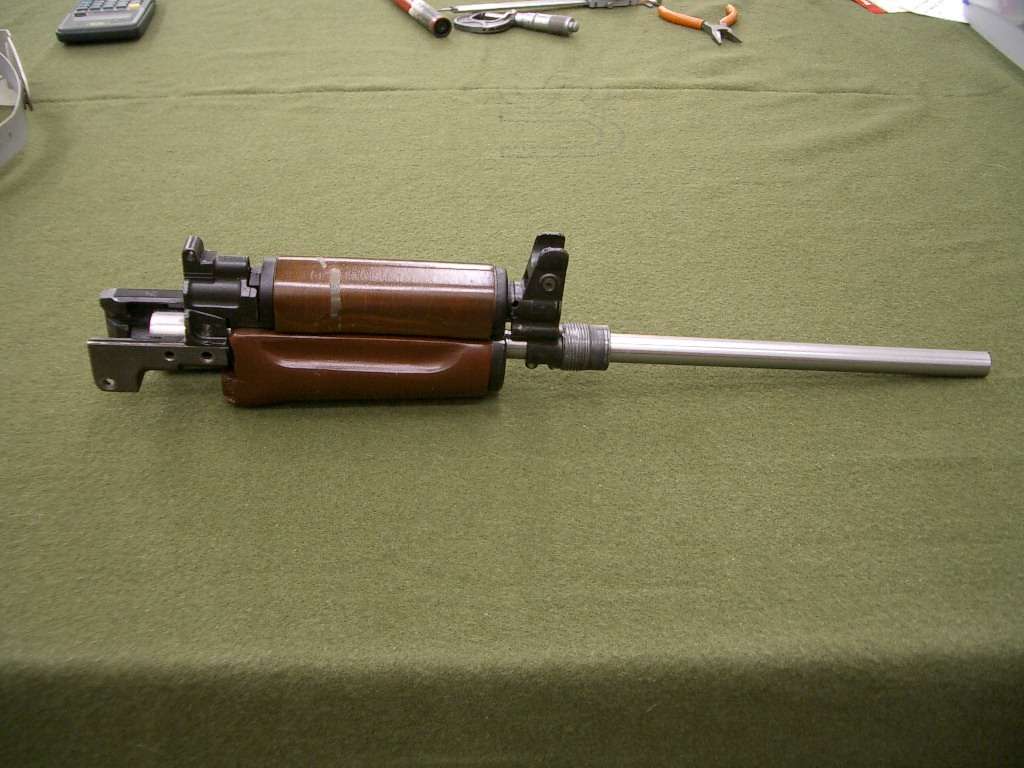
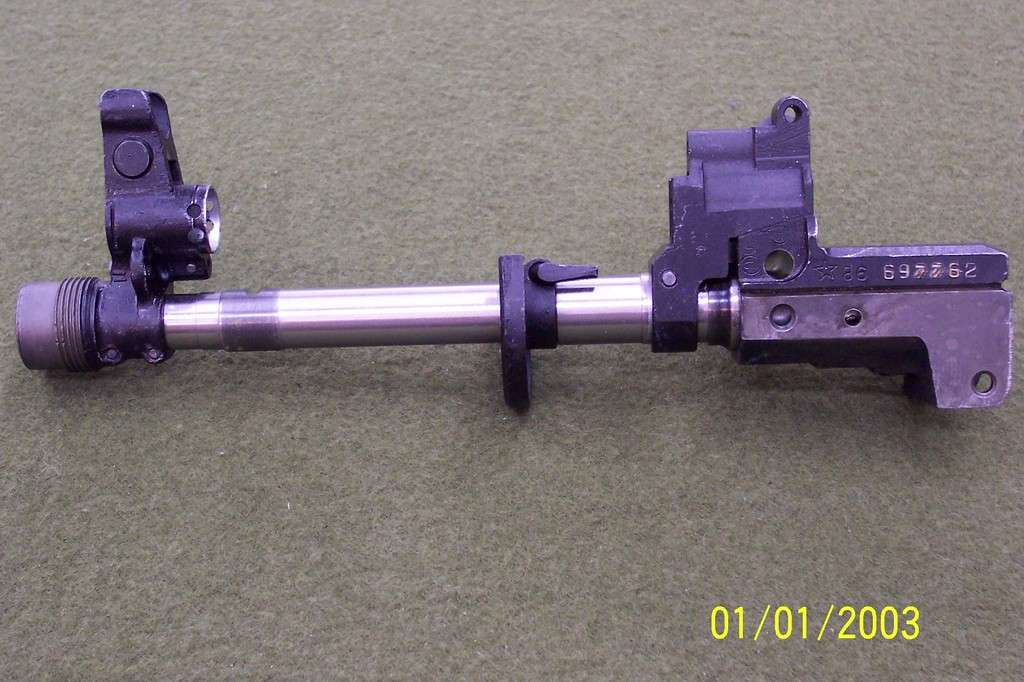
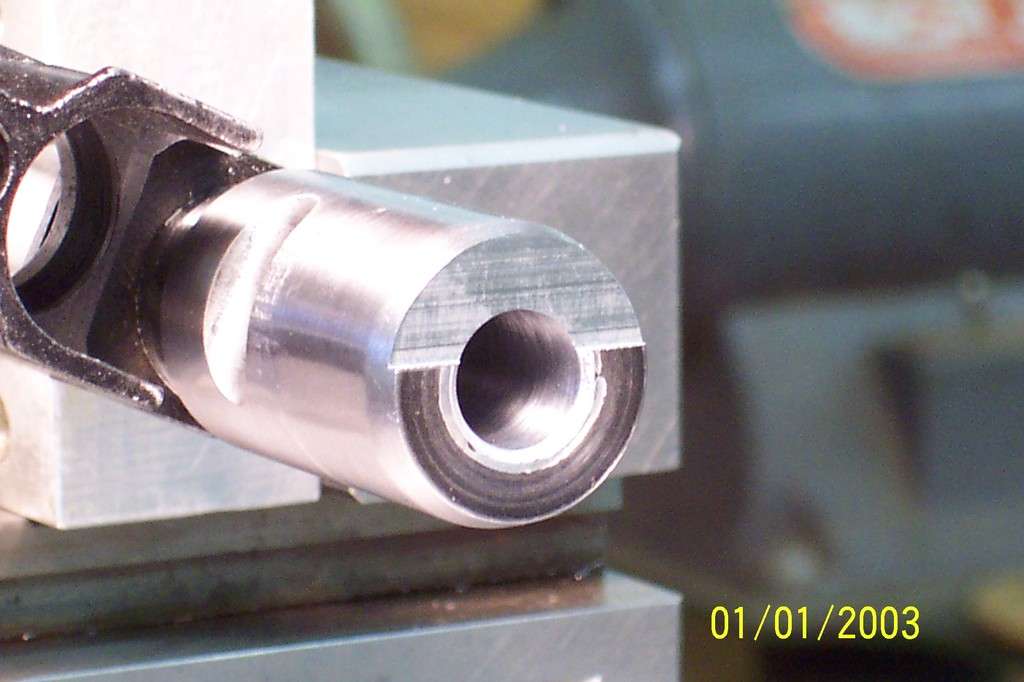
Finished up the first Virgin E.German barrel in Krink length today and thought you might like to see how it turned out.
On this one and one other I did the whole enchilada............. cut and profile barrel , cut new crown, drill new gas port , cut new HG ret. groove .........demill the entire kit and press out the stubs, reinstall and pin parts on new barrel, press barrel back into trunnion, headspace , drill and ream barrel pin hole, and then press the barrel back out.
Finish with the extractor cut..................
Enjoy................
Uploaded with ImageShack.us
Uploaded with ImageShack.us
Uploaded with ImageShack.us
Uploaded with ImageShack.us
Uploaded with ImageShack.us
Uploaded with ImageShack.us
Uploaded with ImageShack.us
Uploaded with ImageShack.us
Uploaded with ImageShack.us
Uploaded with ImageShack.us
-
OK Guys, I just did an update of this service with a price restructure and expanded it a little .
Please go here , and PM me for complete list of work offered with prices and details if you think you might be interested
http://www.theakforum.net/phpBB3/viewtopic.php?f=42&t=131494
Thanks, Chuck
-
ya, im guessing your right niner..... but id still like to hear if these cut down barrels can still achieve OK accuracy even though on paper they claim it wont.
actually i was curious as to where i found that info about my first post, so i dug it up and here it is if yall want to read it.
http://www.warriortalk.com/showthread.php?t=68739
also im pretty interested in your services loner42. i hope youll be doing this for the next few months. im currently deployed to shitland for the next couple months so thats obviously in the way.
I will more than likely still be doing it when you return. Stay safe and thanks for your service................
Chuck
USN 1960-1964
-
No, they are all 22mm.. except the one which was .871 dia. It's just standard deviation in the tolerances. I built 5 M92 kits prior to this project and all had the same size trunnion and chamber dia. except one. It was .010 bigger than the rest and the trunnion was too, so the interference fit was still about .001, just .010 bigger than the rest.
As far as was it a bigger project than expected, I'd have to say yeah. Alot of measuring and laying out dimensions , making drawings, double checking and soforth, but I'm pretty used to all that. I just don't have to do it every day now that I'm retired.....................


Romanian AK parts, Colt 1911 parts, AK100 parts, Chinese gas tube
in Unsorted Ads prior to November 2012 (WTS / WTT)
Posted · Edited by loner42
I'll take the two latches for 60.00. PM to follow