

rjwillow
-
Content Count
64 -
Joined
-
Last visited
Content Type
Profiles
Forums
Gallery
Blogs
Calendar
Store
Posts posted by rjwillow
-
-
If you don't get a beech forend, you can follow the method I described. Just sand the first dye/shellac coat down to the minimum of black streaks and continue with the method. The Beech stock may need a coat or 2 more to get to the same shade(or close enough). Or you can hit the Beech with a walnut stain before the black shellac....
I've touched up tons of instruments over the years in tons of different shades and colors. Pretty good at color matching by now... But believe it or not, Black (and White) are tougher to get right...
 But the distance between the 2 parts will make it a lot less noticable.
I don't know if you were responding to me when you said "anything you have for me" So I'll leave it there. But if you do want more advanced technique options, let me know...
later
rich
-
Getting the Beech forend will make life easier. I have a lot of experience with finishing Beech from my previous life as a Violinmaker and repairman...
Beech is hard and waxy but usually will take any finish. To get a uniform finish, I would seal and/or burnish the entire surface. You can seal the wood with cut shellac or burnish it with a hard maple dowel or a polished drill rod. You said that you wanted maximum "pop" from the grain.
One way to do that:
Seal the grain with cut shellac... 2-3 coats. You can just rag it on. 2-3 coats can be done in 4-5 hours. Leave it overnight and scuff sand it with fine sandpaper. You can use the sticky rag from the shellac as a tack cloth. Getting the dust and junk off the wood will go a long way in making a better result.
After it's sealed, you can add black dye (transtint or similar) to the shellac. You can go as dark as you want with the dye. rag on the dyed shellac just like the sealer. It's going to look ugly but don't worry... Once you get it covered leave it overnight. When it's dry you can wet sand it or steel wool with oil (mineral oil or olive oil is fine). You're going to take most of the color off just leaving the dye/shellac in the soft grain. You may get to a point in this process where you like it as is. So you can stop and just poly over it and you're done. Otherwise, keeep sanding until there is only the most dramatic streaks of black left. From there you can use an oil stain (ebony) or other dye (analine,leather dye or similar). The oil will be easier and less streaking.
Wipe on the dye and let it sit. Depending upon what stain/dye you use you may leave it overnight. You may be able to wipe it off with a polishing motion or might have to do the steel wool and oil thing. If you like the result, hit it with poly clear. If not, hit it with the stain again and repeat.
If you are more adventurous, there are options for adding the color to the clear and spraying... (That's my preferred method) But this way should be fine...
Let me know if you want more info...
later
rich
-
Hi, Nick...
Yup... don't file the front of the tube at all. FUBAR'ed my first one like that...
Look at the original tube and note the angles milled into them. If you have a new Polish or Bulgy tube , it will most likely be dead flat on the receiver end. You will need to match those angles and fit accordingly. Once you start roughing it in, hit the mating surfaced with dykem blue or even black sharpie... you will see scrub marks and know where to take off. A few passes with a fine mill file at a time..
One thing to keep and eye on is the right side shoulder of the tube... see if it rubs on the retainer lever. I put my retainer lever in the "open" position and filed the edge that stuck out past the rear sight block flush. I probably should have done that first. But I didn't see the interference until later in the fitting.
The relief cut on the bottom is not as critaical and can be rounded a little. But the top cut must match the angle for the retainer lever block.
Get it close as you can while it's still tight and put it on and off a bunch of times. Then polish out the file marks and check the fit again. If it's still tight but manageable, leave it alone and shoot it. It will probably wear in a bit and you can always take a few passes with a file or a little more polishing the next time you clean it.
Have fun,
rich
-
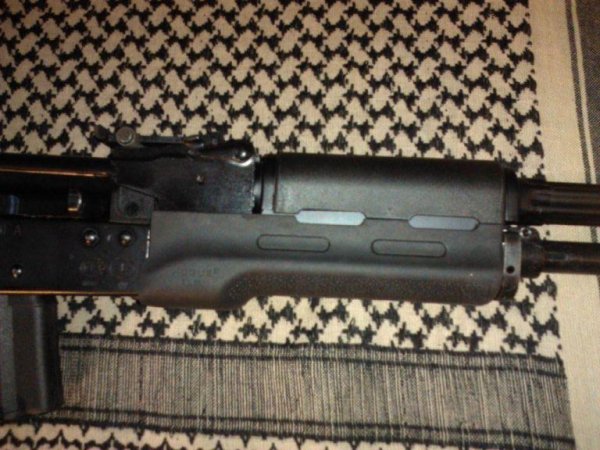
I like my hogue forend. If feels right to me. But I have hogue stuff on a lot of my guns so it's a feel that I'm used to.
If you can find a FDE one, it makes sense to match your grip. The newer ones are supposed to have a matching top/gas tube cover. Older ones are just black. Make sure you get what you want...
I don't plan on hanging anything off them. So the rails and top cover with the rail are relegated to the junk drawer.
I have a retainer spring in the top handguard and it is nice and tight. The hogue top guard has the cut out for it. Don't think if it would be tight enough for an optic. But I'm not going there anyway...
I was able to get the lower handguard nice and tight with a bolt on retainer that I made from a standard bulgy retainer. I've since swapped FSB and GB and now have a real lower retainer on. It isn't as tight as I could get with the bolt on but it it does fine.
The heat shield in the hogue seems like it would want to rattle, touches the barrel and interfered with my retainer lever, the gas block lever and cleaning rod. After trimming it, shimming it with tinfoil and finally breaking one of the tiny retaining tabs, I ditched it. I don't think it will be a problem and if it is I'll do something else. If hogue made a traditional grip with the overmold, I'd have one. I like the way the hogue grip feels. But I love the look of the standard AK grip.
good luck with the drilling
rich
-
 1
1
-
-
Basically... it's hot water that does the work. Then lube it. But I'll give some insight into some of the other stuff and some other recipes.
The windex thing comes from when they used to make an ammonia free product with vinegar and lemon. I used to have a 5 gallon bucket with 4 gallons of water and 1/2 a bottle of that windex in my truck. I would take the grips offf my blackpowder and fast draw guns that shot blackpowder blanks and drop them in. After sloshing around in there on the way home from the range or competition everything was nice and loose. I'd drop them into another empty bucket and hose them down, let them dry (or blow out with a compressor) and lube them.
Apple cider vinegar in water is also good. Baking soda in water may help "neutralize". I used to do a second bucket with baking soda in water when I got home before rinsing but eventually dismissed it.
Ballistol and/or hoppes will work w/out water if you soak it. But water is cheap. A slop sink is convenient. Or a kitchen sink and an understanding wife....
I've used my dishwasher and clotheswasher for a few things and got into trouble...
Just find what is convenient and don't sweat it
later
rich
-
Torch will do it. Don't really have to get it cherry red. Just get it to glow a bit and let it cool on its own. A carbide bit at a slow speed will do it too. Cutting fluid will help. Being nicely punched will help. Do NOT use a hammer drill. That's for soft materials.... well, softer than hardened steel. You'll shatter your bit and probably worse bouncing all over the place. I have a hand punch press that would have done a good job if I could find it. It has carbide bits and has gone through harder and thicker stuff in the past.
-
I'll second that motion.... recoil is negligable. I only notice what little there is when I rest it on the bench..
I put a 74 brake on mine just for looks and for the sound. I can only imagine what a 5.45 is like with the brake and all....
Any word on the reset thing?
later
rich
-
First of all... I think I have an answer to your red dot question: The one that Looks like an acog but is a red dot w/crosshairs is a bushnell. Sightmark makes one that is similar (probably in the same factory in china).
Anyway... back to the reset issue:
You can take everything out but the hammer and see if there is any interference with a screw,net, etc. I reused mySaiga stock triggerguard and the screw I used was long enough to foul the reset. Used a shorter screw and thinner nut just to be sure. All is OK now. Also, you can take out the hammer and look for rub marks where it might be hitting.
From what I saw on mine, if the screw/nut sticks up more than 1/8" or so, it can be a problem.
As for the spring, you can hand cycle it with the top cover off and see if the spring moves or ride up the BHO. Cycle the action with your finger on and off the trigger and see if there is any difference. The spring should stay put and just go up and down on the trigger legs.
good luck... let us know how you make out...
later
rich
-
Most likely a trigger guard screw too high and fouling the action. But also check that the hammer spring is sitting solidly on the trigger legs. Sometimes it slips to the side or gets up on the BHO (if you have one). You can bend the spring more inboard for a more positive hold.
Still I think it's a high TG screw.... not that I have any personal experience with it....
later
rich
-
Yup... in front of the firing line by 10' sometimes. I get a lot of "abandoned" brass that way. If it's completely trashed, I toss it. Otherwise, don't worry about the dings and such...
-
You sorta need the bayo lugs on the gas tube abd FSB for the cleaning rod to work. I pressed on a new GB and FSB so I could have a rod and Lower retainer.
I've seen a post here doing the thread in job. But I still think it looks better with the lugs.
-
You will be FL sizing anyway. Just reload them and chuck anything that worries you too much. I use range pickup brass for my Saiga along with stuff hat is out of my specs for my bolt guns and precision rifles, I have a "pool" of brass dedicated for "down and dirty" reloads....
-
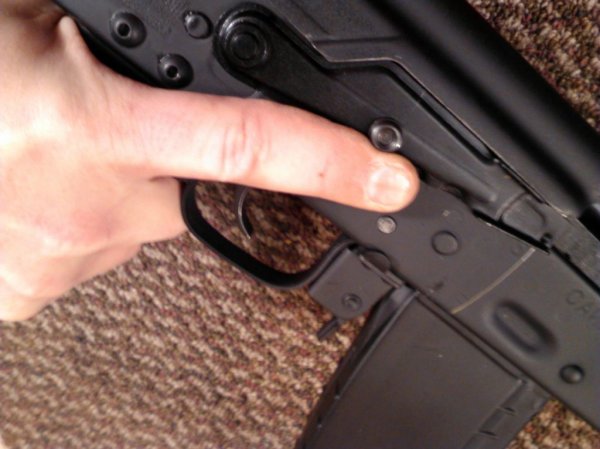
Here's another thing I did on my 223 conversion:
I used 10-32 hex, pan head screws from a screw build kit to fill the leftover Saiga FCG holes.
I tapped the existing hole to 10-32 and installed the screws with locktite. The holes on one side are undersize. So the tap is nice and tight. On the other side it is a little bigger than the minor diameted of the thread but the tap still bites enough. The locktite will take care of that. But if you want, you can put a nut of some sort on the inside for more piece of mind.
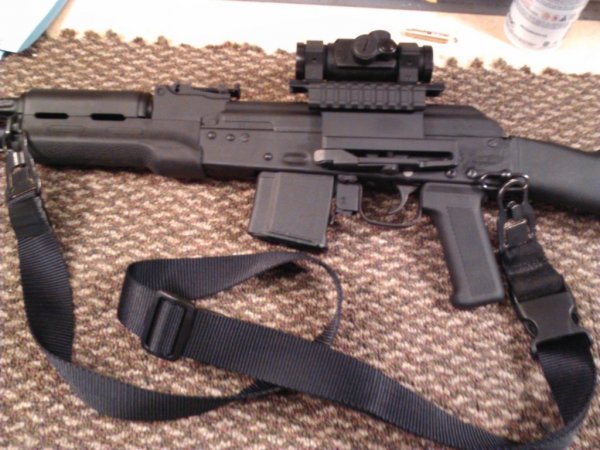
But here's the best part... I used the rearward most hole on the left side to mount a standard 10-32 sling swivel. The threads were strong enough, but I used and locknut on the inside. There's plenty of room inside the receiver so why not?
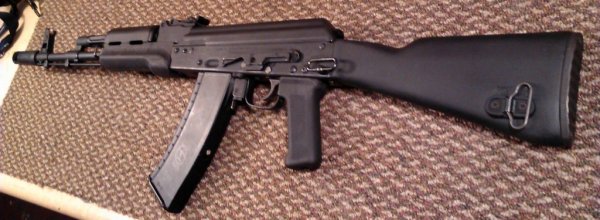
I figured that it might be in the way and foul my grip. But it's just about perfect for my sling arrangement. I use mash hooks on both ends of the sling. So i fit one to this swivel and one to the loop on the lower handguard retainer for a nice 2-point setup. If I want a bit more flexability, I detatch the front mash hook and clip it to the same swivel. It hangs like a single point sling but it's "pendulum" swing is reduced and feels more stable when moving. I have this same type of setup on my ARs and I like it a lot.
This arrangement as it stands will foul your side mount as the swivel body will interfere with the ability to slide the mount onto the side rail. I actually drilled and tapper a hole farther back on the receiver to relocate the swivel. But I have since modified the mount to clear and will be putting the swivel back in the original location.
Pics Below or in my gallery...
later
rich

-
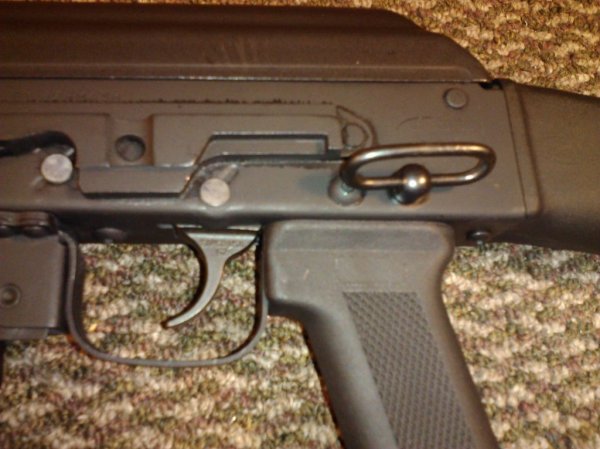
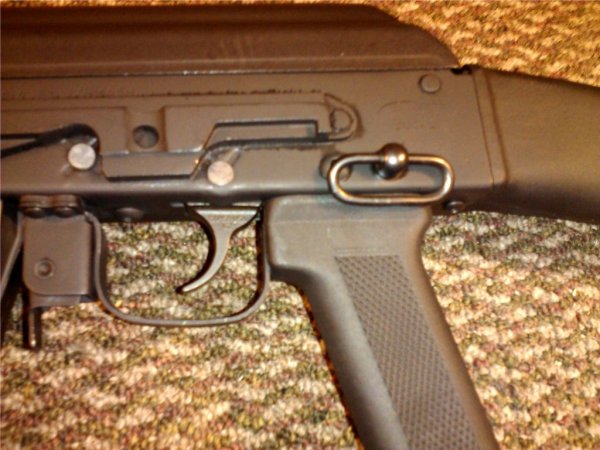
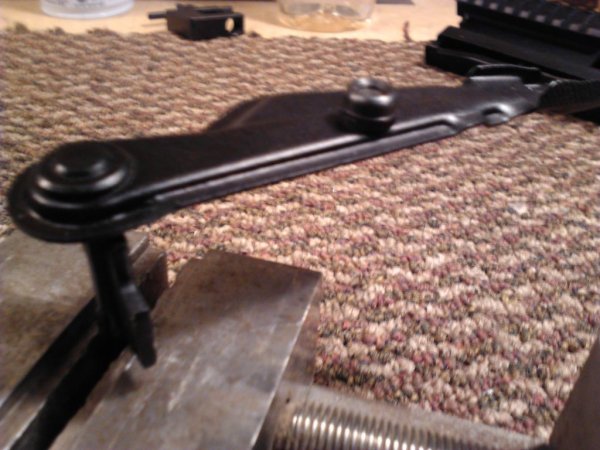
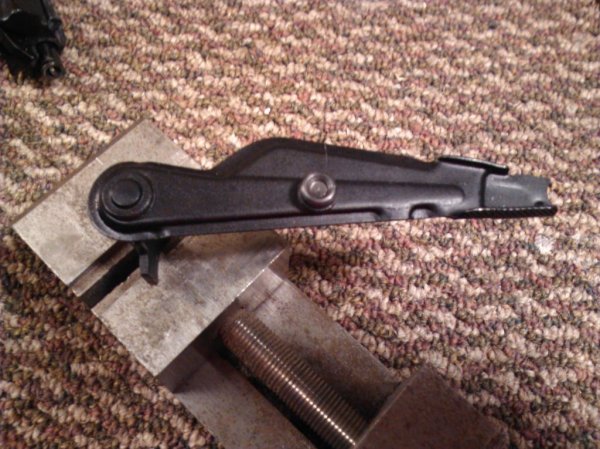
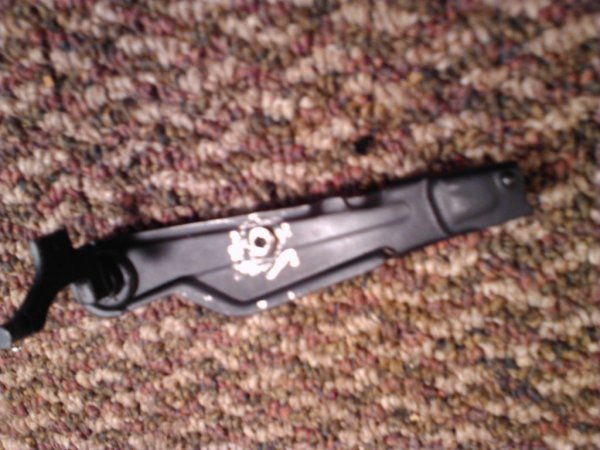
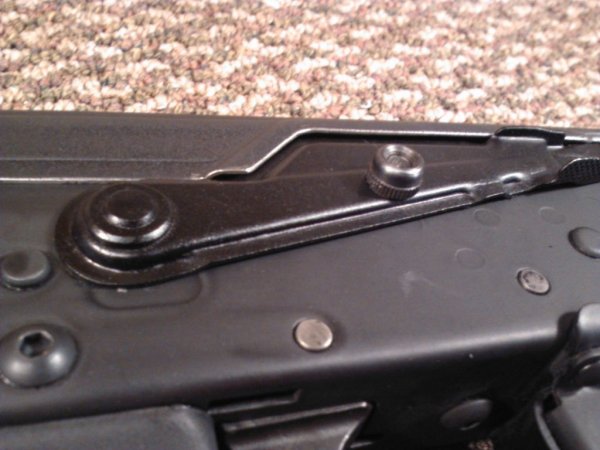
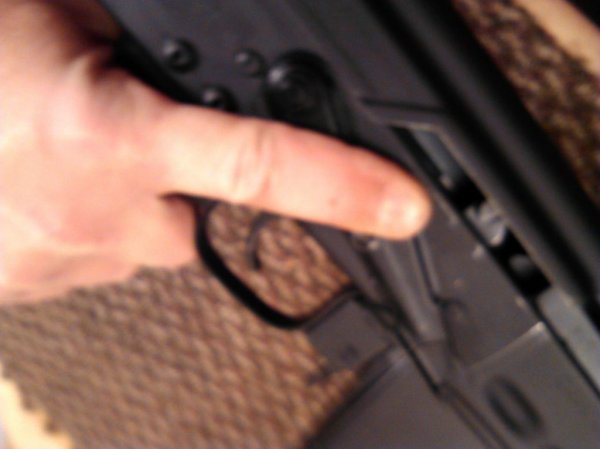
Hey Folks... I wanted to make my selector lever a little more finger friendly and be able to keep some semblance of a firing grip while managing the safety.
This is what a came up with:
I used a leftover 10-32 screw from a screw-build kit. It was hex-pan head when it started. I chucked it into my drill press and brought down the head height and diameter to fit into the stamped channel on the back of the selector.
I drilled and tapped 10-32 through the appropriate location on the lever.
I installed the screw from the backwith locktite and put a knurled nut on from the front. The nut came from a sling swivel kit from my junk drawer. Some locktite on that and it's done.
I have my selector tension dialed in so it's pretty smooth and positive. So this mod feels really good. I also like that I have a positive tactile indicator whre I can index my trigger finger.
I'll add some pics below. Otherwise they are in my gallery...
later
rich

-
2
-
-
5 presses on one bench.
45 acp and 9mm on a dillon sdb
10MM, 45 Colt and 44mag on #1 lee pro 1000
357, 38spl, sometimes 38/40 on #2 lee pro 1000
222, 223 on a lee 4 hole turret press
48/70, 38/55, 32 Win Spl 38/40 on a lee challenge single stage
I also do factory crimp for various calibers on the single stage as well as sometimes priming.
I like the dillon for precise reloads and a smooth feel. But the lee stuff is like the AK of reloading. I is a little looser and rattles a bit. But it is designed that way and is cheap. Once you get the hang of it and have it set up, it always works. I have all calibers set up on quick change turrets and plates.
I was going to do 10MM on the dillon but gave the pro 1000 a shot and I like it better. I use a higher volume powder and the lee handles it better. I crimp separately on the single stage.
For 223 for my saiga and standard AR, I do "down and dirty" full length size, prime, charge, seat, crimp. I use the same load data as my precision bolt gun and dmr AR. But I use mixed range brass without all the prep.
I wouldn't suggest anyone follow my lead. But it works great for me...
-
Yup, I'm happy with it. I think the groups had more to do with getting more (too) comfortable and rushing than anything else. And the shooting 5 rds at a time had more to do with me starting to wobble and barking off rounds without being settled.
In a solid rest with my reloads, I'm sure that I could shrink the groups a bit. But that's not what I bought it for. I save my primo brass and load pricise rounds for my Savage/Stevens. The Saiga gets fed range brass and out of spec stuff. I'm not really curious enough to bang up my precision rounds' brass with the AK kiss...
-
Yup... sub MOA out to 300 yards any Savage 223 will do. My Stevens 200 will do .5 MOA or better at 100 and 200 yards. At 300 it does 2 3/4". With russian Steel case ammo it will still hit 8" steel plates at 100 and 200 and becomes very boring. My Saiga will hit those plates as well, but it's more fun/challenging. Like Liberty said, no one gun does it all. But I expected that the Saiga 223 would be my 50 yard rapid fire (fun) gun. It turns out to be much more than that...
later
rich
-
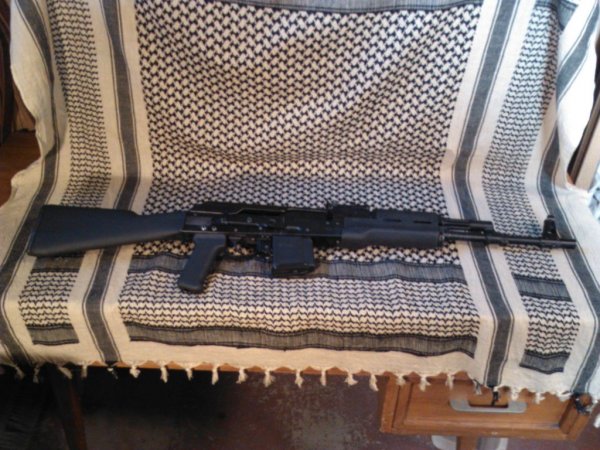
My 223 Conversion totalled $466 including the rifle and one extra surefire mag.
Then I added the CSS bullet guide and 4 more mags (Bulgy and Tapco Galils) and a US Gas Piston... Went up to $588
Decided to go with a traditional-ish Hogue HG a Polish Gas Tube and made my own retainer out of a Bulgy.... $679
Couldn't leave well enough alone and knocked off the FSB and GB and got Bulgy FSB, another retainer, GB ,74 brake and cleaning rod from MarkW1...that along with some other parts, accessories and such got me to $809 to have it the way I want it. Not all that bad really.
But if I go to the total of all the parts, supplies and accessories that I bought and didn't like or messed up, I'm at $951.
But I saved a bit because I did everything myself and now know what I like and what I don't. So I'm thinking my nexy 5.45 and 7.62s can stay $650-700
I can hardly wait...
-
I like mine a bunch... they feel great and look close enough to original for me -
I hear you, Mr Jim...
But it was $20 for the Polish tube and I like knowing that the tube is fit to my rifle.... and knowing that I can fit it to my rifle...
I will probably loosen mine a bit after I do the FSB and gas block after seeing how everything lines up.
To the OP: Take Jim's advise if you don't feel comfortable fitting the Polish tube.
later
rich
-
My first shots with my S223 at 50 yards with Ulynvosk (sp?) 55 grain made a 1" hole with all shots (10rds) touching. This was at a bench just resting my arms on the deck. After I adjusted the sights to point of aim and blasted a bit, the group started to open up a bit. With the same ammo and some wolf 55grain, The best I was able to manage was 4" at 100 yards with irons. But I am happy with that because I can hit my 8" gongs offhand at 100 and 125 regularly. Almost 100% if I don't try more than 5 shots at a time. 5 shots, rest at low ready, up and 5 more...
I have no interest in mounting optics on mine. But I did change the front sight to one of those red plastic tapco jobbies. Helps a bit...
later
rich
-
I would normally say to just reload 308 in order to have an accurate and cheaper to shoot rifle. But 308 isn't cheap to reload anymore.
I think a "couple hundred more" might not get you an AR. But you could probably build one for that $$$. If you can do a saiga conversion, you should be able to build a nice AR. Or get a DPMS bull barrel /varmint upper for about the same as an unconverted Saiga and just build the lower.
If you are going for accuracy, the AK sights may hold you back a bit. By the time you add rigid mounted optics to overcome the AK sights, you will be in AR $$ country.
I have 3 ARs and my saiga 223 is my first AK. Probably won't be my last. But I went with 223 because I shoot and reload 223 for many rifles. I feed the s223 the same recipe for my Precision rifle.... Just without all the case prep... just full length size, powder and crimp.
If you want cheap, 5.45 may be fun and probably close to the accuracy of the 223. But the cheap 5.45 is getting close to or is the same as cheap 223 lately.
I would get the just get S223 so later on you can justify the purchase of a AR by knowing that you shoot/stock/reload 223 anyway...
Good luck!
rich
-
+1 on the Polish tubes from Apex... If you want it tight, it's the best way to go. I was able to fit mine to a way tight fit. Maybe tight enough to use the railed upper handguard that came with my Hogue. Gotta try it...
-
Tapco Galil mags work the best for me. A couple of them wobble a bit... but only when empty.
I also have modded the follower on Bulgy 74 mags and have zero issues. But I can't load them past 15rds anyway where I live. I have them blocked to 10 rds and 15rds.
If you want the curved look of the 5.45/AK74, go for it. Just don't bet you life on loading more than 10-15 rounds in them. For looks and range play, they're fine.
Advise me on Dyeing/Staining wood AKA Stock Options
in Tech Section
Posted
Burnishing in this case would be rubbing the entire surface with moderate pressure with a hardwood dowel or polished drill rod. Even a smooth polished/chromed screwdriver shaft would work. The goal is to close up the cells of the wood and compress them a bit. It makes the stain absorbtion more uniform. You will get less blotchiness and no darkening of the end grain.
More of a back and forth motion taking long passes when possible. Start with about the same amount of pressure you would use with an eraser on a pencil and add more until you see the surface get shiny then add a bit more speed with the same pressure thereby generating a little heat. Shouldn't take more than10-15 minutes...
Yup, you can do the walnut part and see what it looks like. Then, either hit the stock with walnut stain or just the black. I would probably try the walnut stain on the beech while the forend is still in a natural state to see how it matches. If I could get it close, I would then do both parts at the same time. If not, I would go the way you suggested.
If you do get a walnut stain, try to find an "antique wanut" as many walnut stains tend to have a bit more red in them. Beech has a lot of red in it that you don't notice until you stain it. A few drops of blue transtint will tone down the red. Black won't do it. it will only make it a dirtier red.
Keep in mind that when you're done, you will have 2 items that match in color. But the grain structure will be different. So you will probably need to go a little darker than you think. Also, go with less gloss on the top coat...
Good luck,
rich