

nitukamots
-
Content Count
74 -
Joined
-
Last visited
Content Type
Profiles
Forums
Gallery
Blogs
Calendar
Store
Everything posted by nitukamots
-
What tube are you using for the MOE? I have a CTR and waiting on the TITAN. My Tube is the CAA aluminum and I know I will need a riser. would be good info for me too!\ And GF does have alot of good ideas and help around here!!
-
 The best to both, and GOD is watching over "shotgun style"
 -
 That is a good tip !! I never thought about the factory stock for fill material. I will have to test the plastic for compatability. One idea is to use my plastic welding equipment for the build-up (tempreature controlled heatgun with special tip that feeds plastic rod) and fuse a build-up. The trick is to determine the plastic type of the magazine and use the correct rod for the weld (just like you would with metal). Then a simple file job to shape. If I don't have compatable rod, then I'll use a bonding agent that will chemically bond fill material. Yes I will do a detailed post on the mo
 -
Yes, I have read about the sheard ribs, but I also have a possible fix that I am working on, one is to notch the mag as others have done, the other is a buildup of material. With my experience of working with many different materials and compounds I hope to develope a solid fix. It will probably be posted for others to explore when I arrive at the best method I can come up with. Maybe it will lead to something even better.
-
 Absolutely, alignment of the magazine and subsequent position of the next round to be chambered is based off of the forward edge of the magazine opening in the receiver, as I have learned you can remove small amounts of material from the sides of the opening (as per R&R), but NEVER remove any from the front.. Do you have a small amount of "rock & lock" action just before the mag latch catches on the JTE magwell? I have found on the TAC 47 magwell, the last bit of travel is the rear of the magazine just before lock-up. I don't know who's is better or worse, I chose the TAC 47 f
 -
I see, You have the JTE magwell and safety stop. it looks like the magwell is narrower than the TAC 47 magwell, but I'm not sure of that. Nice aluminum work on both!! I build, modify,and maintain aircraft by trade and have decades of sheet aluminum experience and tools. If you find you have a need for 6064-T3 ,up to .120" I probably will have some in my shop (most common is .040, 060, .080), just let me know and I'll see if I can help you out.
-
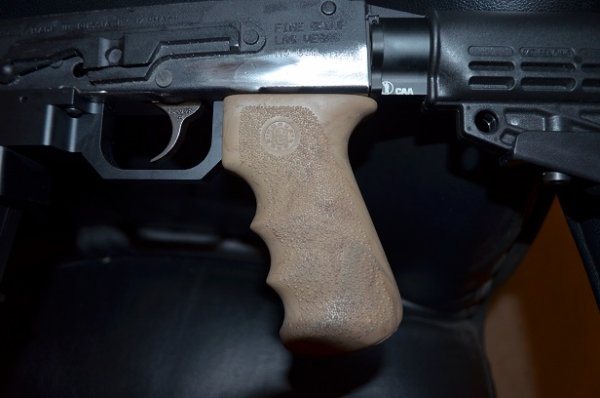
 GunFun, As a newbie to the AK platform I was not sure what should be modified. After speaking with Cliff @ TAC 47 it became clear that the correct thing to do was to modify the grip. The mark represents the amount of material in the grip that prevents the two from properly mating. As I was informed by cliff the SAW and other AK grips are cut to mate with this grip tang. After studing the grip I found a simple way to do the mod and keeps the internal "plastic form" of the grip in contact with the bottom of this tang, my concern with the mod was the stress induced on the trigger guard by wedg
 -
 The Titan rail is SICK !!! Wish I had mine now!!!
 -
Powder Springs M10/.45acp
nitukamots commented on MCASgt New River's gallery image in forum.Saiga-12.com Gallery
 I want one !!!!! No, I want 2, one for each hand !!!
 -
GunFun, How did you install it? Can you post a picture?
-
From the album: Tac47 Magwell Conversion
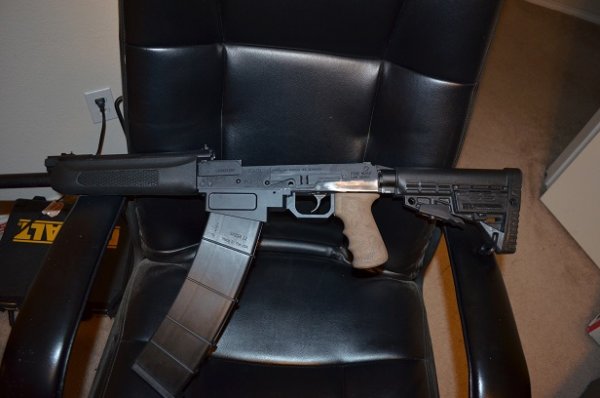
Here, after talking with Cliff at TAC 47 I now understand the issue with the grip and with some careful measurements and material removal, the Houge grip now fits perfectly. It is not difficult to do with easy to control tools. USe a drill that has variable speed, not a triggger with just a on/off I may do a post on this if anyone is interested. Next is fitting the FCG, then it is time to prep for refinishing. Can't wait to get my CHAOS TITAN rail !!! -
From the album: Tac47 Magwell Conversion
Here she is after welding the unused holes and smoothing them out. (2) on each side, (2) on the bottom, the old trigger guard holes at the front holding the cover plate on, and back rivet hole near the edge of the receiver, what was the rear trigger guard. The SGM/Surefire magazine has been fitted to the magwell now too. I will attempt to mod one of the AGP mags if it will work, if not I guess I'll have 3 to sell. -
From the album: Tac47 Magwell Conversion
Before disassembly I mounted the CAA aluminum tube and mounted a temporary butt stock to check fit and cheek weld.Now it will be disassembled, holes welded, painted and can then begin final assembly. MORE TO COME ON THE PROGRESS -
From the album: Tac47 Magwell Conversion
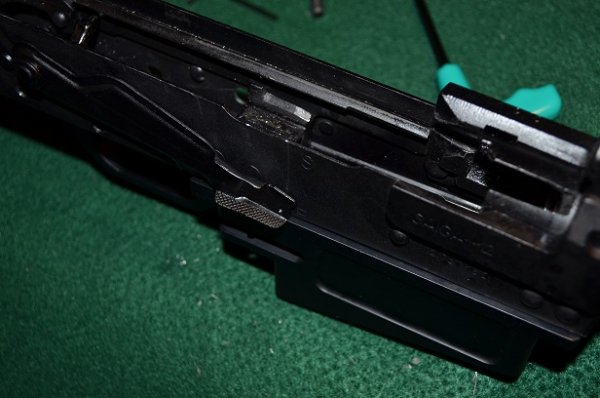
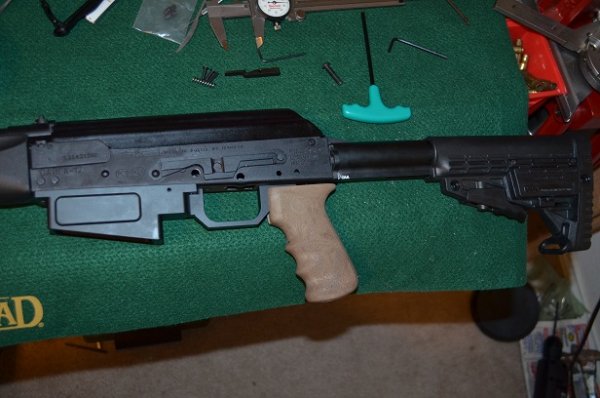
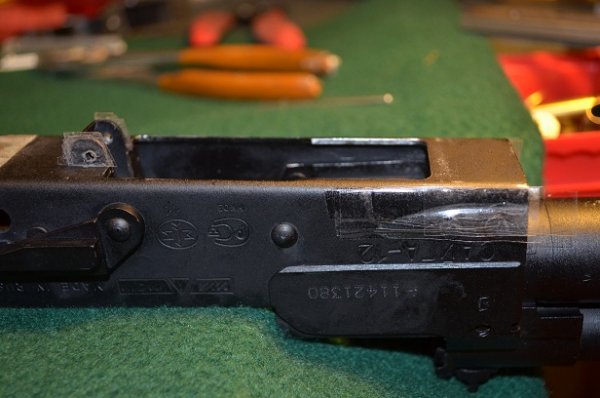
In this picture I removed a small amount of paint on the edge of the receiver magazine opening so you can see the alginment a little better. Other than locktite on all screws and the instalation of the magazine catch/release, this woud be complete. I am removing the magwell to complete the relocation of the FCG, welding the unused holes and will modify the pistol grip. -
From the album: Tac47 Magwell Conversion
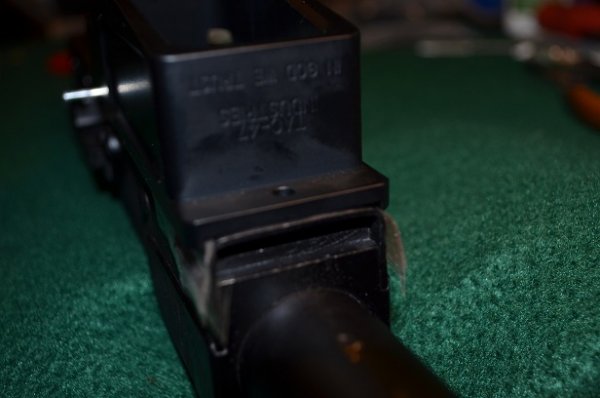
The most critical part of this installation is to make sure that the front of the magwell opening is flush with the receiver magazine opening and check your screw hole alignment many times BEFORE you drill. -
From the album: Tac47 Magwell Conversion
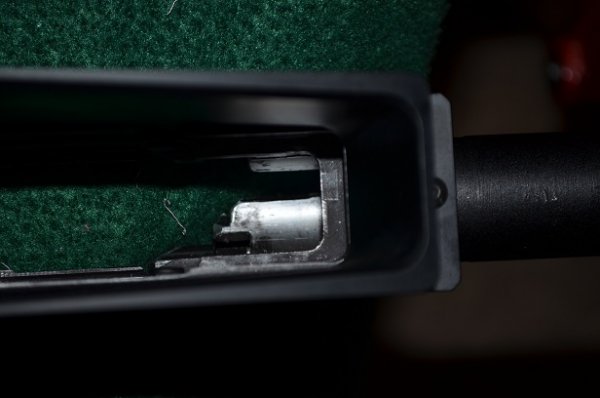
One interesting note, as you can see, there is no need for a safety stop, the edge of the magwell does this quite well -
From the album: Tac47 Magwell Conversion
The mark shown indicates how much of the internal form of the grip has to be removed, it is angled this much. The forward edge of the grip has to have material removed as well. If soemone is interested in this prceedure I would be willing to do a post on it. -
From the album: Tac47 Magwell Conversion
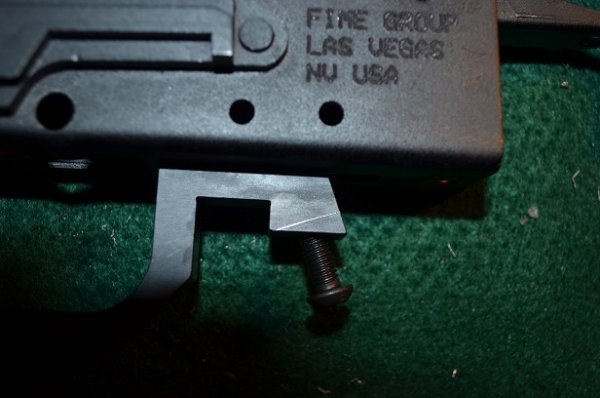
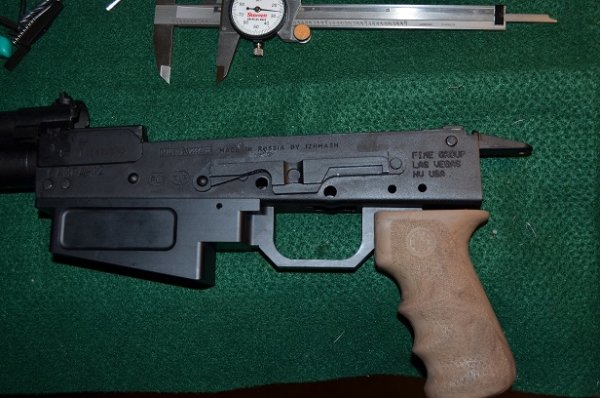
I then found that the aft trigger guard screw was larger than the factory hole in the receiver, after measuring the screw it was determined that a .250" drill bit would be required to open the hole. After removing the magwell I opened the hole to correct size and reassembled the magwell including the aft guard screw. Then was time for the pistol grip fit. As you can see the Houge grip would not seat against the receiver. There is a required amount of material to remove from the grip to fit it. unlike the Saw or other AK grips, I have Houge on all my weapons and love them, so it was worth the -
From the album: Tac47 Magwell Conversion
The magwell was put into place, and screws installed without thread locker for test fitting purposes. -
From the album: Tac47 Magwell Conversion
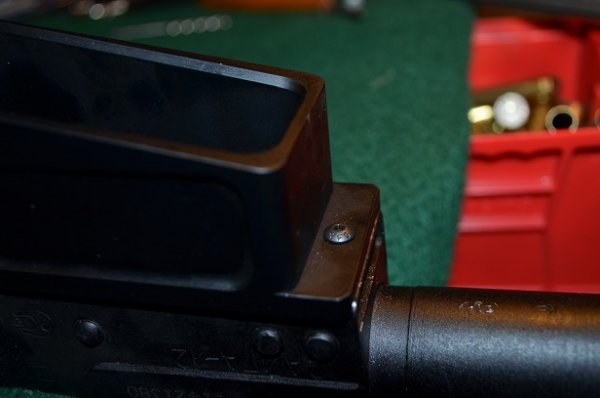
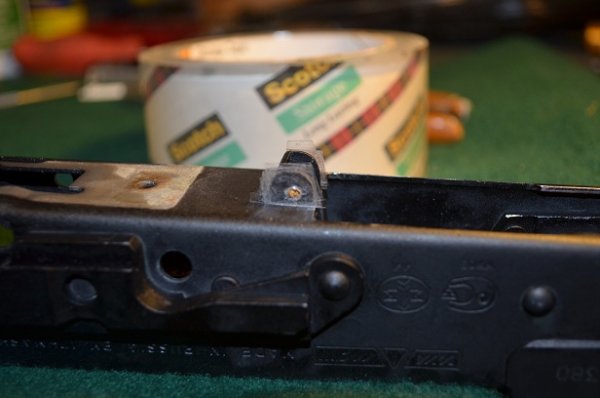
Here you can see the packing tape at the forward end of receiver and magwell. I used a roll pin punch the same size as the holes in the magwell to mark the hole locations. This worked very well, If your not familiar with what that is, it is a punch that has half of a ball on the end, slightly smaller that the diameter of the punch. The ball made a very light mark of where center of the hole is and made center punching the spot for drilling much easier. I then removed the alignment rod and magwell, punched and drilled the 3 holes with the #36 drill bit, and taped with the 6/32. Be sure to use t -
From the album: Tac47 Magwell Conversion
I also used packing tape at the forward end of the receiver to center the front of the magwell. (NOTE: do not place tape over the radius or it will prevent the magwell from seating correctly and the holes will not properly align after drilling -
From the album: Tac47 Magwell Conversion
Installing the magwell: Place the magwell on receiver and insert the alignment rod thru the magwell and factory magazine release pin holes, this helps to align magwell to gun. I notice with my gun that there was a lot of side to side movement so to help with centering I layered packing tape on each side of the mag release mount to fill the gaps. This centered the magwell nicely and helped to prevent movement for setting the location of each hole to be drilled. -
From the album: Tac47 Magwell Conversion
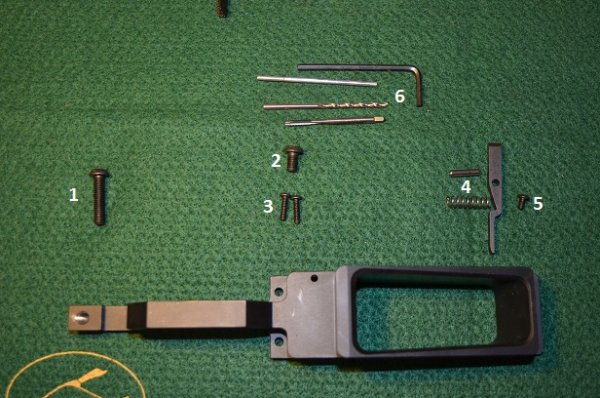
Here are the parts included in the TAC 47 MAG-12 kit. (1) Pistol grip screw, (2) Aft Trigger guard Screw, (3) Forward trigger guard/aft magwell screws, (4) Magazine release/spring/pin, (5) Forward magwell screw. (6) Installation tools (top to bottom) allen wrench, alignment rod, #36 drill bit, and 6/32 tap. -
From the album: Tac47 Magwell Conversion
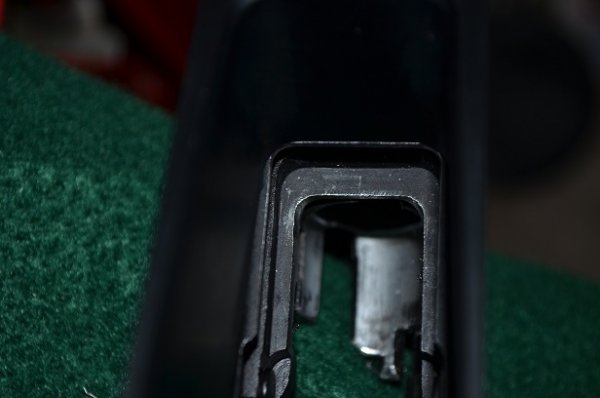
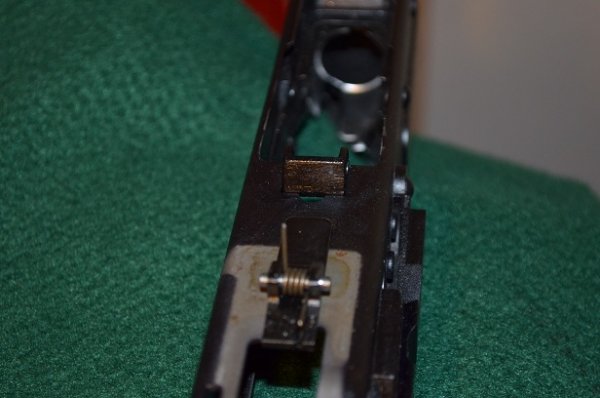
The Magazine release, spring, and pivot pin removed and ready for the next step.
