

undertoad
-
Content Count
23 -
Joined
-
Last visited
Content Type
Profiles
Forums
Gallery
Blogs
Calendar
Store
Posts posted by undertoad
-
-
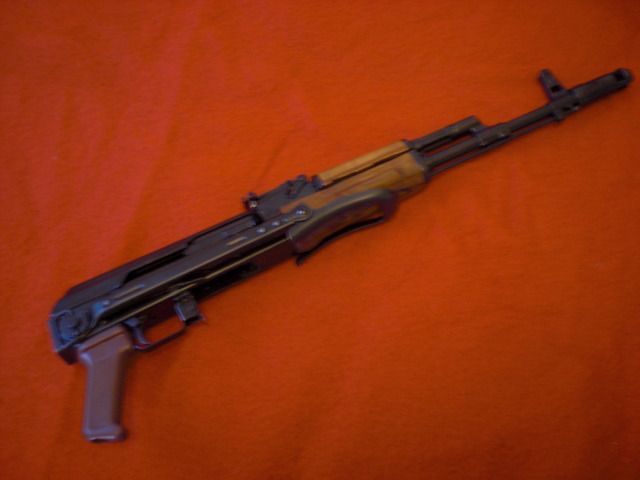
Been a busy summer. I finally got hte last screws blued and installed, and the underfolder Saiga is ready to rock, at last.
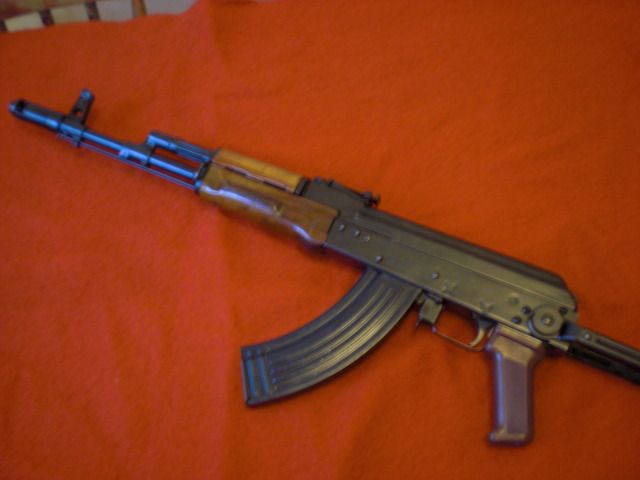
The bluing turned out great, IMO.
It's shiny and lustrous and prob'ly over the top for an AK, but so what?
Who cares if it's guilding the lilly? I'm in lust with it. I
It sure is a nice, handy package to store when the stock is folded. The folding stock is tight and locks up like a bank vault.
Next, a custom peep sight to make it shoot even better . . .
-
 2
2
-
-
I've got a Yugo underfolder that I am very fond of and would like to do this on a .223. Would I be wrong to think I could do this by cutting off the tang and then (very carefully) drilling the required holes without stripping it down like this?
Second, is there a Saiga 12 vendor that sells the kit? Nice job undertoad.
Sorry. I've been AWOL. I am no expert. This is the one and only Saiga or AK I've ever owned or worked on. My imperfect understanding is that you need to entirely replace the rear trunnion with an underfolder trunnion. From the little I know, there are two fundamentally different types of rear trunnions:
1) Romanian, which use two rivets that are in entirely different places than the rivets on my Saiga and which slant the underfolder stock downward at an angle
2) Polish/Yugo, which use three rivets, two of which will need new holes but one of which will not. These carry the stock more or less striaght back.
Either way, you will need to drill two rivet holes and weld up the rest. The Yugo/Polish type of stock locks up with two lugs on each side, whereas the Romy locks up with two lugs on only one side.
Here's a decent deal on the stock and locking mechanism:
https://www.apexgunparts.com/product_info.php/cPath/21_86/products_id/946
Apex also has the trunnion, but the price has recently gone up markedly. so I'm not sure it's a good deal.
Unfortunately, I know nothing about Saiga 12s. Sorry.
undertoad, I would like to do a underfolder conversion too, Your info has been very helpfull. I was wondering what type of stock and trunnion you needed to get for this (and where you got them). thanks, Joe
I got a trunnion and stock from Apex. The stock is still a good deal there. I'm not sure the trunnion is, now. Link in previous post.
-
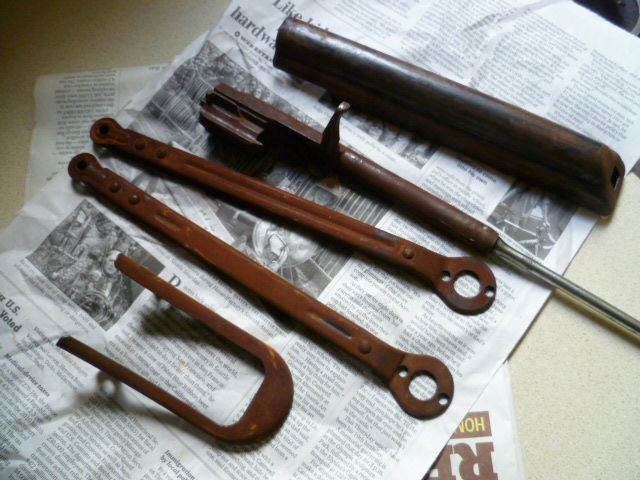
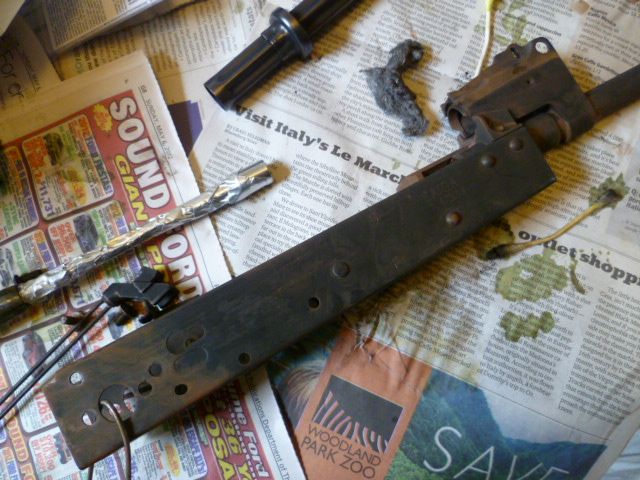
I've made a bit more progress. First, I bead-blasted off all the russkie paint. The metal underneath was Commie-cobby—full of dimples and rough machine marks. In anticipation of wanting a worn, carried-for-20-years look, I draw-filed out the works of the pitting and rough machining marks, especially in those areas an underfolder would take handling wear when carried slung across the chest for years.
There it is, polished up pretty well and ready for "juicing" with bluing compound.
Before long, everything was good and rusty.
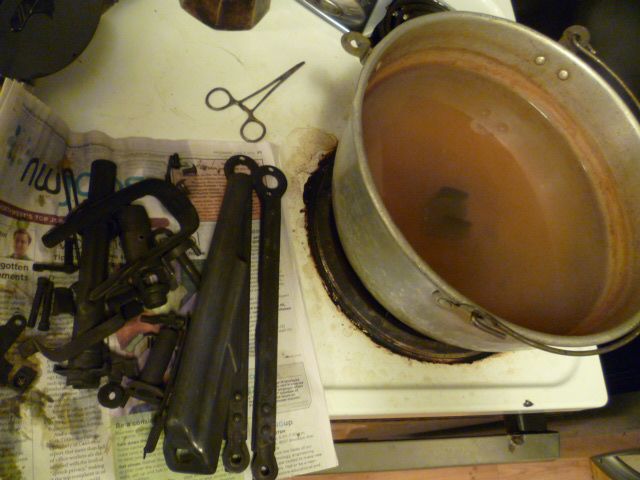
Time to boil the parts in distilled water. I used an old pot to boil the smaller parts. I made a trough to boil the longer parts from 30 inches of aluminum gutter with end-caps JB Welded on. I didn't get a picture of it, but it worked perfectly. The boiling water kept the JB Weld from melting during the boil. The boiling water converts the red rust (Fe2O3) to black-ish magnetite (Fe3O4), and the parts come out of the water considerably darkened and coated in what looks like soot from an oil lamp.
Next comes the "carding," in which you scrub all the loose oxide off with cloths, brushes, and 0000 steel wool. It's picky work. I blued every piece of the gun and underfolder except the trigger mechanism and the recoil spring. Fortunately, it can be done in small batches, as you have time.
Then, juicing, boiling, and carding as many times as it takes to get the finish you want. I plan on rubbing it back at some point, so I left off bluing while there was still a bit of translucence left in the finish.
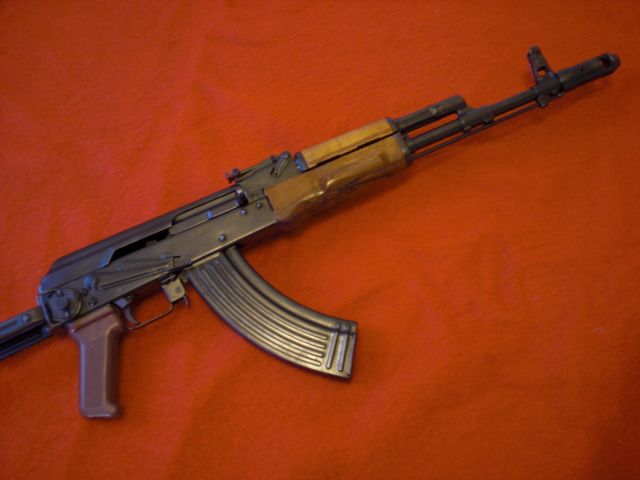
I think it'll look properly worn with most of the casting and machining marks smoothed off.
It's really quite a beautiful finish for a gun and quite tough. It'll be some work rubbing it back, but I think it'll be all worth it when I'm done. I plan on having only one AK, and this is the one I've always wanted—a Russian-built underfolder.
-
2
-
-
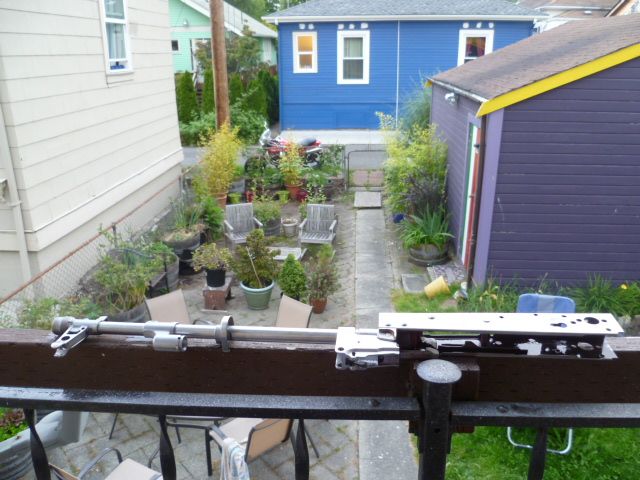
All the welding and cutting is done. I'm rust-bluing the whole thing right now. I'm going for the weathered, starting to take on some brown, rubbed back look of a gun that's spent a lot of time being carried outside but then gets cleaned up once in a while, like my best friend's Dad's 30-40 Krags always looked. If it looks sucky when I get it there, I'll just keep bluing for a new look. If that fails, I'll paint it.
-
I've started cutting metal, at last. As others have noted, it takes some time to work up the courage to cut big holes in a perfectly good receiver.
I also wanted itmine to be convertible, so I could fit it with an underfolder stock, but also be convertible back to being able to use a wooden fixed stock. That turned out to be a bit more work, leaving the requisite hole in the receiver for the woodens stock and drillling matching holes in the underfolder trunnion.
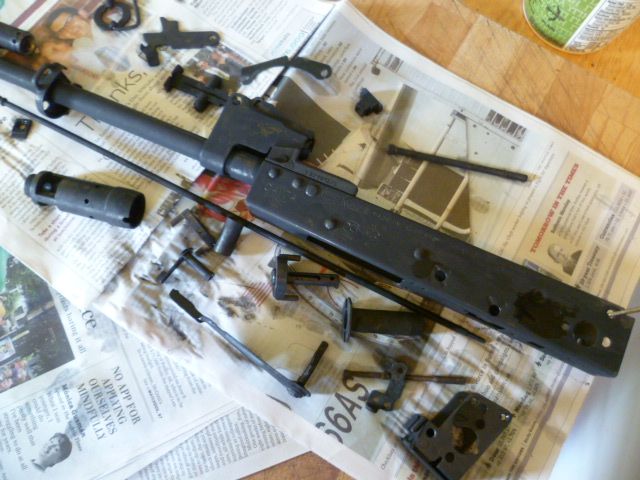
First, drill out ther fixed-stock rivets and the other rivets necessary for conversion. Commie rivets're hard.
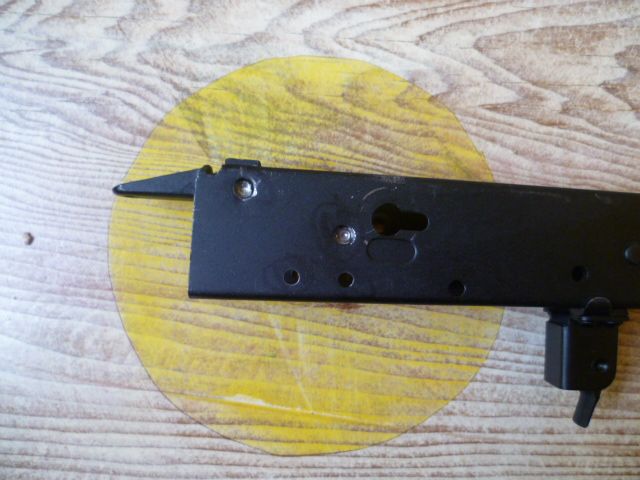
Here are the most puckering of those holes:
I used a hand drill to get close, and then file-fit every part. Mine's tight. It's stiff, even, but with time will loosen to be perfect.
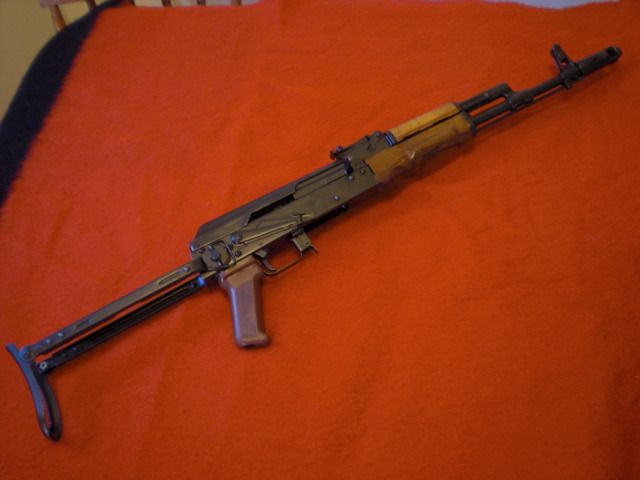
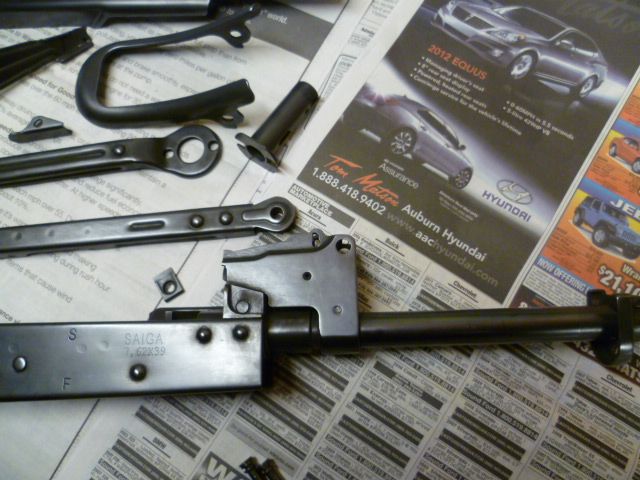
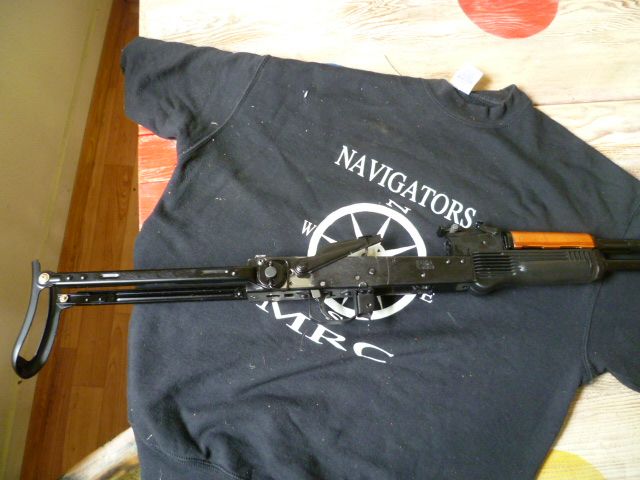
I also wanted it to be convertible so that I could switch the pushbutton folding mechanism to accomodate lefties and righties. That took further hillbilly-ized engineering. But now it does that. Possibly, I have the only convertible fixed/underfolder, lefty/righty Saiga conversion in the whole whirled right now.

Here, it's extended:
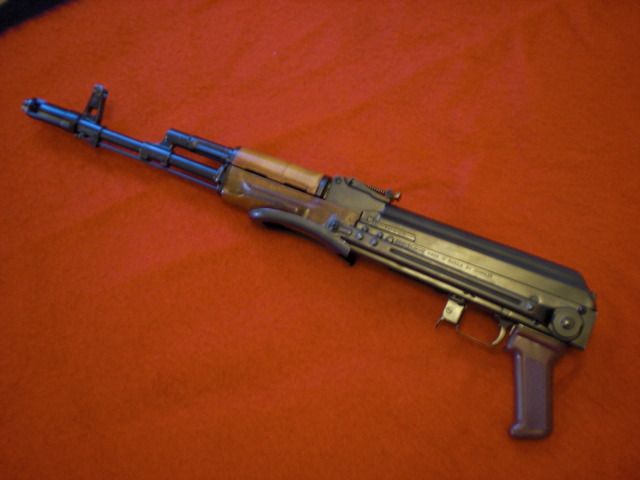
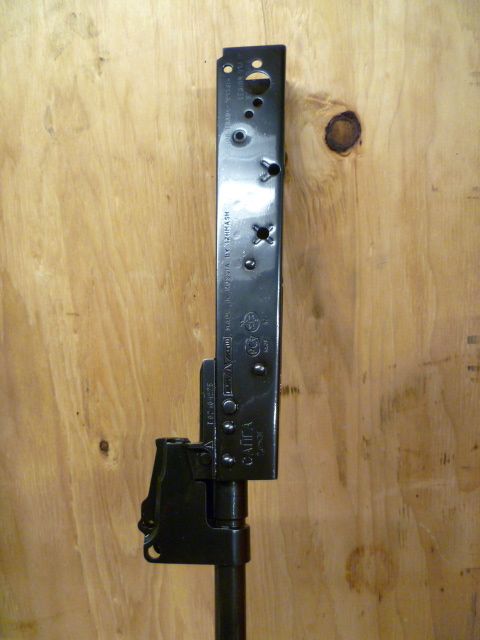
Here, it's folded:
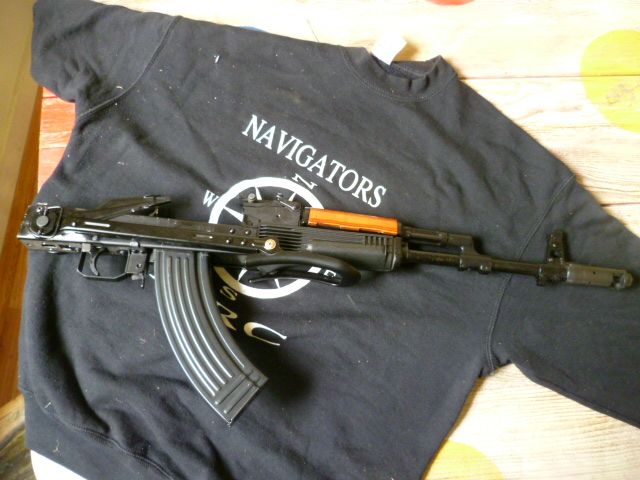
I still have to weld a few more holes, index the muzzle break, and then paint or blue it, but I like it so far.
-
4
-
-
OK, then. I won't cut the slots into my receiver. Thanks, all.
-
http://home.earthlin...jb/AKbuild3.htm
look at #5. there are pin that keep the internal mech from rotating freely.
This is the truth.
Well, #5 is on the left side of the weapon. The slots I'm asking about are on the right side of the weapon, so the pin in #5 could never contact the slots shown.
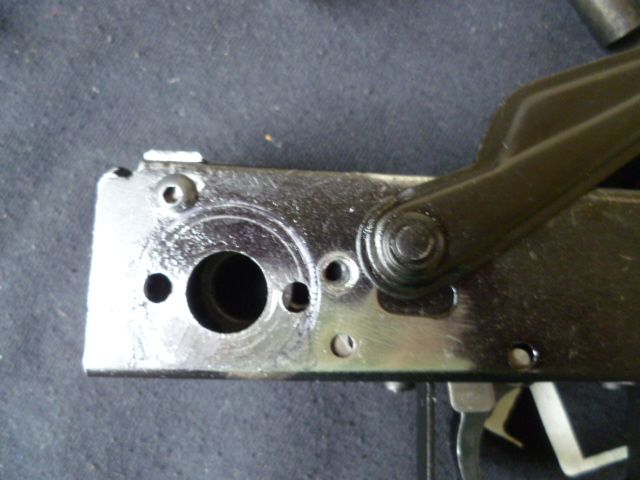
Anybody know what the slots at 6 and 12 o'clock on the right side of the trunnion are for? I don't want to cut them if they're not needed.
-
It's been a while since I had one apart, but IIRC the little holes are where the pins get inserted.

Yes, that's what the holes are for. What I'm curious about is what the slots at 12 and 6 o'clock are for. Do any of you know?
-
You need to cut for them.
OK, I will. Can you explain to me their function?
-
shit you may be right. now i am curious.
found it. http://home.earthlin...jb/AKbuild3.htm
look at #5. there are pin that keep the internal mech from rotating freely.
I was wondering if maybe it was meant to allow driving one of the pins out partially and then pulling that part of the shaft out og the starboard side to complete removal of the pin?
I want to cut what I need to cut, but I want also to cut no more than necessary.
-
they are there to allow he folder to lock. look at the parts you have. there is a collar that has 2 pins that spring load and slip into these notches when the stock is extended
eta: you will need to mimic these on the receiver. i used an 1/8" carbide cutter on my dremel to notch the receiver.
Hmm. Mine looks like it locks into the holes to each side of the lateral axis. I coul
-
I'm working on my underfolder and can't quite see what is the function of the two notches on the vertical axis of the center hole. What are these for?
Thanks!
-
I thank you both for taking the trouble to answer.
As a side note, the T-rex doing pushups really made me howl with laughter.
-
1
-
-
I pushed the button and have one on the way.
I'd appreciate opinions from anyone on what is the best trigger to get.
Thanks!
-
Eeks. I'm all in, now. Just ordered one, to convert to an underfolder. I wish me luck.

-
Does the 332 have the necessary holes and bracketry to install a cleaning rod?
Thanks!
Mine did and it came with the right cleaning rod also.
Thank-you, sir!
-
Does the 332 have the necessary holes and bracketry to install a cleaning rod?
Thanks!
-
I guess I'm the newest member of the "folder club".
Did mine yesterday. Will post a pic when she is all done.
Yes, please do.
I got my underfolder stock today. Now, I need to get a Saiga affordably.
-
did it to my s20. the hardest part was growing a set large enough to actually cut the receiver.
Thanks. By "cut," do you mean just installing the trunnion and cutting the holes for the folder, or must the receiver be cut shorter, or something else?
I'm really starting from zero knowledge, so please pardon my ignorance.
-
It wouldn't be that hard. You would have to remove the trunion and weld the holes, which you would do with the trigger holes anyway I would hope.
Going underfloder the scope rail is a gone item, more than likely.
The templates you can search the web there around, but the fact of printing them might be off. Still not that big of a problem.
I used the old stub of the reciever as a template, but with that kit it's not an option. because it's not included.
So, if I was going to take on this project, I'd make my own template.
Its easy to make your own template. Just take a piece of masking tape and stick it onto the side of the rear trunion, covering the entire trunion. Use an exacto knife to trim away the extra tape overlapping the edges. Then take a pencil and gently rub it onto the tape. The color will rub onto the tape except where the holes are, which will be a colorless outline of the holes. Carefully peel off the tape from the trunion, and stick it to the reciever. Left trunion trace to left side of receiver, right to right. Now you have an instant bonded template that perfectly matches the trunion.
Don't forget the rivets and a 24" rivet tool. The 18" model wont reach dont to the lower foward rivet.
 Been there, done that.
That's very helpful. Yes, I would weld up the holes. I work with aircraft mechanics all day, so they have every riveting tool known to man.
-
Those pix certainly are inspiring.
I would appreciate seeing a template.
Any opinion on the matter of if that photo shows the trunnion?
-
Hello:
First post, but almost certainly not my last.
The Vz.58 I built needs a Comrade, so I'm thinking of converting a Saiga, but I want an underfolder.
http://centerfiresys.../STKAKA-UF.aspx
How difficult would it be to fit the set of underfolder parts shown above to a Saiga 7.62 or 5.45?
Am I correct that the trunnion is shown as being included?
If so, is it just a matter of drilling holes and riveting in the trunnion (as well as removing anything that is in the way)?
What other considerations am I overlooking?
Thanks for any help you can offer.
Saiga Underfolder Conversion
in Saiga Rifle Conversions
Posted · Edited by undertoad
In each side, you need to cut one big hole and two little holes.
More info and pix here:
http://forum.saiga-1...rfolder-so-far/
I used regular drill bits for the small holes and a step bit for the large holes.