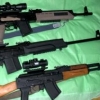
paprotective 362 Posted August 27, 2010 Author Report Share Posted August 27, 2010 Well I got my Brake in from DinZag and the FSB that was honed out for me also. The brake came with a washer that he also bored out for me. He included 2 drill bits and 2 more FSB pins. I broke a drill bit already and I got my leg in the process.. try again tommorrow drilling and pinning.. Going to use the rearmost existing FSB 'hole' for the front and drill another for the back one. I also got my FACTORY 308 HANDGUARD for $45 in also. still have to stain to match.. you get the idea though.. Here she is.. Janis is simple BADASS IMHO.. now to the Poconos to visit my sister and run her out to 300 and hopefully 450+ yards this weekend. much MUCH thanks to Brian (aka DinZag).. he is THE MAN.. Albert Quote Link to post Share on other sites
ChileRelleno 7,071 Posted August 27, 2010 Report Share Posted August 27, 2010 Looking good Bro Quote Link to post Share on other sites
jimdigriz 580 Posted August 27, 2010 Report Share Posted August 27, 2010 Very nice indeed. Quote Link to post Share on other sites
BrutalGardener 205 Posted August 27, 2010 Report Share Posted August 27, 2010 I have got to get of my ass and do this as well, this is the comp/FH I am going to use, if I can achieve the 5/8-24 thread. I am interested in threading the barrel on my S308 and am currently trying to gain an understanding of what's involved. What exactly do you mean by "if I can achieve the 5/8-24 thread"? What would keep you from achieving it? Thanks. Quote Link to post Share on other sites
paprotective 362 Posted August 27, 2010 Author Report Share Posted August 27, 2010 You have to measure under the FSB.. some barrels are LARGER in diameter than the others. .671 vs .631 (or something..) check this link http://www.dinzagarms.com/saiga_308/308fsb.html If your barrel is .671 you can just thread to 17m. if its .631 you can thread to 5/8" He does RENT a new muzzle cutter kit to cut it to 5/8" with a drill http://www.dinzagarms.com/tools/mcr.html and then you can also rent the 5/8" thread kit and DIY. http://www.dinzagarms.com/tools/tkr.html I was going to but I don't own a drill press or a vise to even hold the rifle while cutting to 5/8" Al 1 Quote Link to post Share on other sites
paprotective 362 Posted August 27, 2010 Author Report Share Posted August 27, 2010 Heres the factory handguard AFTER sanding for an hour or so.. Quote Link to post Share on other sites
BrutalGardener 205 Posted August 27, 2010 Report Share Posted August 27, 2010 You have to measure under the FSB.. some barrels are LARGER in diameter than the others. .671 vs .631 (or something..) check this link http://www.dinzagarms.com/saiga_308/308fsb.html If your barrel is .671 you can just thread to 17m. if its .631 you can thread to 5/8" He does RENT a new muzzle cutter kit to cut it to 5/8" with a drill http://www.dinzagarms.com/tools/mcr.html and then you can also rent the 5/8" thread kit and DIY. http://www.dinzagarms.com/tools/tkr.html I was going to but I don't own a drill press or a vise to even hold the rifle while cutting to 5/8" Al Thanks! That finally cleared up some crucial points for me! Quote Link to post Share on other sites
paprotective 362 Posted August 29, 2010 Author Report Share Posted August 29, 2010 Ok.. here is the conclusion.. DinZag provides 2 drill bits with your FSB when he send it back and 2- 3mm pins.. Use your newly threaded barrel to help you with the reamed/honed FSB you may have also sent to DinZag. Use your new Brake/FHider to PRESS the FSB back on for you.. Keep an eye on the little original pin holes.. when the FSB front hole aligns with your REAR exisiting barrel PIN hole STOP.. Then use the small Cobalt looking bit to gently drill the REAR FSB hole thru to notch you barrel for the new rear pin placement.. Then use the provided HSS (dark) 3mm bit he provides to ream both to correct 3mm size for the pins.. Then put the new pins in.. and done.. Then adjust your timing on you brake/FHider so it lines up the way you want it or it needs to be.. I will add another few pics in a few days after I drill and pin mine on for those sucky trips to NJ.. AL Quote Link to post Share on other sites
paprotective 362 Posted August 29, 2010 Author Report Share Posted August 29, 2010 After setting all up to put the pins in.. I measured the DEPTH of the Brakes threading.. It was about 1/4"-3/*8 deeper then the FSB new pin NOTCHES. So I cranked the Brake all the way down until it was FLUSH to the CROWN and then drilled 2 fresh notches in the bbl for the FSB.. I don't want any GAP if possible (even thought some says its ok).. Here it is all finished up with the new handguard (stained to match the 'Drag' stocks 'Golden Pecan' color).. I am VERY happy.. Now I need that Harris Bi-Pod.. Al Quote Link to post Share on other sites
paprotective 362 Posted August 31, 2010 Author Report Share Posted August 31, 2010 UPDATE... next thing to do.. the PIN'ing of the brake.. Lowes has a drill bit and tap combo for $4.45 and a 4pk of 8-32 black CAP allen-head cap screws for $1.27. I marked the bottom of the brake (centered) with a marker.. woo-hoo HI-TECH.. Going to drill a single #29 Drill Bit hole (from the package), put the brake back on the rifle all the way and drill a little bit more into the bbl to dimple it.. (going to post pics here when i do this step in a few days) Then remove the Brake again and TAP it.. Put the Brake back on the rifle.. Then insert the new cap screw and tighten it down.. then simply LOP off the head and part that sticks out.. dremel flush.. You can drill and tap 2-3 holes if you want.. I think 1 is sufficient.. IMHO.. Refinish the brake... This will aide in keeping the Brake on and keep it TIMED, and if you need it to be legal toss a small weld on the PIN'd area. I will add more pics when I do the drilling and tapping in the next few day.. Albert Quote Link to post Share on other sites
superbee 15 Posted August 31, 2010 Report Share Posted August 31, 2010 UPDATE... next thing to do.. the PIN'ing of the brake.. Lowes has a drill bit and tap combo for $4.45 and a 4pk of 8-32 black CAP allen-head cap screws for $1.27. I marked the bottom of the brake (centered) with a marker.. woo-hoo HI-TECH.. Going to drill a single #29 Drill Bit hole (from the package), put the brake back on the rifle all the way and drill a little bit more into the bbl to dimple it.. (going to post pics here when i do this step in a few days) Then remove the Brake again and TAP it.. Put the Brake back on the rifle.. Then insert the new cap screw and tighten it down.. then simply LOP off the head and part that sticks out.. dremel flush.. You can drill and tap 2-3 holes if you want.. I think 1 is sufficient.. IMHO.. Refinish the brake... This will aide in keeping the Brake on and keep it TIMED, and if you need it to be legal toss a small weld on the PIN'd area. I will add more pics when I do the drilling and tapping in the next few day.. Albert You never got back to me if you want me to weld it for you....I can save you all the time with the tapping, but just droping a piece of TIG wire in the hole for you..Up to you...Let me know Tom Quote Link to post Share on other sites
paprotective 362 Posted August 31, 2010 Author Report Share Posted August 31, 2010 superbee will do.. got to drill the hole into the brake first.. seeing if my workplace has a drill press tommorrow.. brother in laws one is an antique.. not going to try drilling on my knee again.. as that didn't end well last time.. no rush not going back into NJ till next weekend... Al Quote Link to post Share on other sites
superbee 15 Posted September 1, 2010 Report Share Posted September 1, 2010 superbee will do.. got to drill the hole into the brake first.. seeing if my workplace has a drill press tommorrow.. brother in laws one is an antique.. not going to try drilling on my knee again.. as that didn't end well last time.. no rush not going back into NJ till next weekend... Al Yea man do them in a press...I did 3 AR's and its really the only way to go.... Quote Link to post Share on other sites
paprotective 362 Posted September 3, 2010 Author Report Share Posted September 3, 2010 (edited) So I managed to have the brake drilled out so I could tap it for the 8-32 screw. I also put a decent dimple into the bbl with the brake in-place so the screw has a place to grab onto.. I then 'TAP'D' the brake.. And then I simply dremel off the excess screw length and grind a little bit to flush.. I tried to get the brake off with the screw in place , even by using a screwdriver thru the brake slots.. ain't happening.. Project complete. Al Edited September 3, 2010 by YWHIC Quote Link to post Share on other sites
BrutalGardener 205 Posted September 27, 2010 Report Share Posted September 27, 2010 Then put the new pins in.. and done.. Hey, Al. I was just curious... what keeps those pins from popping out? Quote Link to post Share on other sites
paprotective 362 Posted September 28, 2010 Author Report Share Posted September 28, 2010 IRT.. the FSB 3mm pins.. Nothing.. they just get hammered in and stay put.. I guess you could put JB weld on them then tap them in.. The BRAKE 'pin' is acutally a screw LOPPED off. so that isn't moving. Al Quote Link to post Share on other sites
Recommended Posts
Join the conversation
You can post now and register later. If you have an account, sign in now to post with your account.