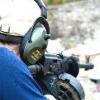
katneosen 2 Posted December 10, 2010 Report Share Posted December 10, 2010 I feel a little stupid having to post this but I need a solution to keep my Tromix charging handle (as pictured) from falling off my bolt handle. I've filed a little on the existing charging handle so the tromix would fit completely on, it seems tight. I even drilled an indent into the existing charging handle for the tromix set screw to sit in. Loctite it and tighten as best I can but it still falls off (big PITA to find the thing in the middle of a shooting bay). It's not the Loctite causing the problem, the set screw is tight and locked in place. The tromix just manages to wiggle off. I don't know any welders although I'm sure that would be the best solution. I was thinking of using some JB weld... Any other suggestions? Thanks! Quote Link to post Share on other sites
JDeere7296 1 Posted December 10, 2010 Report Share Posted December 10, 2010 I would just JB weld it on there! It's not that critical to have it welded on....the JB ought to stay on. It sounds like the screw isn't tightening enough onto the charging handle before it is bottoming out the threads...... Quote Link to post Share on other sites
epbullen 21 Posted December 10, 2010 Report Share Posted December 10, 2010 No worries man. Mine consistently wiggled loose every ~300 rds with red Loctite and a very tightened set screw. I just put it in the closet. You're using the red Loctite, right? Quote Link to post Share on other sites
vinnivanhood 17 Posted December 10, 2010 Report Share Posted December 10, 2010 One of mine came off once with loctite so I filled it with super glue and it hasn't budged since! That was on my S12, the one on my SGL hasn't required any more than the loctite. I gotta add that I love the things! 1 Quote Link to post Share on other sites
shades_of_grey 1,092 Posted December 10, 2010 Report Share Posted December 10, 2010 No worries man. Mine consistently wiggled loose every ~300 rds with red Loctite and a very tightened set screw. I just put it in the closet. Mine as well. Loctite or no, it would eventually come loose. It became a habit to check the CH several times during a shooting session to make sure it wasn't gonna fly off mid-drum. I got sick of it, took the CH off, and no longer use it. I don't blame Tromix for this; they were simply responding to a customer demand by making a bolt-on CH. I don't think that attachment method is sufficient for a part that is so constantly stressed by violent motion(s). A new CH should be welded, or perhaps JB weld would work. That superglue idea is another good one. Quote Link to post Share on other sites
vinnivanhood 17 Posted December 10, 2010 Report Share Posted December 10, 2010 That superglue idea is another good one. I couldnt duct tape it so that was the next logical step Quote Link to post Share on other sites
lvjeffro 30 Posted December 10, 2010 Report Share Posted December 10, 2010 you have to jb weld them on, that sux... Quote Link to post Share on other sites
chupa 34 Posted December 10, 2010 Report Share Posted December 10, 2010 Mine did the same and I eventually took it off. Tried red locktite, I'm not JB welding mine on. It's not that big of a deal to me. Quote Link to post Share on other sites
BrutalGardener 205 Posted December 10, 2010 Report Share Posted December 10, 2010 I have these on all my three Saigas. After red LocTite to the set screw, they've been on there solid. They make tactical reloads much easier on your wrist. Quote Link to post Share on other sites
jnelson228 4 Posted December 10, 2010 Report Share Posted December 10, 2010 Why dont you just get a small drill bit and drill through both handles and when you get all the way through, hammer it flush with something fairly light and cut off the other end of the drill bit. Quote Link to post Share on other sites
TonyRumore 1,332 Posted December 10, 2010 Report Share Posted December 10, 2010 It sounds like we need to start including installation instructions with the handles. 1. Run the set screw completely through the handle, until it drops out into the center bore. That will ensure that screw is not stopping on any foreign debris left over from sand blasting. 2. Clean and degrease both the threads in the handle and the set screw with contact cleaner and allow to dry completely. 3. Apply red #262 Loctite to BOTH the set screw and the threads in the charging handle. 4. Slide the Tromix handle over the OEM handle and start the set screw. Slowly turn the set screw inward as you wiggle the handle in order to allow the set screw to find the "sweet spot" in the saddle of the OEM handle. 5. Using a large 4.5" long allen wrench, hoss that screw down until you think it's about to break. It won't. Tony Rumore Tromix Quote Link to post Share on other sites
katneosen 2 Posted December 10, 2010 Author Report Share Posted December 10, 2010 Thanks for feedback. Superglue sounds like the ticket. I swear after it fell off twice I cranked on that thing real good with red loctite. After ~100 rounds off it went again. No more looking for a small black object on the ground! Quote Link to post Share on other sites
Jpanzer 1,265 Posted December 10, 2010 Report Share Posted December 10, 2010 Got them on my S12, AK74, and STG 942 clone. They are rock solid. I've actually tried to remove it from my 74 and can't even get the screw to budge! Quote Link to post Share on other sites
Fumes 84 Posted December 11, 2010 Report Share Posted December 11, 2010 I spent an hour looking for mine with a magnet. Finally found it in about 2 inches of mud. I made sure it's on real good now. Quote Link to post Share on other sites
mike12345 18 Posted December 11, 2010 Report Share Posted December 11, 2010 (edited) I have these on all my three Saigas. After red LocTite to the set screw, they've been on there solid. They make tactical reloads much easier on your wrist. I understand a tactical reload to be reloading before your empty, with the bolt closed and a round still in the chamber. I dont understand how a bolt on charging handle makes that easyer. how about drilling a hole into the charging handle and using a longer set screw? Edited December 11, 2010 by mike123456 Quote Link to post Share on other sites
corbin 621 Posted December 11, 2010 Report Share Posted December 11, 2010 Mine's had probably 3K rounds through it now without it even getting LOOSE. Red loc tite, like Tony says. Quote Link to post Share on other sites
Paulyski 2,227 Posted December 11, 2010 Report Share Posted December 11, 2010 I don't know any welders Any other suggestions? Thanks! For anyone who doesn't know any weldors, if you need little unimportant things like this spot welded, just drive by local muffler shops & if you see any techs just standing around, offer them $5.00 to spot weld "whatever". Before I began welding & acquired 6 different welders, that's what I always did. If it's stuff that really needs to be held right though, stick with machine shops. They'll pay closer attention to the type of steel & use the appropriate rod/electrode/wire. Quote Link to post Share on other sites
scoutjoe 276 Posted December 11, 2010 Report Share Posted December 11, 2010 5. Using a large 4.5" long allen wrench, hoss that screw down until you think it's about to break. It won't. Guess that's the technical term for grow a pair and give er hell My screw worked loose once on mine, I then used locktite and it hasn't moved since. Quote Link to post Share on other sites
joelrod47 373 Posted December 11, 2010 Report Share Posted December 11, 2010 It sounds like we need to start including installation instructions with the handles. 1. Run the set screw completely through the handle, until it drops out into the center bore. That will ensure that screw is not stopping on any foreign debris left over from sand blasting. 2. Clean and degrease both the threads in the handle and the set screw with contact cleaner and allow to dry completely. 3. Apply red #262 Loctite to BOTH the set screw and the threads in the charging handle. 4. Slide the Tromix handle over the OEM handle and start the set screw. Slowly turn the set screw inward as you wiggle the handle in order to allow the set screw to find the "sweet spot" in the saddle of the OEM handle.5. Using a large 4.5" long allen wrench, hoss that screw down until you think it's about to break. It won't. Tony Rumore Tromix Finding that "sweet spot" is truly the key......It's the absolute lowest point on the concave surface of the handle, at the fullest extension of the set screw. Anywhere else allows the set screw to slide down to that lowest spot.....loosening it and allowing it to come off.. Mine are all rock-solid too............ Quote Link to post Share on other sites
ChileRelleno 7,071 Posted December 11, 2010 Report Share Posted December 11, 2010 (edited) It sounds like we need to start including installation instructions with the handles. 1. Run the set screw completely through the handle, until it drops out into the center bore. That will ensure that screw is not stopping on any foreign debris left over from sand blasting. 2. Clean and degrease both the threads in the handle and the set screw with contact cleaner and allow to dry completely. 3. Apply red #262 Loctite to BOTH the set screw and the threads in the charging handle. 4. Slide the Tromix handle over the OEM handle and start the set screw. Slowly turn the set screw inward as you wiggle the handle in order to allow the set screw to find the "sweet spot" in the saddle of the OEM handle. 5. Using a large 4.5" long allen wrench, hoss that screw down until you think it's about to break. It won't. Tony Rumore Tromix I did pretty much this after mine came off the first few times, I even drilled a divot into the charging handle for the set screw to sit in... Nope, no joy.Lost it at the range, saw it go flying, never to be found again. I was not a happy camper. I keep wanting another, but not throwing good money after bad. Great product, if it would stay on. I had no idea others were having similar problems. Edited December 11, 2010 by ChileRelleno Quote Link to post Share on other sites
danklab 57 Posted December 11, 2010 Report Share Posted December 11, 2010 Never had a problem with any of mine.. Have them on 2 x39 rifles and my S-12. I only used the blue locktite on mine also.. still tight as hell. But I also tightened them to the point that it wouldn't possibly screw in any further. Hell.. mine were fairly tight just sliding on the charging handle itself. I might go back and use the red loctite on all of them just to be sure. I always get paranoid over whether or not I've sufficiently loctited all my bolts.. etc. Quote Link to post Share on other sites
Zambidis 90 Posted December 11, 2010 Report Share Posted December 11, 2010 Interesting that some don't stay. I put one on one my S12s and wasn't sure if I was going to keep it on or not so I didn't locktite it on. Just installed it and cranked the set screw down. I've fired hundreds and hundreds of rounds including magnum slugs and bucks since then and it hasn't moved. This thread reminds me that I've been meaning to locktite it on. Quote Link to post Share on other sites
BrutalGardener 205 Posted December 11, 2010 Report Share Posted December 11, 2010 (edited) I have these on all my three Saigas. After red LocTite to the set screw, they've been on there solid. They make tactical reloads much easier on your wrist. I understand a tactical reload to be reloading before your empty, with the bolt closed and a round still in the chamber. I dont understand how a bolt on charging handle makes that easyer. how about drilling a hole into the charging handle and using a longer set screw? I am talking about very fast reloads, where you hold your Kalash by the pistol grip, pressing it into your shoulder and keeping it on target, while your left hand grabs a fresh mag, uses it to push on the mag release, inserts the fresh mag and then chambers a round by going under the rifle in order to manipulate the charging handle. With some practice, you can do this very, very fast, but the stock charging handle can bruise or even cut your hand/finders during such practice, because it's relatively pointy and sharp. Edited December 11, 2010 by SpetsnazGRU Quote Link to post Share on other sites
22_Shooter 1,560 Posted December 11, 2010 Report Share Posted December 11, 2010 How exactly is it coming off, even with red Loctite on it? The screw is backing out, even with the Loctite on it? Or the screw is still Loctited in place, but the whole unit is wiggling off? Quote Link to post Share on other sites
ChileRelleno 7,071 Posted December 11, 2010 Report Share Posted December 11, 2010 How exactly is it coming off, even with red Loctite on it? The screw is backing out, even with the Loctite on it? Or the screw is still Loctited in place, but the whole unit is wiggling off? I don't know, in my latter case I never found the damned thing to inspect it.Before that, yeah, blue Loctite didn't hold, the screw loosened, and I was bending the Allen when tightening it down. Quote Link to post Share on other sites
Paulyski 2,227 Posted December 11, 2010 Report Share Posted December 11, 2010 How exactly is it coming off, even with red Loctite on it? The screw is backing out, even with the Loctite on it? Or the screw is still Loctited in place, but the whole unit is wiggling off? From what I gather, people may not be making sure the set-screw is in the lowest point of the concave area of the front of the charging handle, then if it moves at all & the set screw is at a lower point, there's no pressure on the set screw, so it can work loose & fly off. Who knows, maybe they're simply pushing it on as far in as it can go & reefing on it, but just a slight movement to the outside will make it loose. I wonder.... What type of steel is the Tromix bolt on charging handle made out of? Quote Link to post Share on other sites
corbin 621 Posted December 11, 2010 Report Share Posted December 11, 2010 (edited) Chile, Sorry you lost yours Bro. If you're not wanting to spend the $20 or whatever for another, a 50 cent rubber plug from the local hardware store can be drilled out and slid onto the handle easily. Don't use too large of a drill though. You want it to slide on hard and grip the handle. Very comfy and as a lefty, it doesn't jam me nearly as hard when slung over my back: Edited December 13, 2010 by Corbin 4 Quote Link to post Share on other sites
ChileRelleno 7,071 Posted December 11, 2010 Report Share Posted December 11, 2010 Chile, Sorry you lost your Bro. If you're not wanting to spend the $20 or whatever for another, a 50 cent rubber plug from the local hardware store can be drilled out and slid onto the handle easily. Don't use too large of a drill though. You want it to slide on hard and grip the handle. Very comfy and as a lefty, it doesn't jam me nearly as hard when slung over my back: Now there is a idea.... +1 to you. Quote Link to post Share on other sites
danklab 57 Posted December 11, 2010 Report Share Posted December 11, 2010 (edited) Interesting that some don't stay. I put one on one my S12s and wasn't sure if I was going to keep it on or not so I didn't locktite it on. Just installed it and cranked the set screw down. I've fired hundreds and hundreds of rounds including magnum slugs and bucks since then and it hasn't moved. This thread reminds me that I've been meaning to locktite it on. Same here.. I actually just put loctite on one I had on an ak a couple weeks ago. I'd taken it off to polish the carrier, and it was just as snug as the day I put it on. Now, this was a rifle and not the S-12 though. If all else fails, I would just say to knock the paint off of the charging handle & rough it up, then cover it in JB weld, and use red loctite on the screw.. making sure it's on the curved side.. and tighten the shit out of it. Edited December 11, 2010 by danklab Quote Link to post Share on other sites
22_Shooter 1,560 Posted December 12, 2010 Report Share Posted December 12, 2010 How exactly is it coming off, even with red Loctite on it? The screw is backing out, even with the Loctite on it? Or the screw is still Loctited in place, but the whole unit is wiggling off? I don't know, in my latter case I never found the damned thing to inspect it.Before that, yeah, blue Loctite didn't hold, the screw loosened, and I was bending the Allen when tightening it down. How exactly is it coming off, even with red Loctite on it? The screw is backing out, even with the Loctite on it? Or the screw is still Loctited in place, but the whole unit is wiggling off? From what I gather, people may not be making sure the set-screw is in the lowest point of the concave area of the front of the charging handle, then if it moves at all & the set screw is at a lower point, there's no pressure on the set screw, so it can work loose & fly off. Who knows, maybe they're simply pushing it on as far in as it can go & reefing on it, but just a slight movement to the outside will make it loose. I wonder.... What type of steel is the Tromix bolt on charging handle made out of? Interesting. I haven't handle one of these things yet, so I was at a loss as to how it was coming loose with red Loctite. I used red Loctite on my DIY, and that sucker ain't moving. (Of course, it's not a moving part like a CH) I tried my damndest to get it off, when I thought I had screwed the PG threads on the DIT, and it didn't budge at all. Quote Link to post Share on other sites
Recommended Posts
Join the conversation
You can post now and register later. If you have an account, sign in now to post with your account.